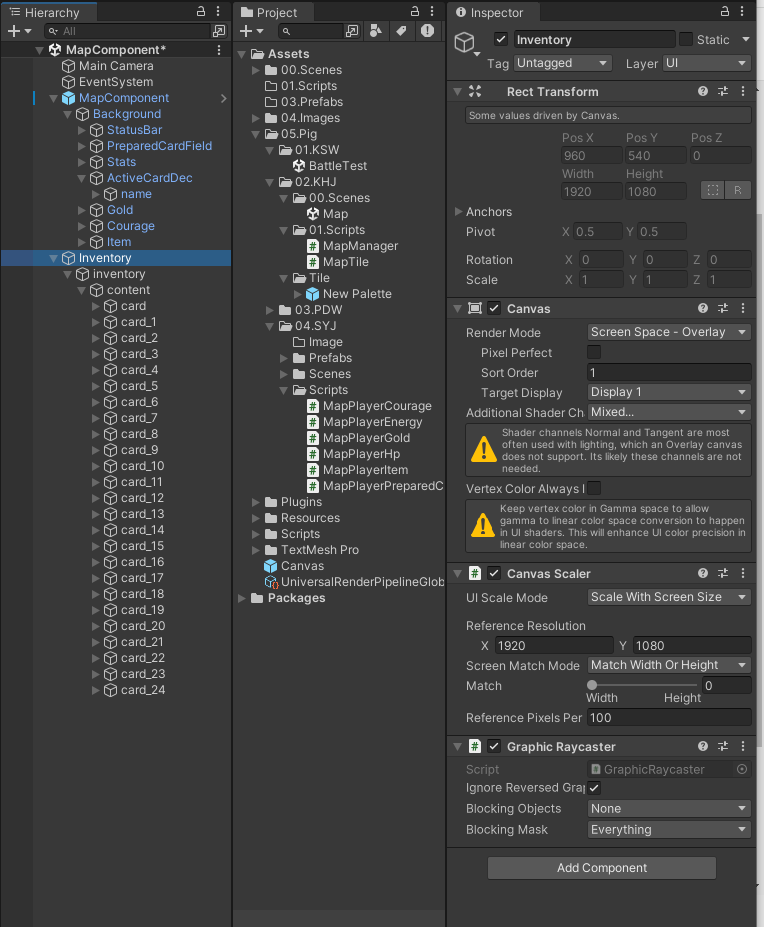
1. 인벤토리 영역 지정

2. 빈 오브젝트(content) 생성 후, 좌상단 (Alt + Shift) 앵커 프리셋 설정

3. 이미지(InvenCell) 생성 후, 앵커 프리셋 좌상단 (Alt + Shift) 설정

4. Guide의 Cell 하나 크기 만큼으로 Cell 크기 설정

5. Width, Height 각각 크기 설정

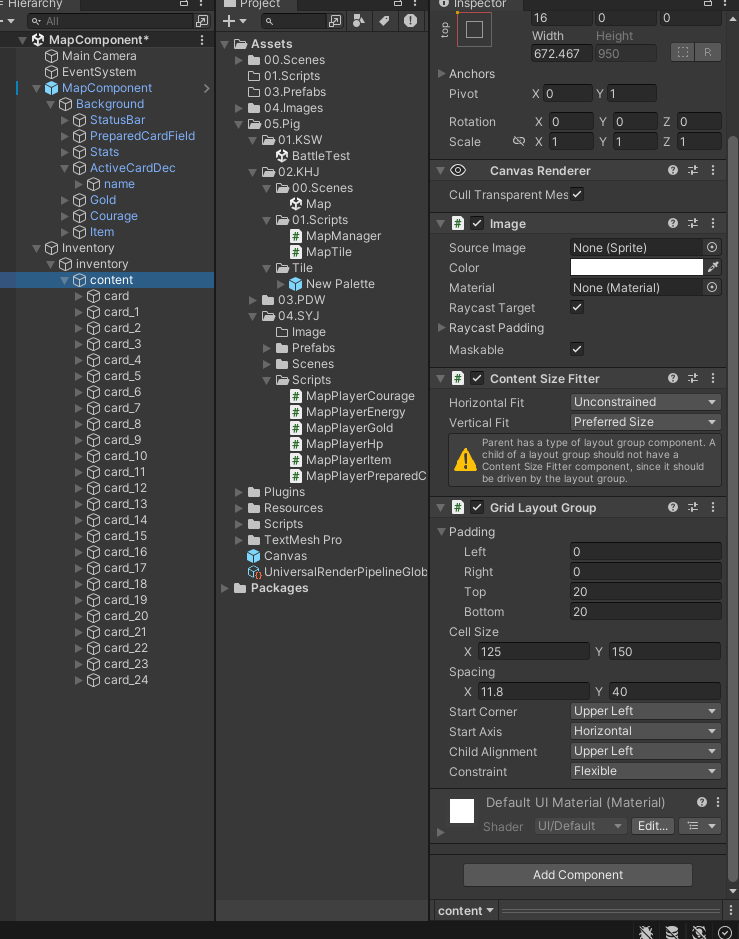
6. Content에 Content Size Fitter, Grid Layout Group 컴포넌트 추가

7. InvenCell을 (Ctrl + D)로 여러개 복사한 후, Cell 과 Cell 사이 간의 Space(공간) 설정

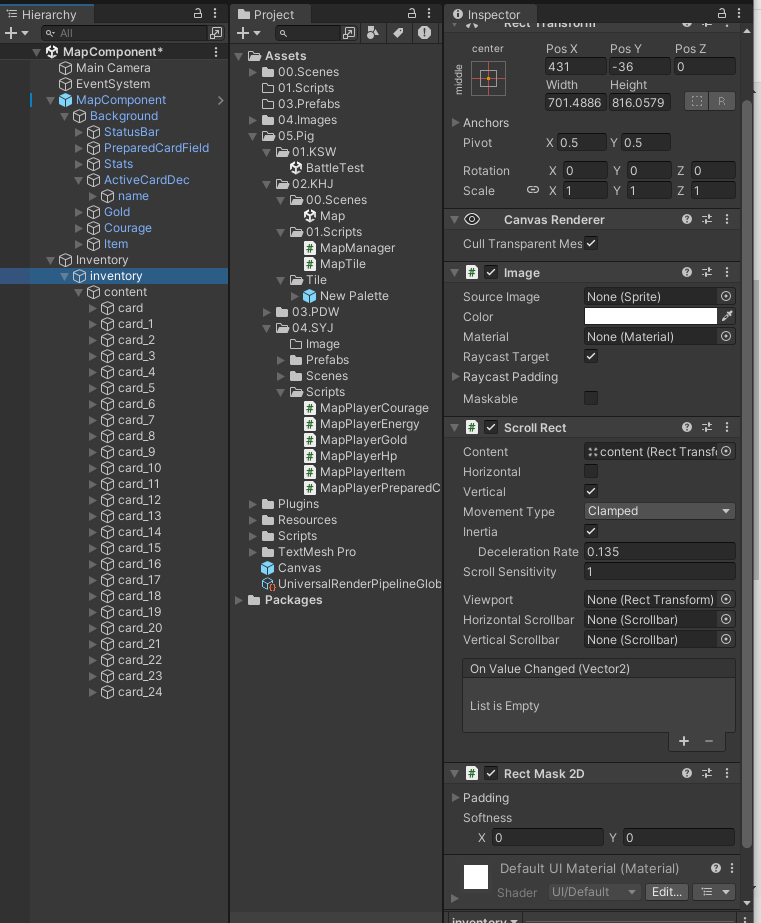
8. UIInvenScrollView의 Scroll Rect의 Content에 Content를 연결하고 Horizontal 체크 해제

9. 씬 실행 후, 스크롤 뷰가 제대로 작동하는지 확인

10. ScrollVIew에 Rect Mask 2D 컴포넌트 추가

11. 수량 표시를 위해 텍스트(Text - Text Mesh Pro) 생성 후, 위치/크기 설정

12. Frame과 Icon 설정

13., ScrollView-Scroll Rect의 Movement Tyoe을 Clamped로 설정


※ 스크롤바를 경직하게 하고 싶지 않으면 Clamped 대신에 Elastic사용


Hp와 Energy는 슬라이더로 제작

향후 대미지를 받았을 경우 혹은 Energy(기력)을 사용할 경우 감소되게 하기 위함.

https://assetstore.unity.com/packages/3d/props/weapons/katana-sword-free-143768


Katana Sword Free | 3D 무기 | Unity Asset Store

Elevate your workflow with the Katana Sword Free asset from Imagine Emotion. Find this & other 무기 options on the Unity Asset Store.

assetstore.unity.com


https://github.com/DavidArayan/ezy-slice


GitHub - DavidArayan/ezy-slice: An open source mesh slicer framework for Unity3D Game Engine. Written in C#.

An open source mesh slicer framework for Unity3D Game Engine. Written in C#. - DavidArayan/ezy-slice

github.com


using UnityEngine;

public class HalfExtentsVisualizer : MonoBehaviour
{
    public Vector3 halfExtents = new Vector3(1, 1, 1);
    public Color boxColor = Color.blue;  // 상자의 색깔을 설정합니다.
    public bool useWireframe = false;    // 상자를 와이어프레임으로 그릴지 여부를 결정합니다.

    void OnDrawGizmos()
    {
        // Gizmo 색상을 설정합니다.
        Gizmos.color = boxColor;

        // 오브젝트의 Collider로부터 중심 위치를 얻습니다.
        Collider collider = GetComponent<Collider>();
        Vector3 center = collider != null ? collider.bounds.center : transform.position;

        // Gizmo의 변환 행렬을 설정합니다. 오브젝트의 회전은 반영하지만, 스케일은 1로 고정합니다.
        Gizmos.matrix = Matrix4x4.TRS(center, transform.rotation, Vector3.one);

        // 상자를 그립니다. useWireframe 값에 따라 와이어프레임 또는 솔리드 상자를 그립니다.
        if (useWireframe)
        {
            Gizmos.DrawWireCube(Vector3.zero, 2.0f * halfExtents);  // 와이어프레임 상자를 그립니다.
        }
        else
        {
            Gizmos.DrawCube(Vector3.zero, 2.0f * halfExtents);  // 솔리드 상자를 그립니다.
        }
    }
}
using System.Collections;
using System.Collections.Generic;
using EzySlice;
using UnityEngine;

public class Slicer : MonoBehaviour
{
    public Material afterSliceMaterial;
    public LayerMask sliceMask;

    public bool isTouch = false;
    private void Update()
    {
        if (isTouch) {
            Slice();
        }
        //if (Input.GetKeyDown(KeyCode.Space))
        //{
        //    Slice();
        //}
    }

    public void Slice()
    {
        Collider[] objectsToSlice = Physics.OverlapBox(transform.position, new Vector3(2.08f, 0.45f, 1.33f),
            transform.rotation, sliceMask);

        Debug.LogFormat("objectsToSlice.Length: {0}", objectsToSlice.Length);

        foreach (Collider col in objectsToSlice)
        {
            SlicedHull slicedObject = SliceObject(col.gameObject);

            Debug.LogFormat("slicedObject: {0}", slicedObject);

            var upperHullGo = slicedObject.CreateUpperHull(col.gameObject, afterSliceMaterial);
            var lowerHullGo = slicedObject.CreateLowerHull(col.gameObject, afterSliceMaterial);

            Debug.LogFormat("upperHullGo: {0}", upperHullGo);
            Debug.LogFormat("lowerHullGo: {0}", lowerHullGo);

            upperHullGo.transform.position = col.transform.position;
            lowerHullGo.transform.position = col.transform.position;

            var velocity = col.GetComponent<Rigidbody>().velocity;

            ApplyPhysical(upperHullGo, velocity);
            ApplyPhysical(lowerHullGo, velocity);
            Destroy(col.gameObject);
        }
    }


    private void ApplyPhysical(GameObject go, Vector3 velocity)
    {
        go.AddComponent<MeshCollider>().convex = true;
        var rbody = go.AddComponent<Rigidbody>();
        rbody.velocity = -velocity;

        int randX = UnityEngine.Random.Range(0, 3);
        int randY = UnityEngine.Random.Range(0, 3);
        int randZ = UnityEngine.Random.Range(0, 3);

        rbody.AddForce(1.5f * new Vector3(randX, randY, randZ), ForceMode.Impulse);
    }

    private SlicedHull SliceObject(GameObject go)
    {
        return go.Slice(transform.position, transform.up, afterSliceMaterial);
    }
}


위에 두개는 테스트 씬에서 플레인과 큐브를 만들고 되는지 확인 후 프리팹으로 뽑아와서 부착하였다.


이런식으로 Grabbable에 옵션으로 한손과 두손관련 정보를 담은 스크립트를 할당해주면

크기를 늘릴 수 있다.


미완성


위의 코드는 오른손과 왼손은의 인지를 다르게 해주게 하기 위함이다.

예를들어 왼손으로는 오른손아래 손잡이를 잡지 못하게 할 수 있다.

using Oculus.Interaction;
using Oculus.Interaction.HandGrab;
using UnityEngine;
using static OVRHand;

public class HandController : MonoBehaviour
{
    [SerializeField]
    private Hand HandType = Hand.None;
    public HandGrabInteractor leftHandGrabInteractor;
    public HandGrabInteractor rightHandGrabInteractor;

    private void OnTriggerEnter(Collider other)
    {
        if (HandType == Hand.HandLeft 
            && other.GetComponent<OneGrabFreeTransformer>() != null) {

            leftHandGrabInteractor.gameObject.SetActive(false);

        }
        else if (HandType == Hand.HandRight
            && other.GetComponent<TwoGrabFreeTransformer>() != null)
        {
            rightHandGrabInteractor.gameObject.SetActive(false);
        }
    }

    private void OnTriggerExit(Collider other)
    {
        if (HandType == Hand.HandLeft
            && other.GetComponent<OneGrabFreeTransformer>() != null)
        {
            leftHandGrabInteractor.gameObject.SetActive(true);
        }
        else if (HandType == Hand.HandRight
            && other.GetComponent<TwoGrabFreeTransformer>() != null)
        {
            rightHandGrabInteractor.gameObject.SetActive(true);
        }

    }
}


완성이되면 왼손 오른손 각각 이미지를 로드 후 세이브 해서 손모양을 저장하고


손을 가져다 대면 각각 왼손과 오른손이 지정된 위치로 그랩을 할 수 있다.

'산대특 > VRAR' 카테고리의 다른 글

[VR] Locomotion(Teleport)  (0) 2024.04.23
[VR]반대손 복사와 회전 및 던지기  (0) 2024.04.19
[VR]총 잡기 - HandGun Grab  (1) 2024.04.18
Create Ghost Reticles  (0) 2024.04.18
Oculus Settings and Grab  (0) 2024.04.17

https://assetstore.unity.com/packages/3d/environments/simplepoly-city-low-poly-assets-58899


SimplePoly City - Low Poly Assets | 3D 주변환경 | Unity Asset Store

Elevate your workflow with the SimplePoly City - Low Poly Assets asset from VenCreations. Find this & other 주변환경 options on the Unity Asset Store.

assetstore.unity.com


using System.Collections;
using System.Collections.Generic;
using System;
using UnityEngine;

public class SimpleCapsuleWithStickMovement : MonoBehaviour
{
    public bool EnableLinearMovement = true;
    public bool EnableRotation = true;
    public bool HMDRotatesPlayer = true;
    public bool RotationEitherThumbstick = false;
    public float RotationAngle = 45.0f;
    public float Speed = 0.0f;
    public OVRCameraRig CameraRig;

    private bool ReadyToSnapTurn;
    private Rigidbody _rigidbody;

    public event Action CameraUpdated;
    public event Action PreCharacterMove;

    private void Awake()
    {
        _rigidbody = GetComponent<Rigidbody>();
        if (CameraRig == null) CameraRig = GetComponentInChildren<OVRCameraRig>();
    }

    void Start()
    {
    }

    private void FixedUpdate()
    {
        if (CameraUpdated != null) CameraUpdated();
        if (PreCharacterMove != null) PreCharacterMove();

        if (HMDRotatesPlayer) RotatePlayerToHMD();
        if (EnableLinearMovement) StickMovement();
        if (EnableRotation) SnapTurn();
    }

    void RotatePlayerToHMD()
    {
        Transform root = CameraRig.trackingSpace;
        Transform centerEye = CameraRig.centerEyeAnchor;

        Vector3 prevPos = root.position;
        Quaternion prevRot = root.rotation;

        transform.rotation = Quaternion.Euler(0.0f, centerEye.rotation.eulerAngles.y, 0.0f);

        root.position = prevPos;
        root.rotation = prevRot;
    }

    void StickMovement()
    {
        Quaternion ort = CameraRig.centerEyeAnchor.rotation;
        Vector3 ortEuler = ort.eulerAngles;
        ortEuler.z = ortEuler.x = 0f;
        ort = Quaternion.Euler(ortEuler);

        Vector3 moveDir = Vector3.zero;
        Vector2 primaryAxis = OVRInput.Get(OVRInput.Axis2D.PrimaryThumbstick);
        moveDir += ort * (primaryAxis.x * Vector3.right);
        moveDir += ort * (primaryAxis.y * Vector3.forward);
        //_rigidbody.MovePosition(_rigidbody.transform.position + moveDir * Speed * Time.fixedDeltaTime);
        _rigidbody.MovePosition(_rigidbody.position + moveDir * Speed * Time.fixedDeltaTime);
    }

    void SnapTurn()
    {
        if (OVRInput.Get(OVRInput.Button.SecondaryThumbstickLeft) ||
            (RotationEitherThumbstick && OVRInput.Get(OVRInput.Button.PrimaryThumbstickLeft)))
        {
            if (ReadyToSnapTurn)
            {
                ReadyToSnapTurn = false;
                transform.RotateAround(CameraRig.centerEyeAnchor.position, Vector3.up, -RotationAngle);
            }
        }
        else if (OVRInput.Get(OVRInput.Button.SecondaryThumbstickRight) ||
                 (RotationEitherThumbstick && OVRInput.Get(OVRInput.Button.PrimaryThumbstickRight)))
        {
            if (ReadyToSnapTurn)
            {
                ReadyToSnapTurn = false;
                transform.RotateAround(CameraRig.centerEyeAnchor.position, Vector3.up, RotationAngle);
            }
        }
        else
        {
            ReadyToSnapTurn = true;
        }
    }
}


collider가 있어서 이 안으로 텔레포트 할 수 없다.

어싸인 확인

이건 엄지와 검지를 닿게 할 것인지를 결정

이제 핸드트래킹(손가락)으로도 턴을 적용 시킬 수 있다.


영상과 같이 길로만 이동할수 있따.


'산대특 > VRAR' 카테고리의 다른 글

[VR] Transformer Interaction  (0) 2024.04.23
[VR]반대손 복사와 회전 및 던지기  (0) 2024.04.19
[VR]총 잡기 - HandGun Grab  (1) 2024.04.18
Create Ghost Reticles  (0) 2024.04.18
Oculus Settings and Grab  (0) 2024.04.17

한손만 복사본을 저장했다면 이버튼을 눌러 반대손도 적용 할 수 있다.


그런데 공을 다시 잡으면 손이 저장된 위치로 가기 때문에 공이 회전한다.

이 공의 회전을 고정하기 위한 작업을 실행했다.

모든 작업들은 오른손을 했으면 왼손도 적용해주면 된다.


이제 공을 다시 잡아도 돌지 않는다.


이번에는 책에 적용해 보았다.

아까 설명한 오른손으로 이미지를 잡고 왼손을 복사하여 적용된 모습이고


생성된 Hand Grab Pose에 Box Grab Surface 컴포너트를 추가한 후

박스를 정하는데

이는 손목을 기준점으로 잡힌다.


그후


여기 Follow Surface를 설정하면 테스트도 해볼 수 있다.


중력을 키면 책이 책상에 떨어진다.

프로젝트에 있는 HandVelocityCalculator 추가 한후

인트렉터에 넣어준다.


주의 !

책의 y좌표보다 낮아야지 리스폰이 된다.

즉, 기존의 좌표보다 낮을 경우 리스폰이 된다.


'산대특 > VRAR' 카테고리의 다른 글

[VR] Transformer Interaction  (0) 2024.04.23
[VR] Locomotion(Teleport)  (0) 2024.04.23
[VR]총 잡기 - HandGun Grab  (1) 2024.04.18
Create Ghost Reticles  (0) 2024.04.18
Oculus Settings and Grab  (0) 2024.04.17


실행 후 1, 2번을 한후 나와서 3번 4번과정

이렇게 에셋이 생성된다.

Max의 옵션을 Locked에서 Constrained로 변경한후 관절을 변경 가능


손의 잔상을 없애기 위해 Hand Grab Interactable 을 비활성화 or 삭제한다.


이렇게 되니 손가락이 움직이면 복사가 되었다 알고보니 이 옵션을 꺼주어야 한다.


원하는 관절을 고정및 변경 시킬 수 있다.


이번엔 컨트롤러에도 설정 할 것이다.


이제 콘솔에 총을 잡으면 출력이 되도록 할것이다.


using Oculus.Interaction;
using System.Collections;
using System.Collections.Generic;
using UnityEngine;

public class HandGun : MonoBehaviour
{

    [SerializeField] private InteractableUnityEventWrapper wrapper;
    private bool isFire = false;

    void Start()
    {
        wrapper.WhenSelect.AddListener(() =>
        {
            Debug.Log("총을 잡았습니다.");
            isFire = true;
        });
        wrapper.WhenUnselect.AddListener(() =>
        {
            Debug.Log("총을 놓았습니다.");
            isFire = false;
        });

    }

    void Update()
    {
        var indexTriggerVal = OVRInput.Get(OVRInput.Axis1D.SecondaryIndexTrigger);

        //인덱스 트리거는 0~1 즉 강도조절
        if (indexTriggerVal > 0.5f)
        {
            isFire = true;
            Debug.Log("발사");
        }
        else if (indexTriggerVal == 0)
        {
            if (isFire)
            {
                //초기화
                isFire = false;

            }
        }

    }
}


인덱스트리거(검지를) 누르면 발사 또 한 출력된다.


'산대특 > VRAR' 카테고리의 다른 글

[VR] Locomotion(Teleport)  (0) 2024.04.23
[VR]반대손 복사와 회전 및 던지기  (0) 2024.04.19
Create Ghost Reticles  (0) 2024.04.18
Oculus Settings and Grab  (0) 2024.04.17
Reticle  (0) 2024.04.16

https://developer.oculus.com/documentation/unity/unity-isdk-create-ghost-reticles/

Option A에 관한 설명을 읽으면 된다.


Create Ghost Reticles | Oculus Developers


developer.oculus.com


큐브의 색이 흰색이면 레티클이 흰색 이미지이므로 안보일 수 있다.

임의로 메터리얼을 생성하여 큐브의 색을 변화시키면

레티클을 보다 가시적으로 확인할 수 있다.


https://developer.oculus.com/documentation/unity/unity-isdk-creating-handgrab-poses/


Create a Hand Grab Pose (PC) | Oculus Developers


developer.oculus.com


왼손이나 오른손으로 지정후

플레이를 한다.

1. 구체에 손을 얹고 Record HandGrabPose를 누르면 흰색으로 스캔이 된다.

2. 그 후 아래에 있는 Save To Collection을 누르면 에셋에 저장이 된다.


이렇게 에셋에 새로운 폴더와 함께 저장이된다.

새로 만들어진 컬렉션을 열어보면 이러한 프로퍼티를 볼 수 있다.

하이어라이키에는 이런식으로 생긴다.


Sphere안에있는 인터렉터를 지우고

HandGrabInteractable를 누른채로 실행하면 

근처에서 잡으면 저장된 손모양이 적용된다.


세이브한 모양이 마음에 들지 않으면 관절을 직접 조절해서 모양을 맞춰줄 수 있다.

'산대특 > VRAR' 카테고리의 다른 글

[VR]반대손 복사와 회전 및 던지기  (0) 2024.04.19
[VR]총 잡기 - HandGun Grab  (1) 2024.04.18
Oculus Settings and Grab  (0) 2024.04.17
Reticle  (0) 2024.04.16
VR로 360도 동영상 다운로드 후 적용하기 + 오큘러스 적용  (0) 2024.04.16

Ctrl + K 혹은


'Study > ' 카테고리의 다른 글

[Tip] Object.FindObjectOfType  (0) 2024.06.11
[Tip] RenderSettings  (0) 2024.06.05
[팁] Slider.onValueChanged  (0) 2024.06.05
[Tip] 3D 프로젝트에서 SpriteAtals 패킹하는 법  (0) 2024.05.23
[Tip] CameraShaker  (0) 2024.03.29

https://developer.oculus.com/documentation/


Oculus Documentation | Oculus Developers


developer.oculus.com

https://developer.oculus.com/documentation/unity/unity-isdk-interaction-sdk-overview/


Interaction SDK Overview | Oculus Developers


developer.oculus.com


https://docs.unity3d.com/560/Documentation/Manual/OculusControllers.html


Unity - Manual: Input for Oculus

Input for OpenVR controllers Input for Oculus Oculus Rift has three inputs: two Oculus Touch Controllers, and one Oculus Remote. To allow native Unity Editor support for Oculus Rift input hardware, the Unity VR subsystem presents these three inputs as sepa

docs.unity3d.com


인덱스 트리거는 누르면 0~1까지의 값으로 변한다. (검지에 위치한 버튼)

핸드 트리거(중지에 위치한 버튼)

같이 누르거나 버튼하나를 다르게 하면 손의 모양을 바꿀 수 있다.


메인카메라를 지우고

OVR Camera를 찾아서 넣어준다.


해당하는 기기에 체크


1번 방법

2번 방법


프로젝트 셋팅에서 이 화면에 Fix 할 거 있다면 Fix하면 된다.


이 안에있는 앵커들은 모두 카메라이고

VR로 양안을 조절하는 카메라들이다.


OVRCameraRig에 있는 속성들로

위에 저 세개 핸드트래킹을 설정하는 것을

습관화 하자


Left Hand로 되있는것을 Right Hand로 바꿔준다.


https://developer.oculus.com/documentation/unity/unity-isdk-quick-actions/


Add an Interaction with QuickActions | Oculus Developers


developer.oculus.com


여기에는 자동으로 해준다고 나와있지만, 수동으로 처리 할 것이다.


조금 복잡하지만 필요한 부분을 캡쳐 및 녹화를 하였다.


컨트롤러를 두번 치고 내려 놓으면 내 손을 인지한다.


이제 메시렌더러를 끄면 보다 깔끔하게 손 모양이 나온다.


'산대특 > VRAR' 카테고리의 다른 글

[VR]총 잡기 - HandGun Grab  (1) 2024.04.18
Create Ghost Reticles  (0) 2024.04.18
Reticle  (0) 2024.04.16
VR로 360도 동영상 다운로드 후 적용하기 + 오큘러스 적용  (0) 2024.04.16
캐릭터 이동지점 변경시 VR시점 변경  (0) 2024.04.12

+ Recent posts