숫자를 문자열로 변경시 바이트가 작아질 수도 커질 수도 있다.

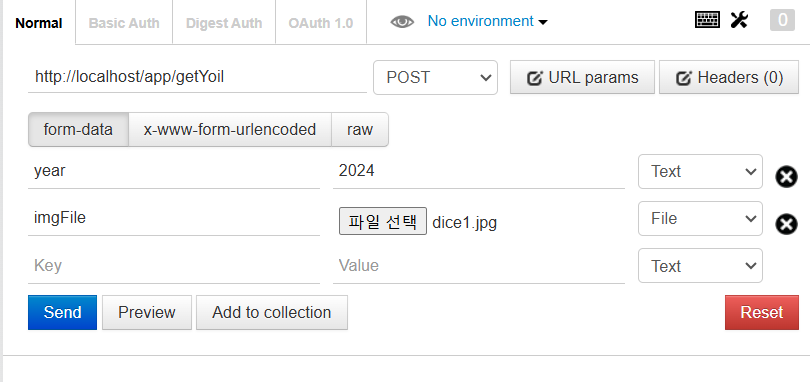
이번엔 POST로 텍스트와 이미지 파일 두 종류를 넣었다.

RequestHeader라는 클래스를 만든다.
package com.fastcampus.ch2;

import java.util.Enumeration;

import javax.servlet.http.HttpServletRequest;

import org.springframework.stereotype.Controller;
import org.springframework.web.bind.annotation.RequestMapping;

@Controller
public class RequestHeader {
	@RequestMapping("/requestHeader")
	public void main(HttpServletRequest request) {

		Enumeration<String> e = request.getHeaderNames();

		while (e.hasMoreElements()) {
			String name = e.nextElement();
			System.out.println(name + ":" + request.getHeader(name));
		}
	}
}
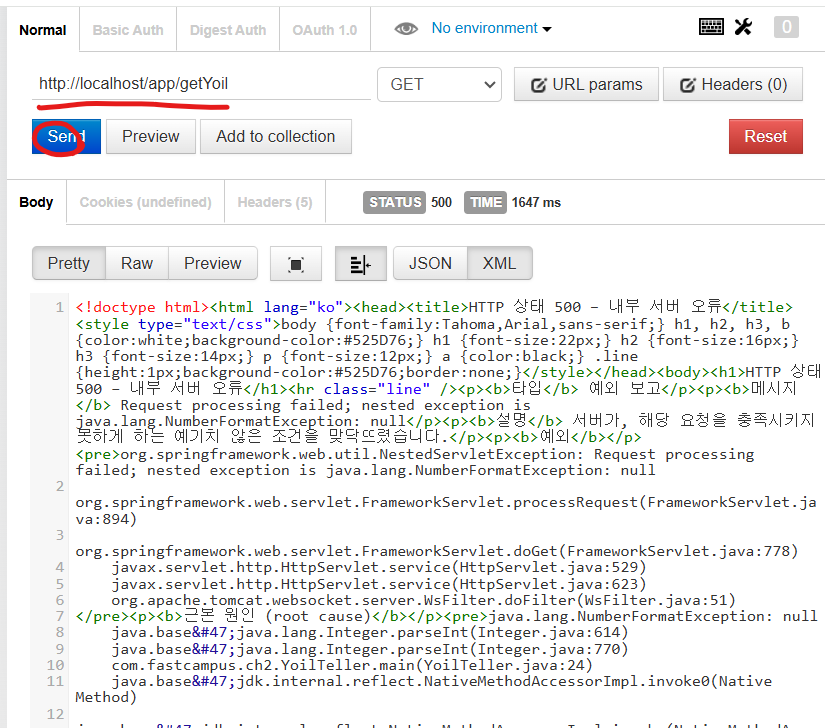
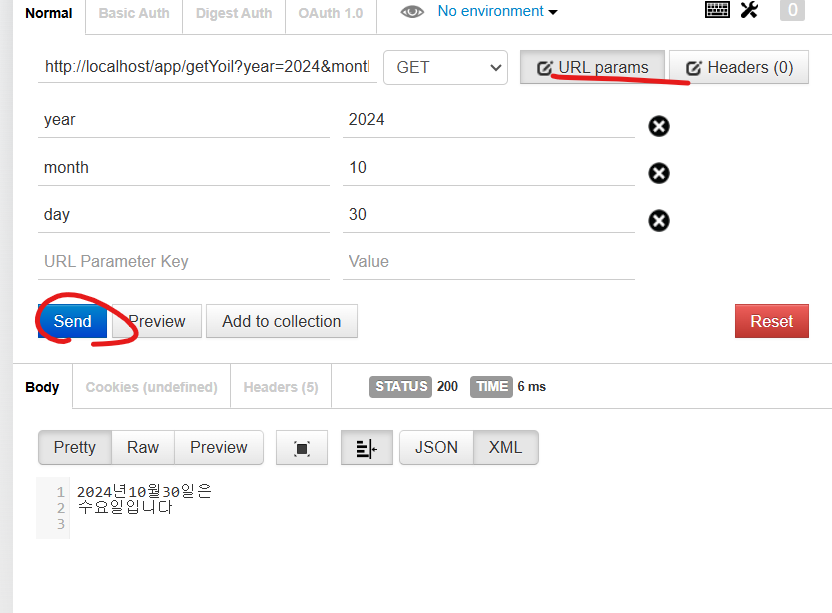
http://localhost/app/requestHeader

https://github.com/castello/spring_basic/blob/main/ch2/RequestMessage.java
spring_basic/ch2/RequestMessage.java at main · castello/spring_basic
남궁성의 스프링 기본 강의 @fastcampus.co.kr. Contribute to castello/spring_basic development by creating an account on GitHub.
github.com
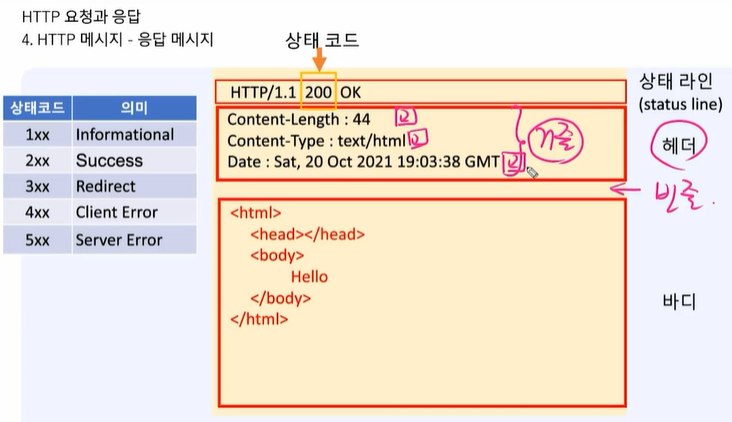
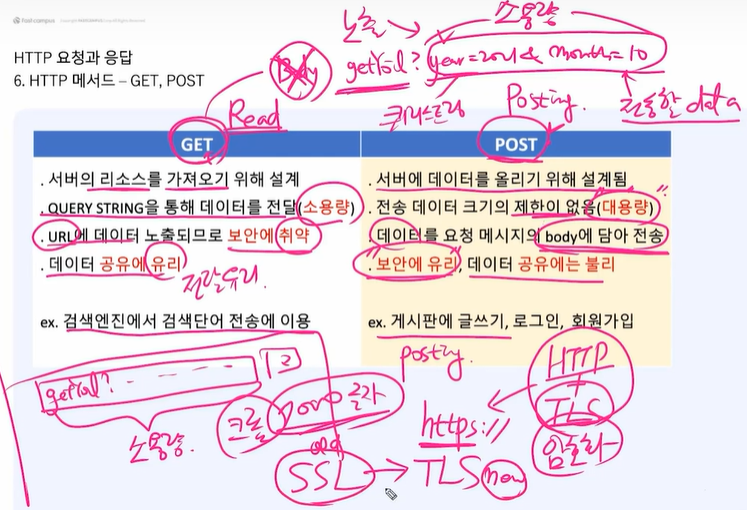
GET에는 바디가 없지만 POST에는 바디가 있다.
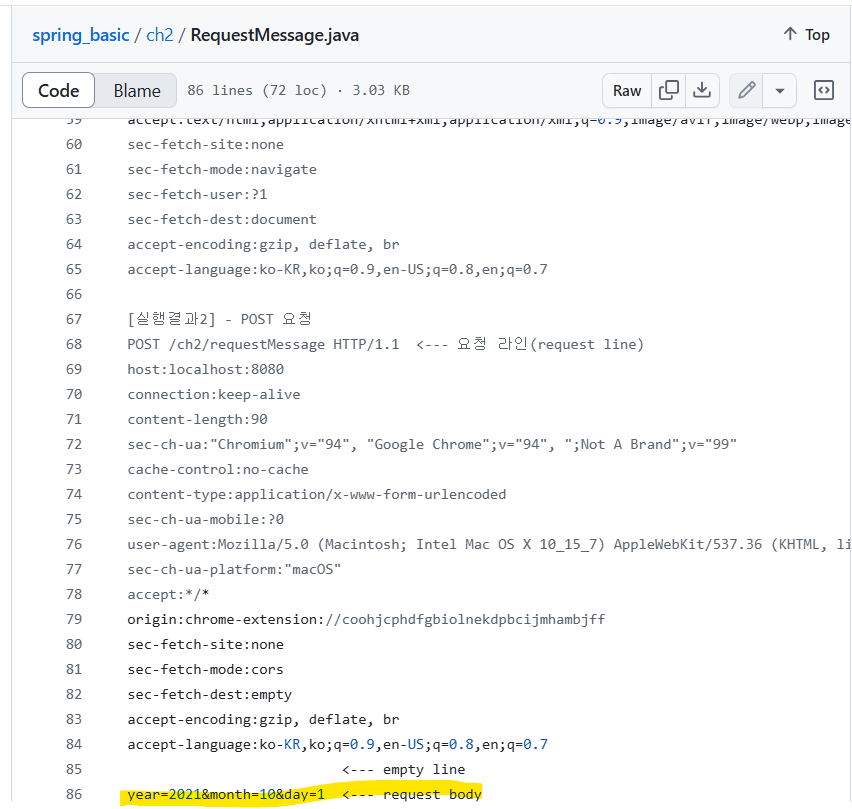
바디가 있을 때

여기는 자주 사용하니 알아두자

Base64

총 2의 6제곱이므로 6비트이고
그에 따라 6글자 씩 끊어서 사용한다.

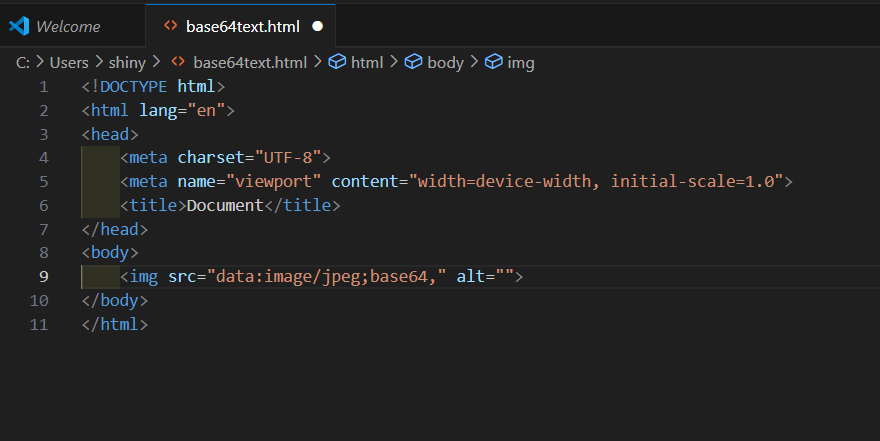
이미지를 base64로 변환할 것이다.
Base64 Encode - Online Tool
Encode and Decode Base64 data with this online base64 encoder.
www.base64encode.net
이미지를 넣고 변환

이제 Visual Studio Code를 킨다.
저걸 복사해서 , 뒤에 붙여넣기

우클릭 후 open in default browser

'Java > 패스트캠퍼스 자바' 카테고리의 다른 글
| [패스트캠퍼스] 관심사의 분리와 MVC패턴 - 원리(1) (2) | 2024.11.03 |
|---|---|
| [패스트캠퍼스]관심사의 분리와 MVC패턴 - 실습 (1) | 2024.11.02 |
| [패스트캠퍼스] Http요청과 응답 - 이론 (1) | 2024.10.30 |
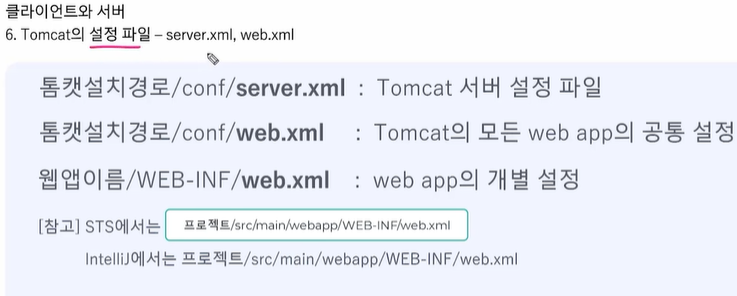
| [패스트캠퍼스]server.xml, web.xml (1) | 2024.10.30 |
| [패스트캠퍼스]Http 요청과 응답(브라우저) (0) | 2024.10.29 |