using System.Collections;
using System.Collections.Generic;
using UnityEngine;

namespace yjShin
{
    public class Woman : MonoBehaviour
    {
        private void OnAnimatorIK(int layerIndex)
        {
            Debug.Log("OnAnimatorIK");
        }
    }

}

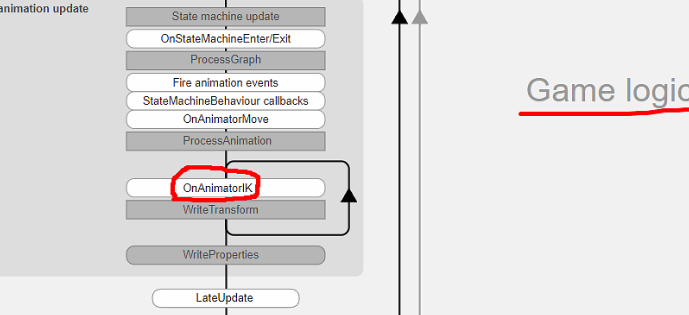


오른쪽 팔꿈치의 좌표를 확인
using System.Collections;
using System.Collections.Generic;
using UnityEngine;
namespace yjShin
{
public class Woman : MonoBehaviour
{
private Animator anim;
private void Start()
{
anim = GetComponent<Animator>();
}
private void OnAnimatorIK(int layerIndex)
{
//Debug.Log("OnAnimatorIK");
Vector3 rightElbowPosition = anim.GetIKHintPosition(AvatarIKHint.RightElbow);
Debug.Log(rightElbowPosition);
}
}
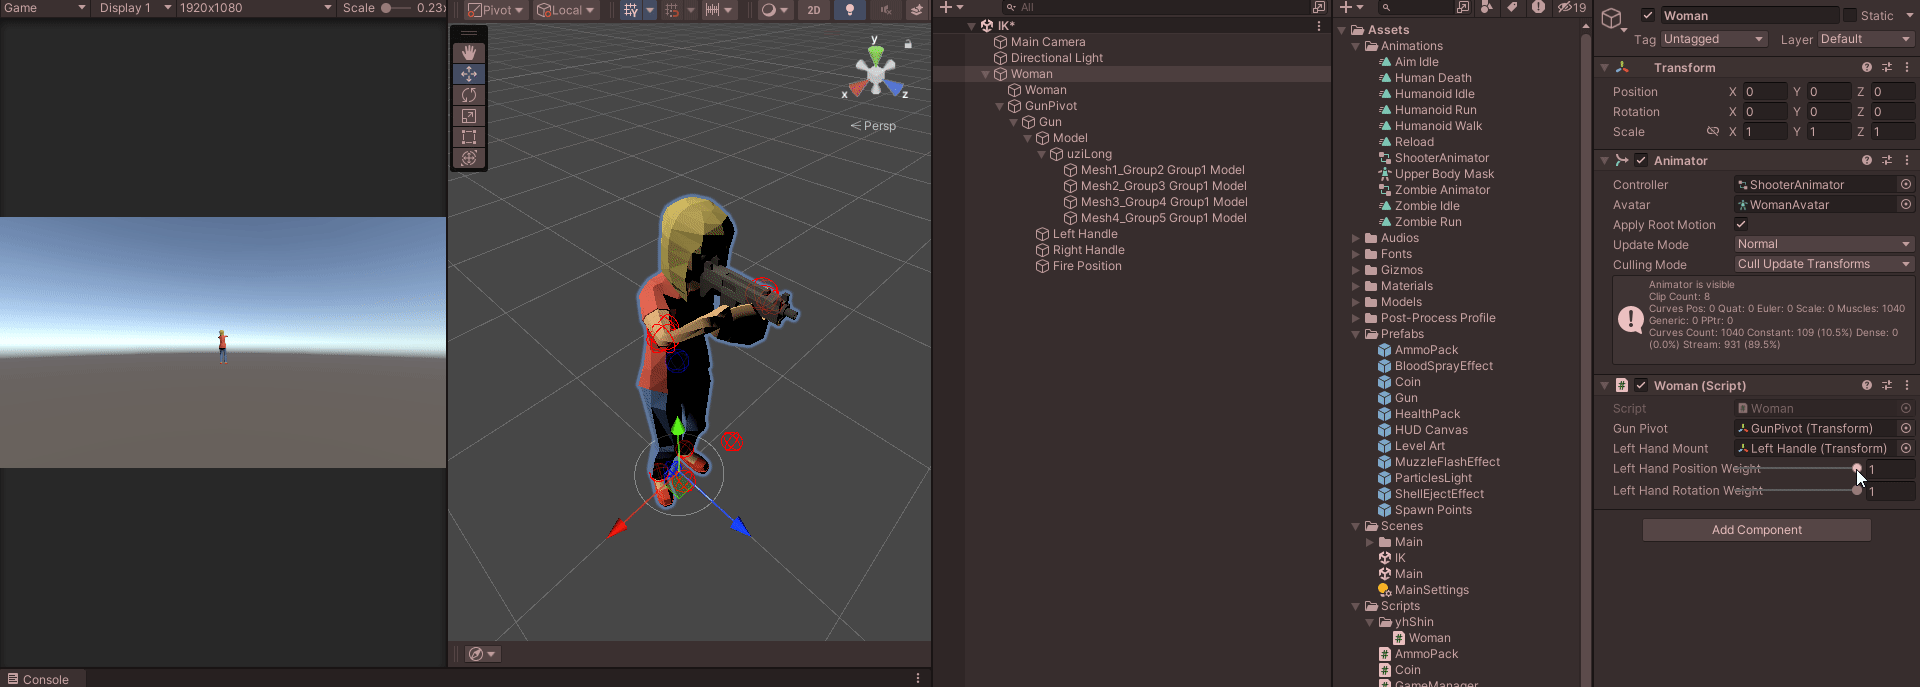
}애니메이터에 저장되어 있는 피봇들

AvatarIKHint.RightElbow는 애니메이션 시스템에서 제공되는 미리 정의된 상수로, 이를 통해 오른쪽 팔꿈치의 위치를 얻을 수 있습니다. 이 값은 애니메이션 시스템 내부에서 이미 정의되어 있으며, 개발자가 직접 오른쪽 팔꿈치를 찾거나 계산할 필요가 없습니다.
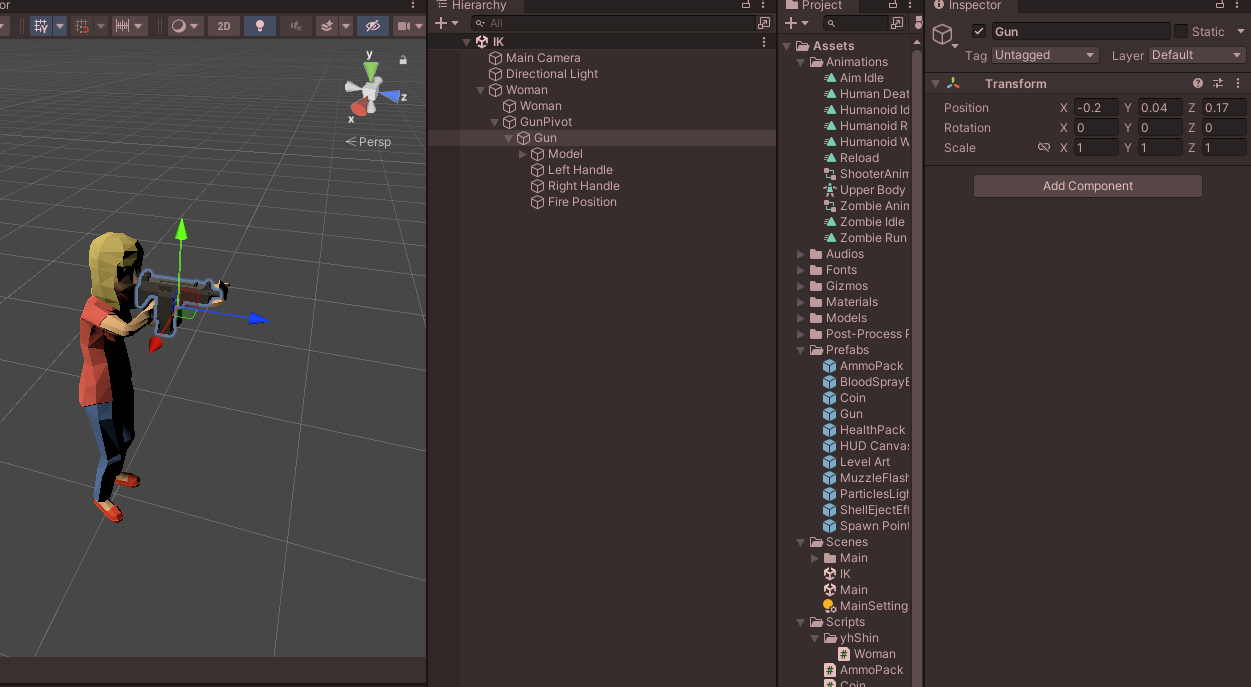
이제 건의 pivot 위치를 잡아 줄 것이다.
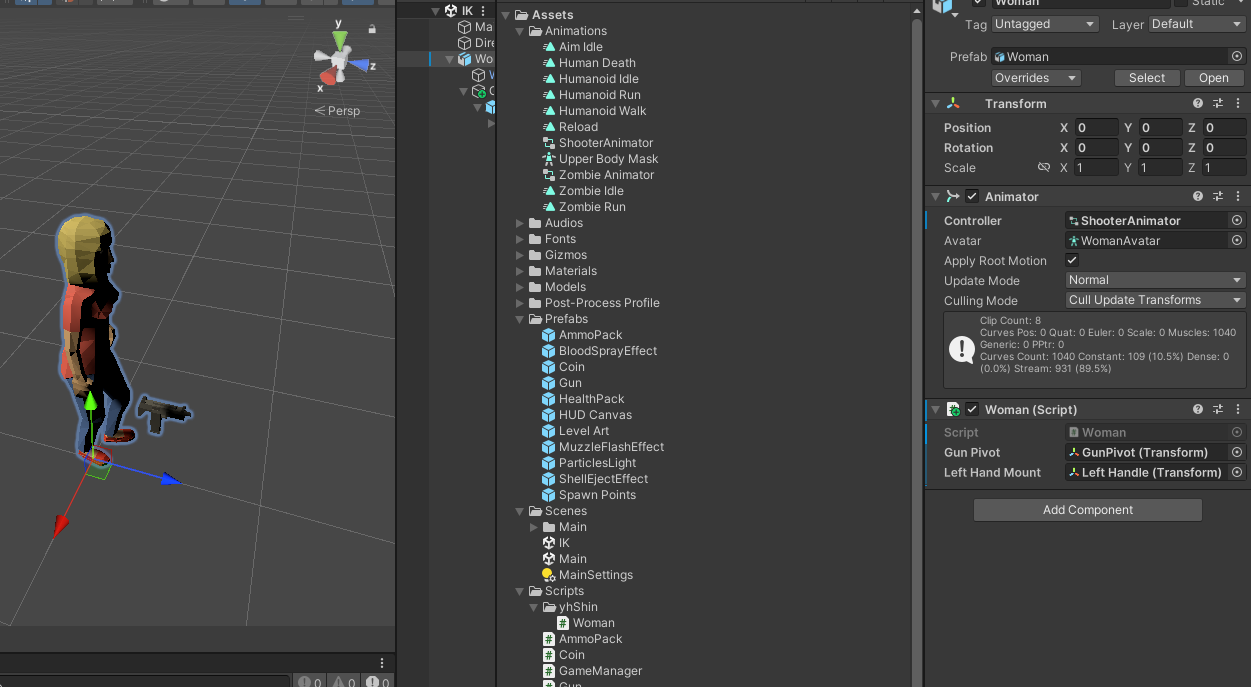
[SerializeField] private Transform gunPivot;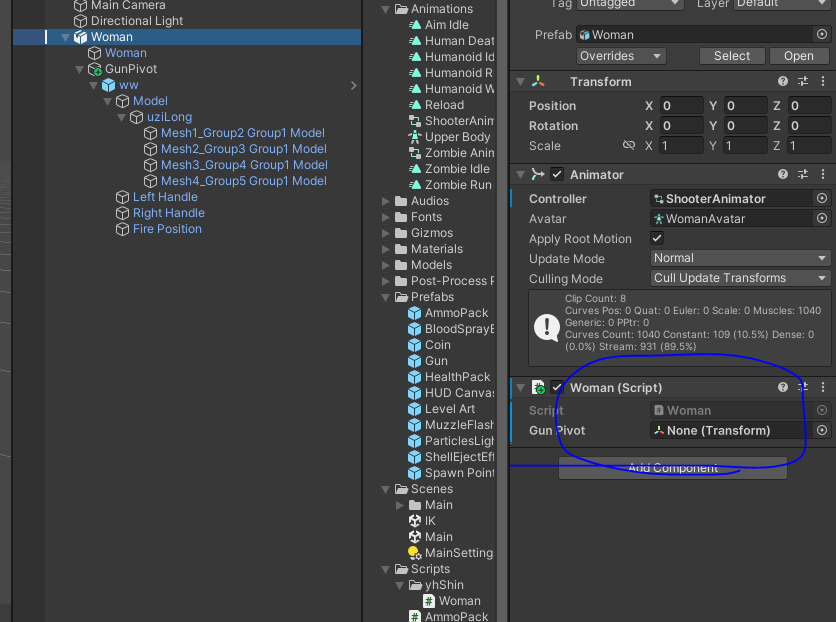
건의 피봇에 오른쪽 팔꿈치의 위치를 넣어줄 것이다.

건의 피봇의 위치가 팔꿈치에 맞춰졌지만 건의 위치는 다르게 위에 있다.

건의 위치를 바로 잡아주기 위해
총의 드래그해서 적절한 위치에 이동 시킨후 좌표를 바꿔준다.
그 후 건의 건을 누르고 복사
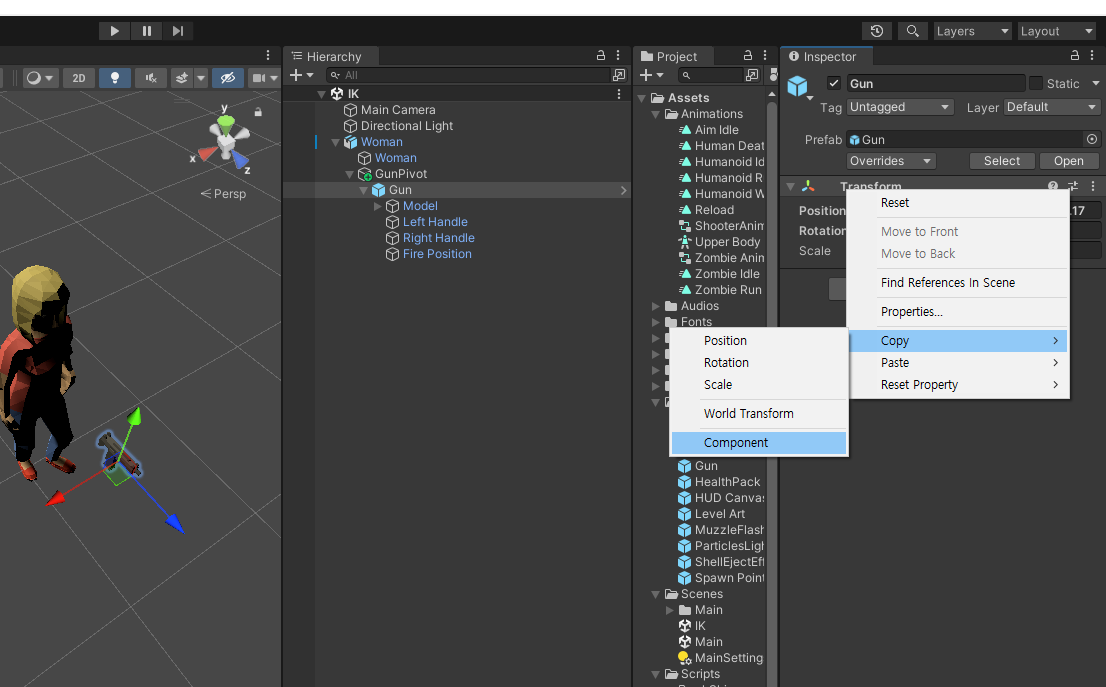
복사된 좌표를 건에다 붙여준다.
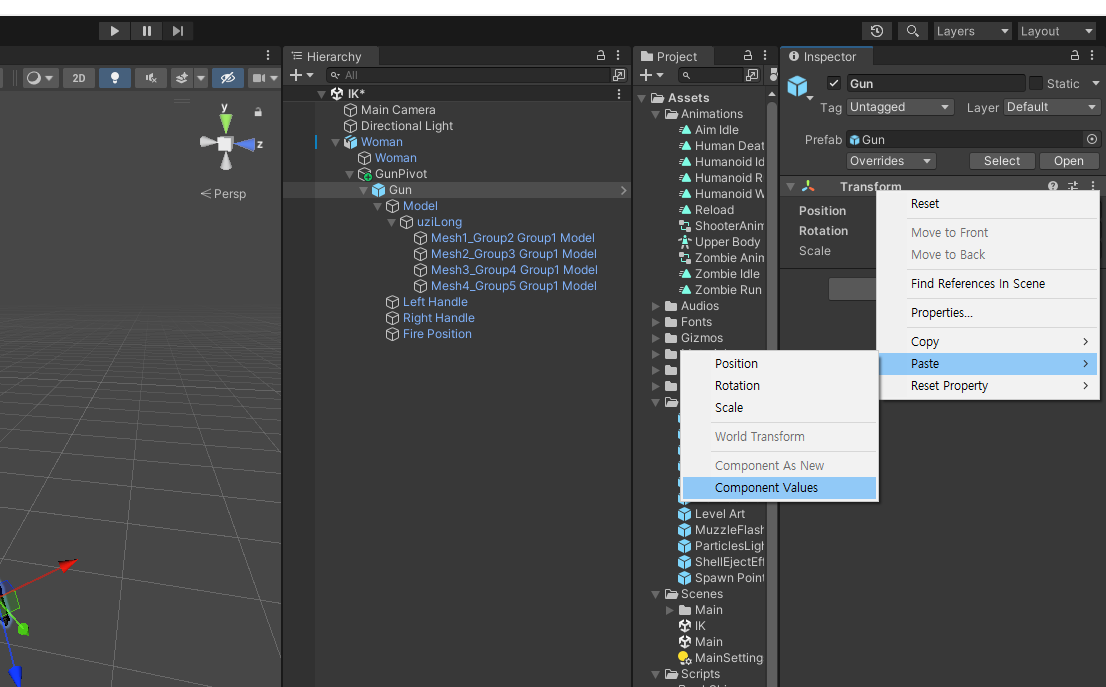
이제 파지를 할 왼손을 넣어줄 것이다.
using System.Collections;
using System.Collections.Generic;
using UnityEngine;
namespace smilejsu
{
public class Woman : MonoBehaviour
{
private Animator anim;
[SerializeField] private Transform gunPivot;
[SerializeField] private Transform leftHandMount; //왼쪽 손잡이
private void Start()
{
this.anim = GetComponent<Animator>();
}
private void OnAnimatorIK(int layerIndex)
{
Vector3 rightElbowPosition = anim.GetIKHintPosition(AvatarIKHint.RightElbow);
gunPivot.position = rightElbowPosition;
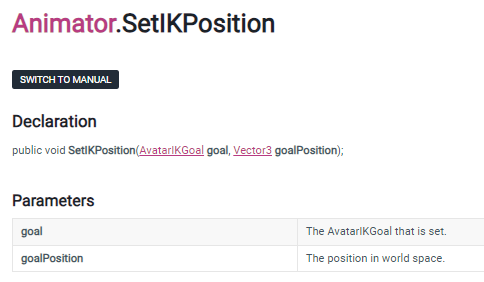
this.anim.SetIKPosition(AvatarIKGoal.LeftHand, this.leftHandMount.position);
this.anim.SetIKRotation(AvatarIKGoal.LeftHand, this.leftHandMount.rotation);
}
}
}
그 후 인스펙터에 할당
이제 왼쪽팔의 무게와 회전을 Range로 넣어줄 것이다.
using System.Collections;
using System.Collections.Generic;
using UnityEngine;
namespace yjShin
{
public class Woman : MonoBehaviour
{
private Animator anim;
[SerializeField] private Transform gunPivot;
[SerializeField] private Transform leftHandMount; //왼쪽 손잡이
[Range(0,1)]
[SerializeField] private float leftHandPositionWeight = 1f;
[Range(0, 1)]
[SerializeField] private float leftHandRotationWeight = 1f;
private void Start()
{
anim = GetComponent<Animator>();
}
private void OnAnimatorIK(int layerIndex)
{
//Debug.Log("OnAnimatorIK");
Vector3 rightElbowPosition = anim.GetIKHintPosition(AvatarIKHint.RightElbow);
//Debug.Log(rightElbowPosition);
gunPivot.position = rightElbowPosition;
this.anim.SetIKPosition(AvatarIKGoal.LeftHand, this.leftHandMount.position);
this.anim.SetIKRotation(AvatarIKGoal.LeftHand, this.leftHandMount.rotation);
this.anim.SetIKPositionWeight(AvatarIKGoal.LeftHand, this.leftHandPositionWeight);
this.anim.SetIKRotationWeight(AvatarIKGoal.LeftHand, this.leftHandRotationWeight);
}
}
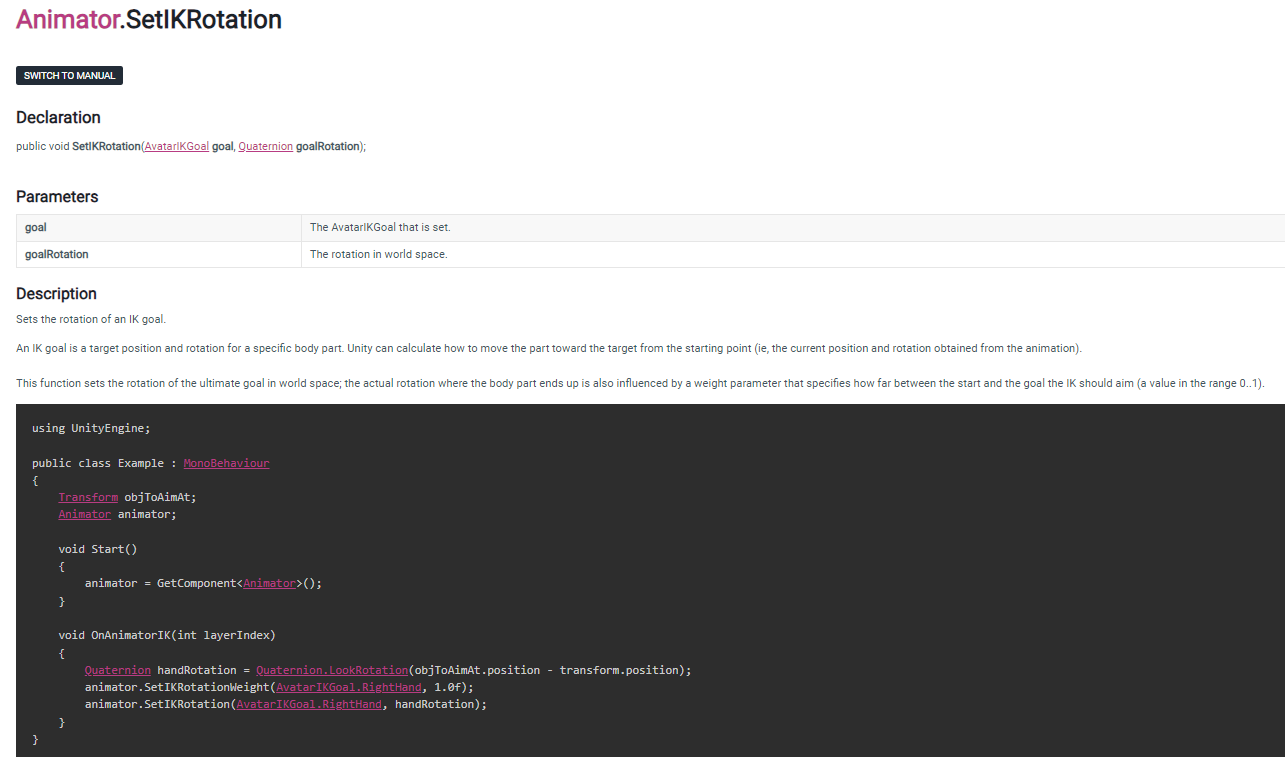
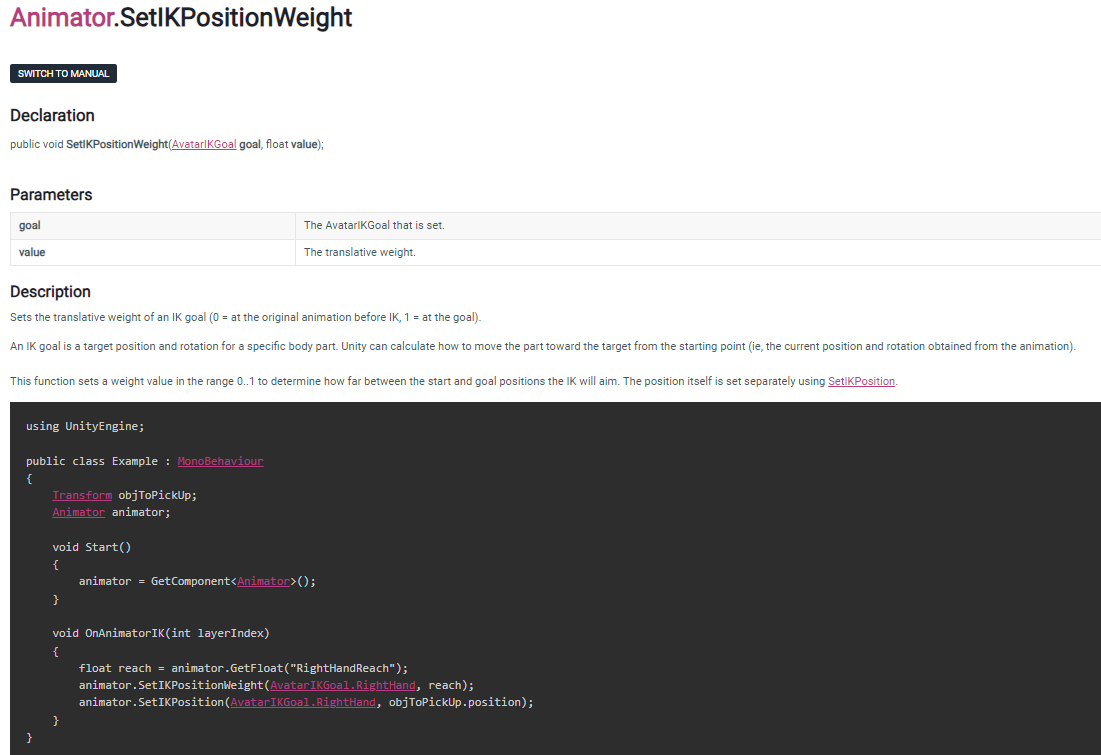
}Animator들의 속성에 대해 모르는 점이 있으면 다큐멘터리를 적극이용하자
https://docs.unity3d.com/ScriptReference/Animator.html
Unity - Scripting API: Animator
Success! Thank you for helping us improve the quality of Unity Documentation. Although we cannot accept all submissions, we do read each suggested change from our users and will make updates where applicable. Close
docs.unity3d.com

그래서 만들어진 완성본
using UnityEngine;
// 주어진 Gun 오브젝트를 쏘거나 재장전
// 알맞은 애니메이션을 재생하고 IK를 사용해 캐릭터 양손이 총에 위치하도록 조정
public class PlayerShooter : MonoBehaviour {
public Gun gun; // 사용할 총
public Transform gunPivot; // 총 배치의 기준점
public Transform leftHandMount; // 총의 왼쪽 손잡이, 왼손이 위치할 지점
public Transform rightHandMount; // 총의 오른쪽 손잡이, 오른손이 위치할 지점
private PlayerInput playerInput; // 플레이어의 입력
private Animator playerAnimator; // 애니메이터 컴포넌트
private void Start() {
// 사용할 컴포넌트들을 가져오기
playerInput = GetComponent<PlayerInput>();
playerAnimator = GetComponent<Animator>();
}
private void OnEnable() {
// 슈터가 활성화될 때 총도 함께 활성화
gun.gameObject.SetActive(true);
}
private void OnDisable() {
// 슈터가 비활성화될 때 총도 함께 비활성화
gun.gameObject.SetActive(false);
}
private void Update() {
// 입력을 감지하고 총 발사하거나 재장전
if (playerInput.fire)
{
gun.Fire();
}
else if (playerInput.reload)
{
{
if (gun.Reload())
{
}
playerAnimator.SetTrigger("Reload");
}
}
UpdateUI();
}
// 탄약 UI 갱신
private void UpdateUI() {
if (gun != null && UIManager.instance != null)
{
// UI 매니저의 탄약 텍스트에 탄창의 탄약과 남은 전체 탄약을 표시
UIManager.instance.UpdateAmmoText(gun.magAmmo, gun.ammoRemain);
}
}
// 애니메이터의 IK 갱신
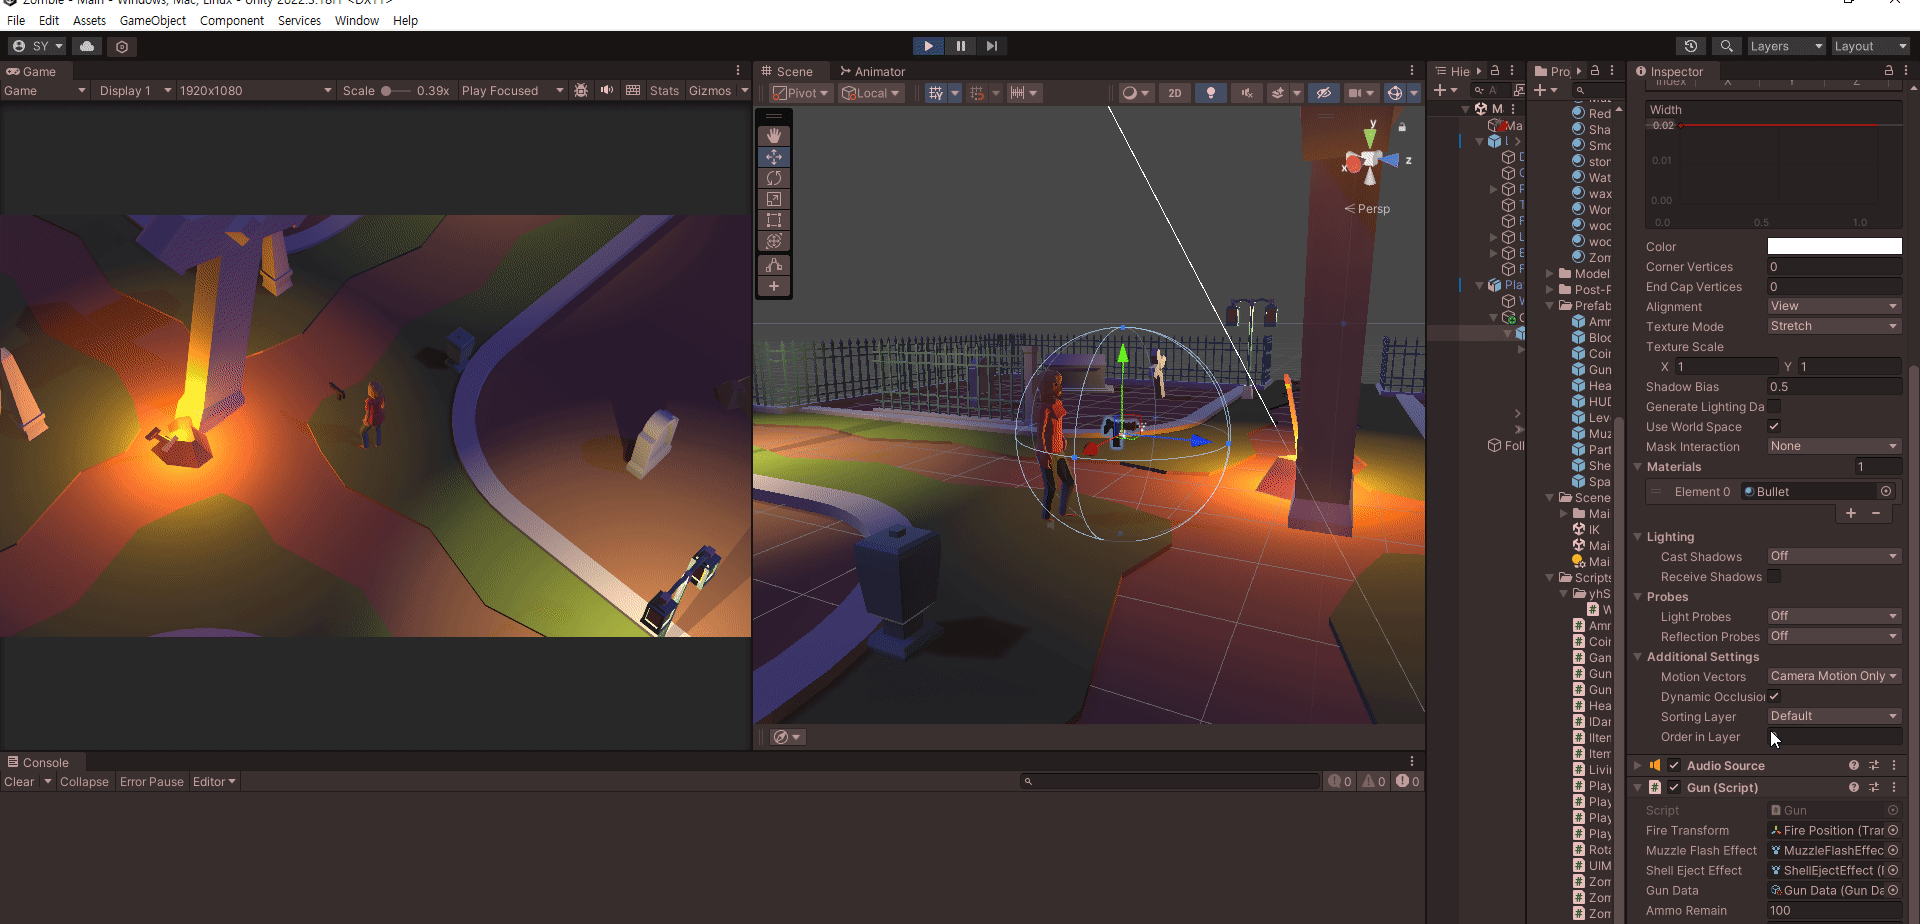
private void OnAnimatorIK(int layerIndex) {
//총의 기준점 gunPivot을 3D 모델의 오른쪽 팔꿈치 위치로 이동
gunPivot.position = playerAnimator.GetIKHintPosition(AvatarIKHint.RightElbow);
//IK를 사용하여 왼손의 위치와 회전을 총의 왼쪽 손잡이에 맞춤
playerAnimator.SetIKPositionWeight(AvatarIKGoal.LeftHand, 1.0f);
playerAnimator.SetIKRotationWeight(AvatarIKGoal.LeftHand, 1.0f);
playerAnimator.SetIKPosition(AvatarIKGoal.LeftHand, leftHandMount.position);
playerAnimator.SetIKRotation(AvatarIKGoal.LeftHand, leftHandMount.rotation);
//IK를 사용하여 오른손의 위치와 회전을 총의 오른쪽 손잡이에 맞춤
playerAnimator.SetIKPositionWeight(AvatarIKGoal.RightHand, 1.0f);
playerAnimator.SetIKRotationWeight(AvatarIKGoal.RightHand, 1.0f);
playerAnimator.SetIKPosition(AvatarIKGoal.RightHand, rightHandMount.position);
playerAnimator.SetIKRotation(AvatarIKGoal.RightHand, rightHandMount.rotation);
}
}
using System.Collections;
using UnityEngine;
using UnityEngine.UIElements;
// 총을 구현
public class Gun : MonoBehaviour
{
// 총의 상태를 표현하는 데 사용할 타입을 선언
public enum State
{
Ready, // 발사 준비됨
Empty, // 탄알집이 빔
Reloading // 재장전 중
}
public State state { get; private set; } // 현재 총의 상태
public Transform fireTransform; // 탄알이 발사될 위치
public ParticleSystem muzzleFlashEffect; // 총구 화염 효과
public ParticleSystem shellEjectEffect; // 탄피 배출 효과
private LineRenderer bulletLineRenderer; // 탄알 궤적을 그리기 위한 렌더러
private AudioSource gunAudioPlayer; // 총 소리 재생기
public GunData gunData; // 총의 현재 데이터
private float fireDistance = 50f; // 사정거리
public int ammoRemain = 100; // 남은 전체 탄알
public int magAmmo; // 현재 탄알집에 남아 있는 탄알
private float lastFireTime; // 총을 마지막으로 발사한 시점
private void Awake() {
// 사용할 컴포넌트의 참조 가져오기
gunAudioPlayer = GetComponent<AudioSource>();
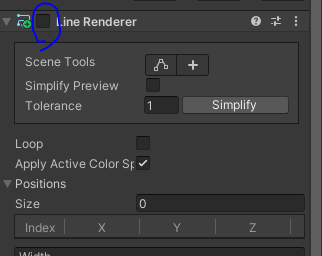
this.bulletLineRenderer = GetComponent<LineRenderer>();
this.bulletLineRenderer.positionCount = 2;
this.bulletLineRenderer.enabled = false;
}
private void OnEnable() {
ammoRemain = gunData.startAmmoRemain;
magAmmo = gunData.magCapacity;
// 총 상태 초기화
this.state = State.Ready;
lastFireTime = 0;
}
// 발사 시도
public void Fire() {
if(this.state == State.Ready && Time.time >= lastFireTime + gunData.timeBetFire)
{
lastFireTime = Time.time;
Shot();
}
}
// 실제 발사 처리
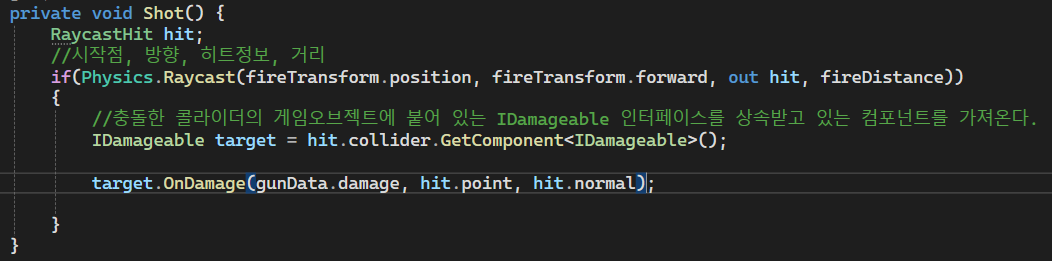
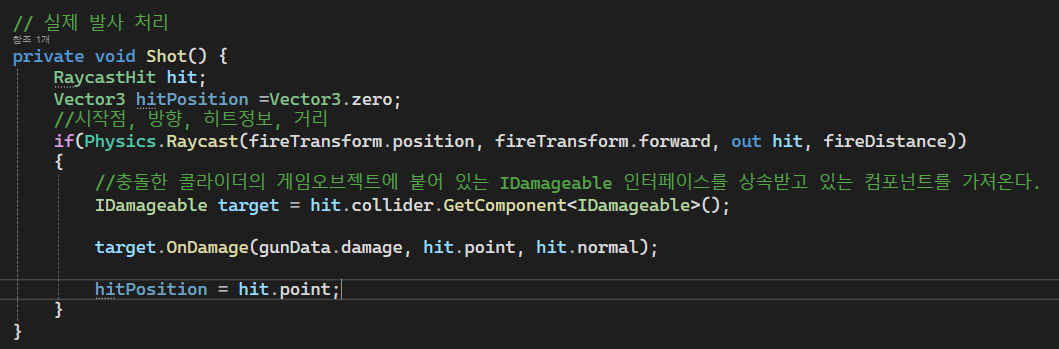
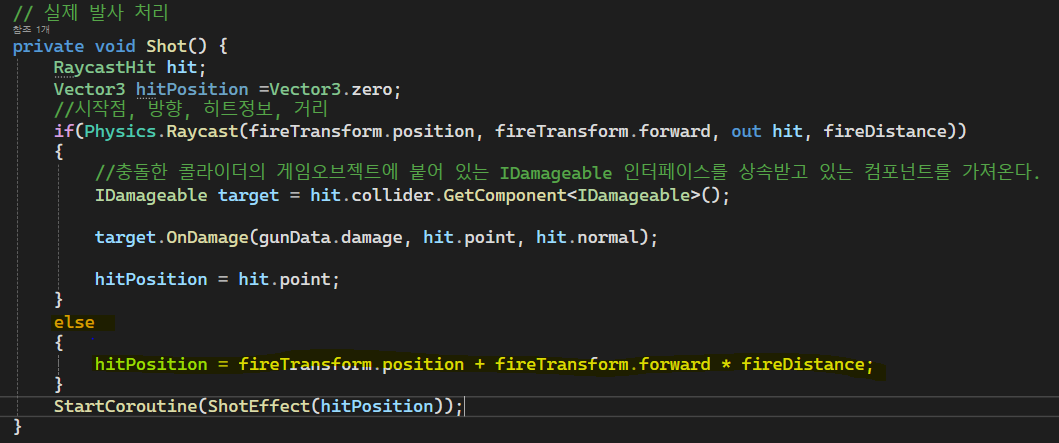
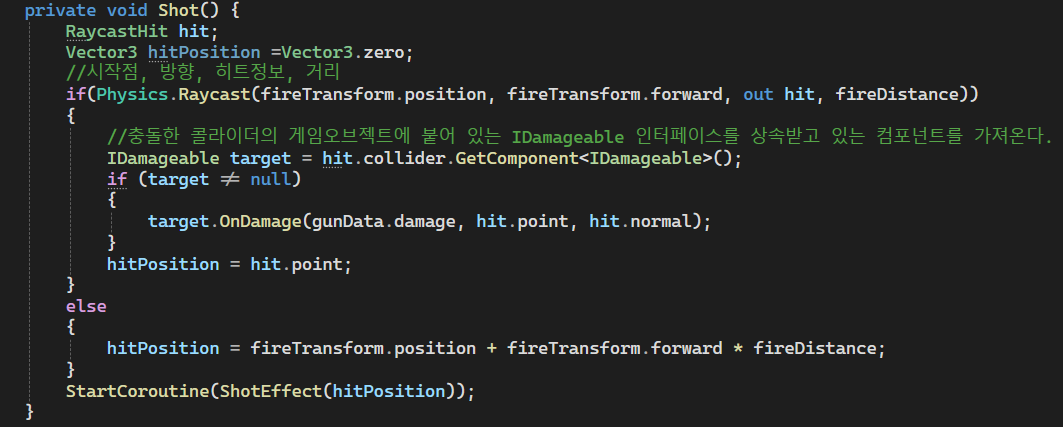
private void Shot() {
RaycastHit hit;
Vector3 hitPosition =Vector3.zero;
//시작점, 방향, 히트정보, 거리
if(Physics.Raycast(fireTransform.position, fireTransform.forward, out hit, fireDistance))
{
//충돌한 콜라이더의 게임오브젝트에 붙어 있는 IDamageable 인터페이스를 상속받고 있는 컴포넌트를 가져온다.
IDamageable target = hit.collider.GetComponent<IDamageable>();
if (target != null)
{
target.OnDamage(gunData.damage, hit.point, hit.normal);
}
hitPosition = hit.point;
}
else
{
//탄알이 최대 사정거리까지 날아갔을 때의 위치를 충돌 위치로 사용 => out hit가 빠진다.
hitPosition = fireTransform.position + fireTransform.forward * fireDistance;
}
StartCoroutine(ShotEffect(hitPosition));
magAmmo--;
if(magAmmo <= 0)
{
state = State.Empty;
}
}
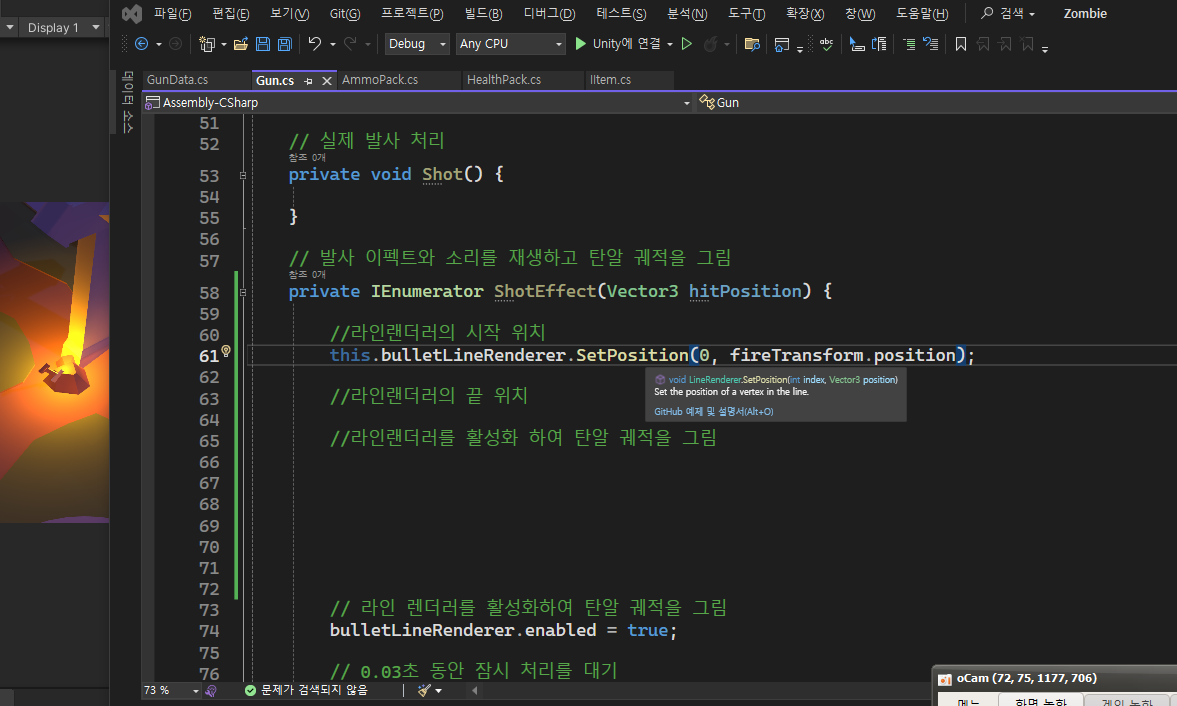
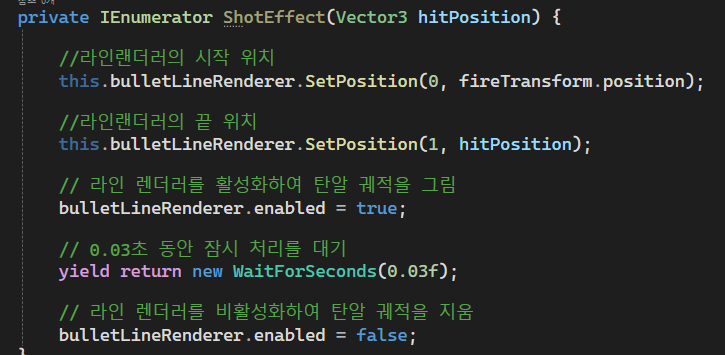
// 발사 이펙트와 소리를 재생하고 탄알 궤적을 그림
private IEnumerator ShotEffect(Vector3 hitPosition) {
muzzleFlashEffect.Play();
shellEjectEffect.Play();
//총격 소리 재생
gunAudioPlayer.PlayOneShot(gunData.shotClip);
//라인랜더러의 시작 위치
this.bulletLineRenderer.SetPosition(0, fireTransform.position);
//라인랜더러의 끝 위치
this.bulletLineRenderer.SetPosition(1, hitPosition);
// 라인 렌더러를 활성화하여 탄알 궤적을 그림
bulletLineRenderer.enabled = true;
// 0.03초 동안 잠시 처리를 대기
yield return new WaitForSeconds(0.03f);
// 라인 렌더러를 비활성화하여 탄알 궤적을 지움
bulletLineRenderer.enabled = false;
}
// 재장전 시도
public bool Reload()
{
if (state == State.Reloading || ammoRemain <= 0 || magAmmo >= gunData.magCapacity)
{
return false;
}
StartCoroutine(ReloadRoutine());
return true;
}
// 실제 재장전 처리를 진행
private IEnumerator ReloadRoutine() {
// 현재 상태를 재장전 중 상태로 전환
state = State.Reloading;
gunAudioPlayer.PlayOneShot(gunData.reloadClip);
// 재장전 소요 시간 만큼 처리 쉬기
yield return new WaitForSeconds(gunData.reloadTime);
int ammoToFill = gunData.magCapacity - magAmmo;
if(ammoRemain < ammoToFill)
{
ammoToFill = ammoRemain;
}
magAmmo += ammoToFill;
ammoRemain -= ammoToFill;
// 총의 현재 상태를 발사 준비된 상태로 변경
state = State.Ready;
}
private void Update()
{
//test
if(Input.GetMouseButtonDown(0))
{
this.Fire();
}
}
}
using UnityEngine;
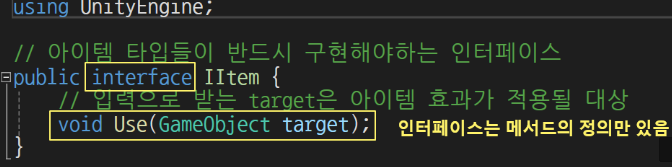
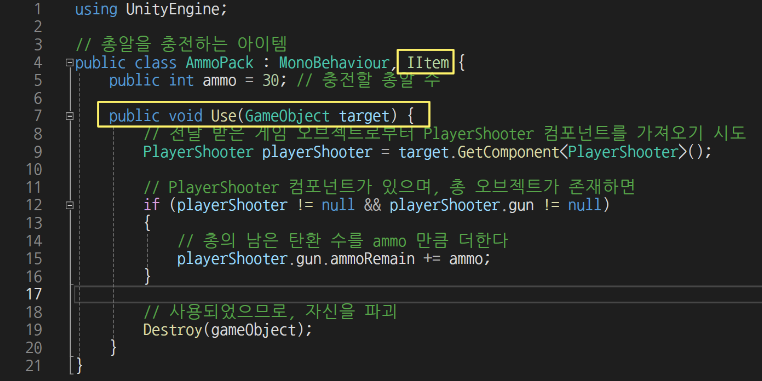
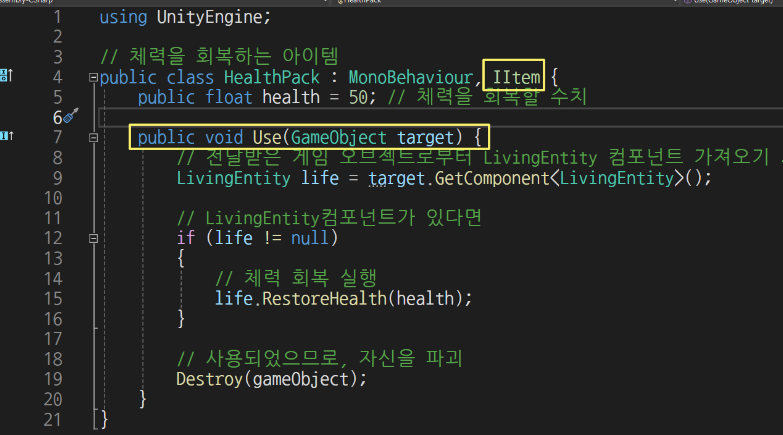
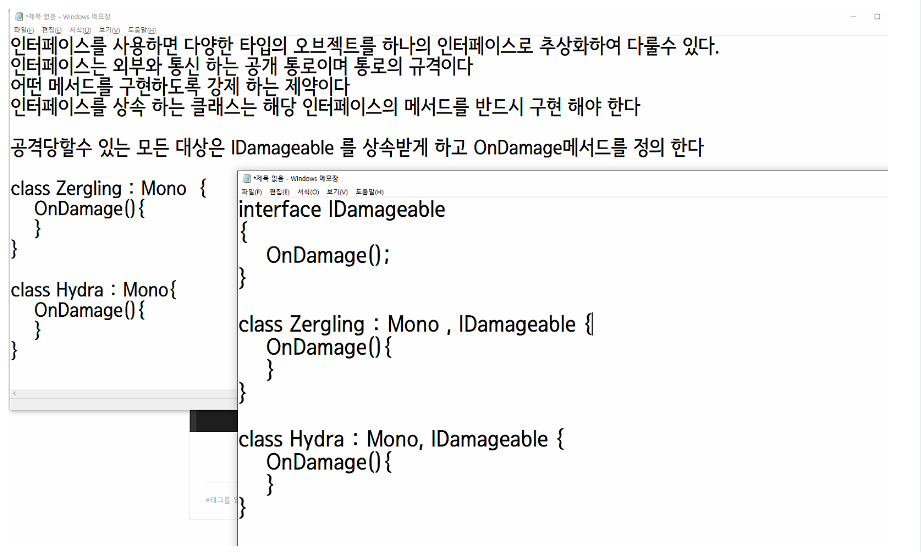
// 데미지를 입을 수 있는 타입들이 공통적으로 가져야 하는 인터페이스
public interface IDamageable {
// 데미지를 입을 수 있는 타입들은 IDamageable을 상속하고 OnDamage 메서드를 반드시 구현해야 한다
// OnDamage 메서드는 입력으로 데미지 크기(damage), 맞은 지점(hitPoint), 맞은 표면의 방향(hitNormal)을 받는다
void OnDamage(float damage, Vector3 hitPoint, Vector3 hitNormal);
}using UnityEngine;
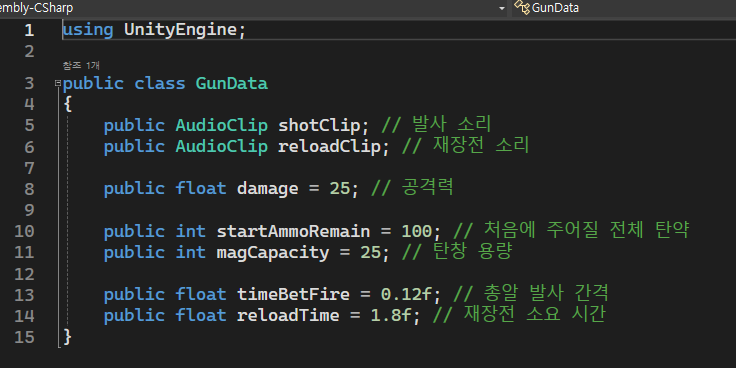
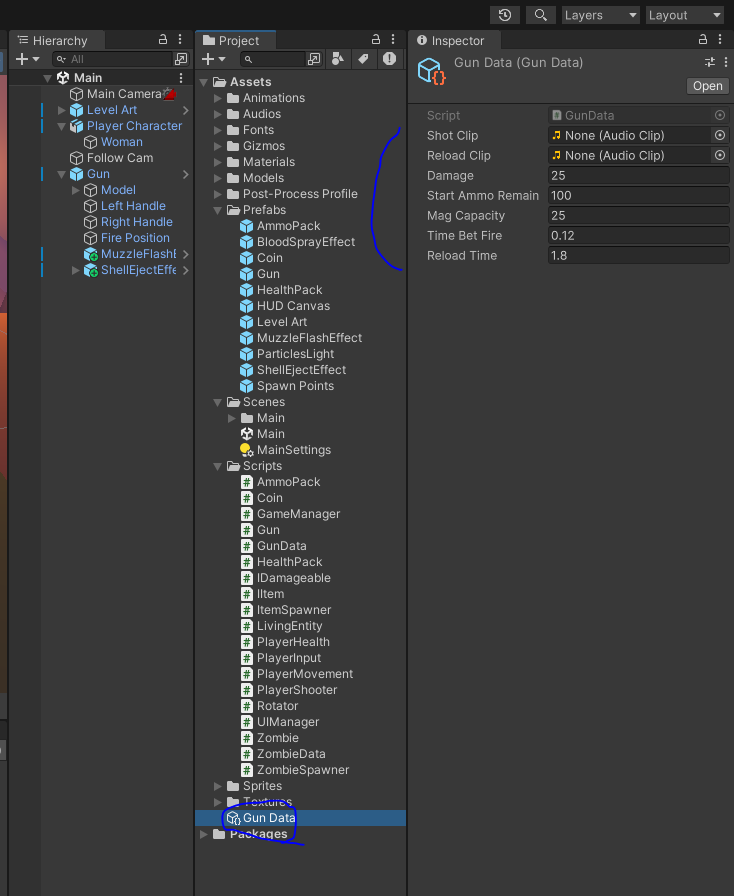
[CreateAssetMenu(menuName = "Scriptable/GunData", fileName = "Gun Data")]
public class GunData : ScriptableObject
{
public AudioClip shotClip; // 발사 소리
public AudioClip reloadClip; // 재장전 소리
public float damage = 25; // 공격력
public int startAmmoRemain = 100; // 처음에 주어질 전체 탄약
public int magCapacity = 25; // 탄창 용량
public float timeBetFire = 0.12f; // 총알 발사 간격
public float reloadTime = 1.8f; // 재장전 소요 시간
}'산대특 > 게임 클라이언트 프로그래밍' 카테고리의 다른 글
| Sprite Shooter - Player and Monster Animation (0) | 2024.03.14 |
|---|---|
| Sprite Shooter - Destroy Barrel and Layer (0) | 2024.03.13 |
| Zombie - Line Render (0) | 2024.03.07 |
| Tank - Rigidbody.MovePosition (0) | 2024.03.06 |
| UniRun (4) | 2024.03.05 |