https://assetstore.unity.com/packages/3d/props/weapons/katana-sword-free-143768


Katana Sword Free | 3D 무기 | Unity Asset Store

Elevate your workflow with the Katana Sword Free asset from Imagine Emotion. Find this & other 무기 options on the Unity Asset Store.

assetstore.unity.com


https://github.com/DavidArayan/ezy-slice


GitHub - DavidArayan/ezy-slice: An open source mesh slicer framework for Unity3D Game Engine. Written in C#.

An open source mesh slicer framework for Unity3D Game Engine. Written in C#. - DavidArayan/ezy-slice

github.com


using UnityEngine;

public class HalfExtentsVisualizer : MonoBehaviour
{
    public Vector3 halfExtents = new Vector3(1, 1, 1);
    public Color boxColor = Color.blue;  // 상자의 색깔을 설정합니다.
    public bool useWireframe = false;    // 상자를 와이어프레임으로 그릴지 여부를 결정합니다.

    void OnDrawGizmos()
    {
        // Gizmo 색상을 설정합니다.
        Gizmos.color = boxColor;

        // 오브젝트의 Collider로부터 중심 위치를 얻습니다.
        Collider collider = GetComponent<Collider>();
        Vector3 center = collider != null ? collider.bounds.center : transform.position;

        // Gizmo의 변환 행렬을 설정합니다. 오브젝트의 회전은 반영하지만, 스케일은 1로 고정합니다.
        Gizmos.matrix = Matrix4x4.TRS(center, transform.rotation, Vector3.one);

        // 상자를 그립니다. useWireframe 값에 따라 와이어프레임 또는 솔리드 상자를 그립니다.
        if (useWireframe)
        {
            Gizmos.DrawWireCube(Vector3.zero, 2.0f * halfExtents);  // 와이어프레임 상자를 그립니다.
        }
        else
        {
            Gizmos.DrawCube(Vector3.zero, 2.0f * halfExtents);  // 솔리드 상자를 그립니다.
        }
    }
}
using System.Collections;
using System.Collections.Generic;
using EzySlice;
using UnityEngine;

public class Slicer : MonoBehaviour
{
    public Material afterSliceMaterial;
    public LayerMask sliceMask;

    public bool isTouch = false;
    private void Update()
    {
        if (isTouch) {
            Slice();
        }
        //if (Input.GetKeyDown(KeyCode.Space))
        //{
        //    Slice();
        //}
    }

    public void Slice()
    {
        Collider[] objectsToSlice = Physics.OverlapBox(transform.position, new Vector3(2.08f, 0.45f, 1.33f),
            transform.rotation, sliceMask);

        Debug.LogFormat("objectsToSlice.Length: {0}", objectsToSlice.Length);

        foreach (Collider col in objectsToSlice)
        {
            SlicedHull slicedObject = SliceObject(col.gameObject);

            Debug.LogFormat("slicedObject: {0}", slicedObject);

            var upperHullGo = slicedObject.CreateUpperHull(col.gameObject, afterSliceMaterial);
            var lowerHullGo = slicedObject.CreateLowerHull(col.gameObject, afterSliceMaterial);

            Debug.LogFormat("upperHullGo: {0}", upperHullGo);
            Debug.LogFormat("lowerHullGo: {0}", lowerHullGo);

            upperHullGo.transform.position = col.transform.position;
            lowerHullGo.transform.position = col.transform.position;

            var velocity = col.GetComponent<Rigidbody>().velocity;

            ApplyPhysical(upperHullGo, velocity);
            ApplyPhysical(lowerHullGo, velocity);
            Destroy(col.gameObject);
        }
    }


    private void ApplyPhysical(GameObject go, Vector3 velocity)
    {
        go.AddComponent<MeshCollider>().convex = true;
        var rbody = go.AddComponent<Rigidbody>();
        rbody.velocity = -velocity;

        int randX = UnityEngine.Random.Range(0, 3);
        int randY = UnityEngine.Random.Range(0, 3);
        int randZ = UnityEngine.Random.Range(0, 3);

        rbody.AddForce(1.5f * new Vector3(randX, randY, randZ), ForceMode.Impulse);
    }

    private SlicedHull SliceObject(GameObject go)
    {
        return go.Slice(transform.position, transform.up, afterSliceMaterial);
    }
}


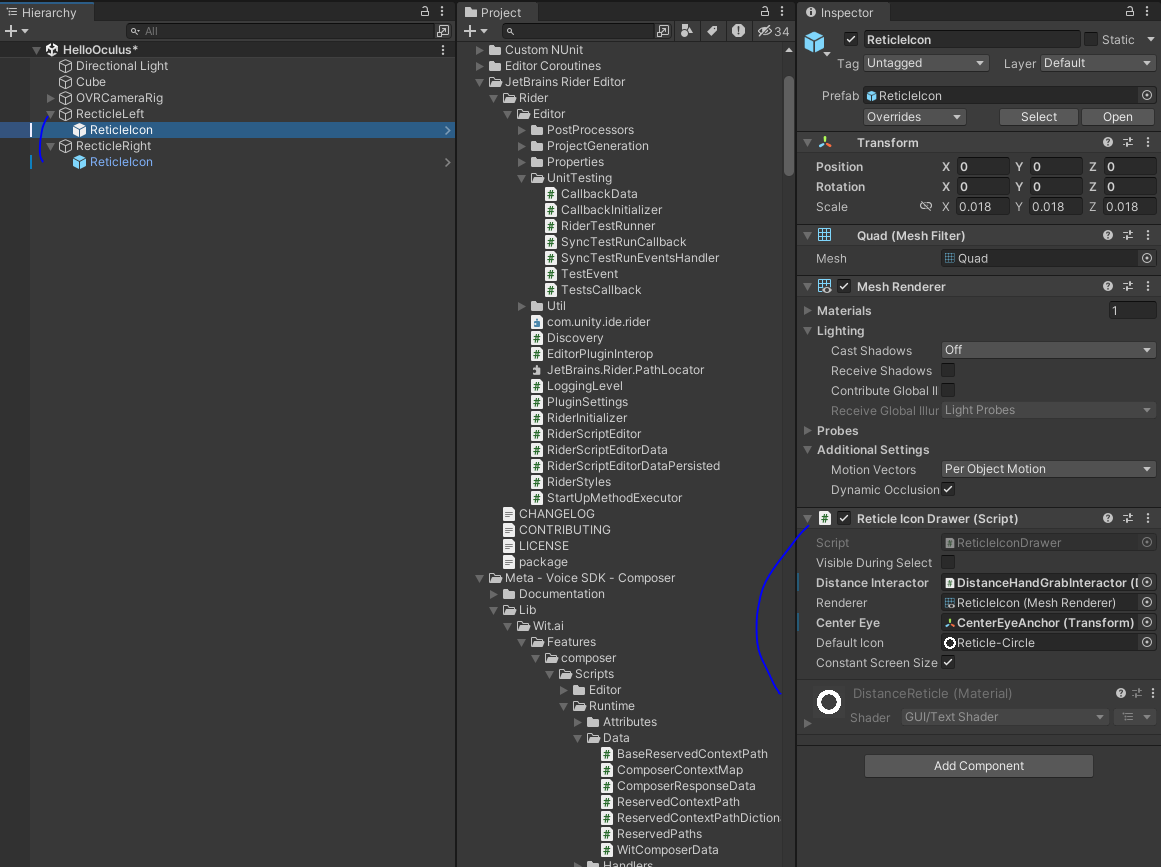
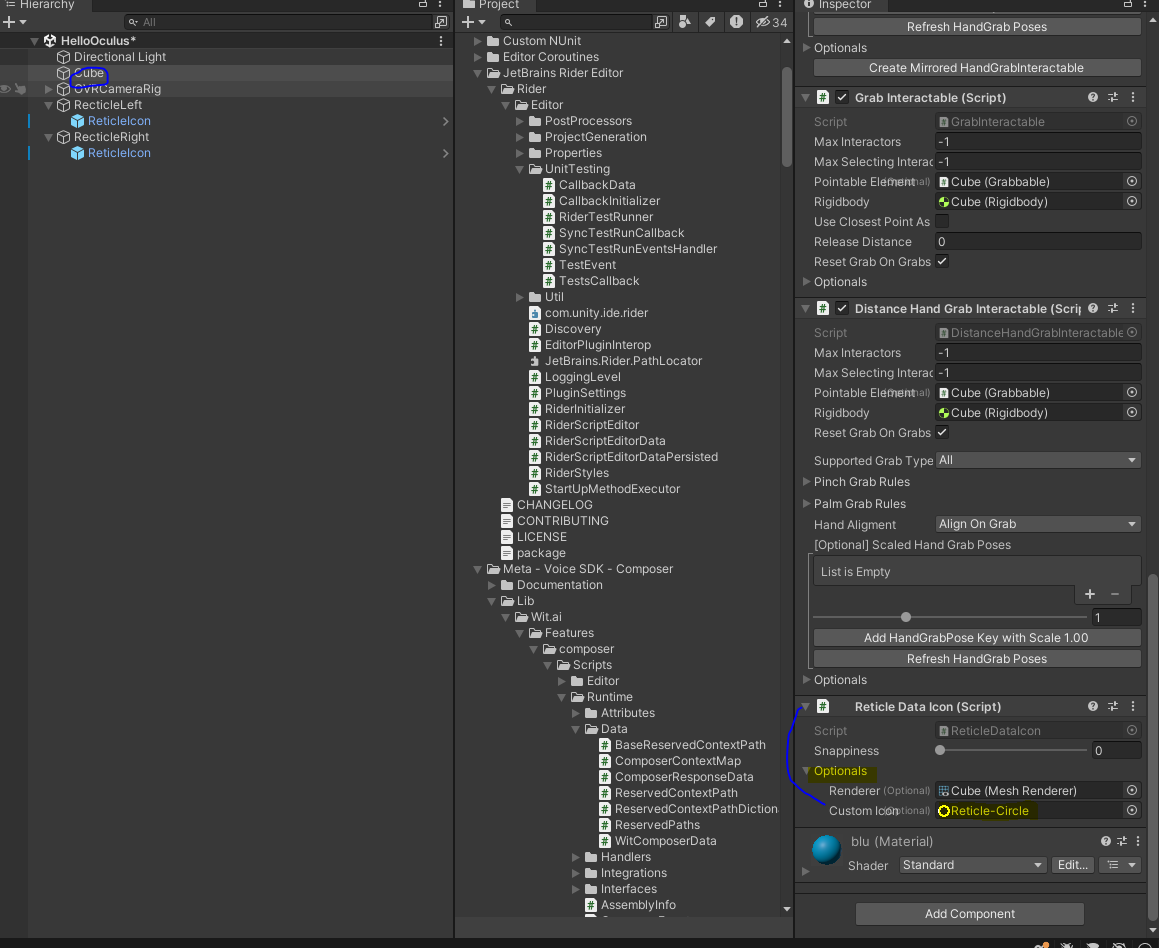
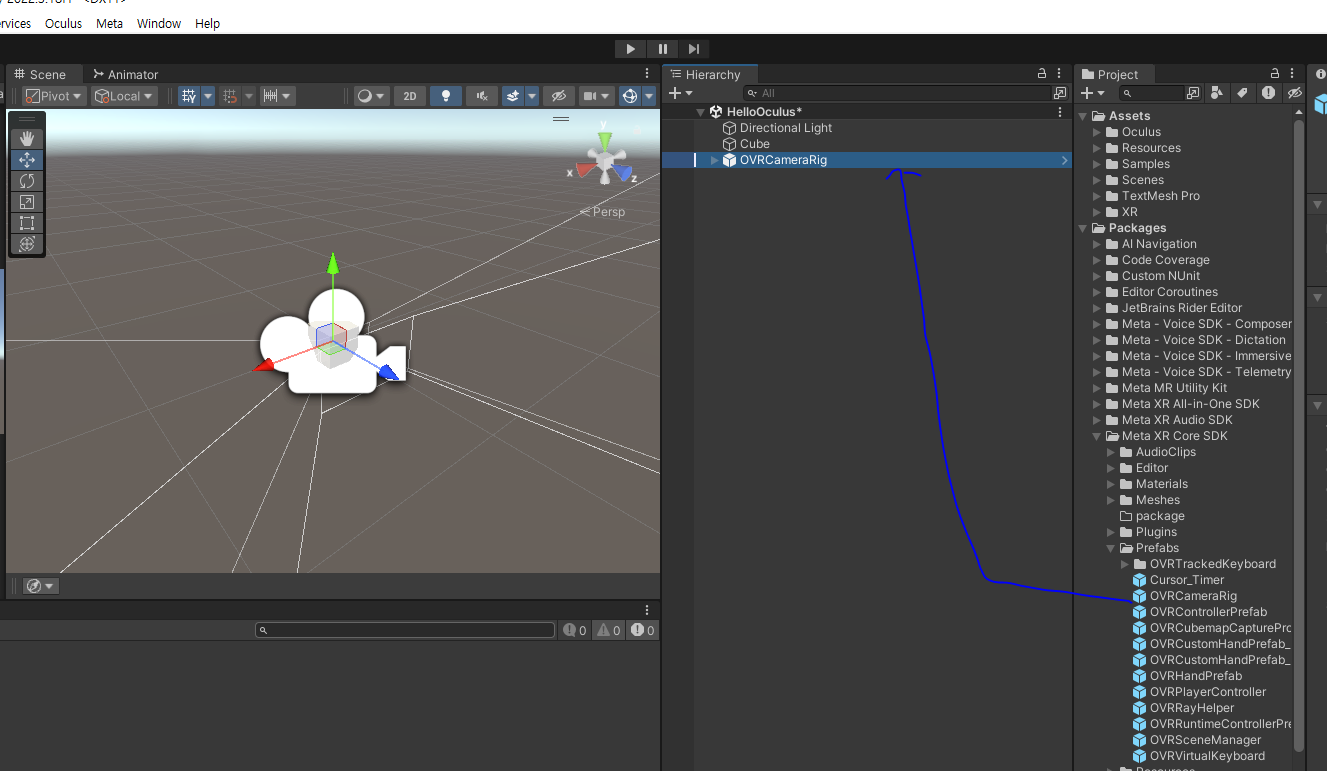
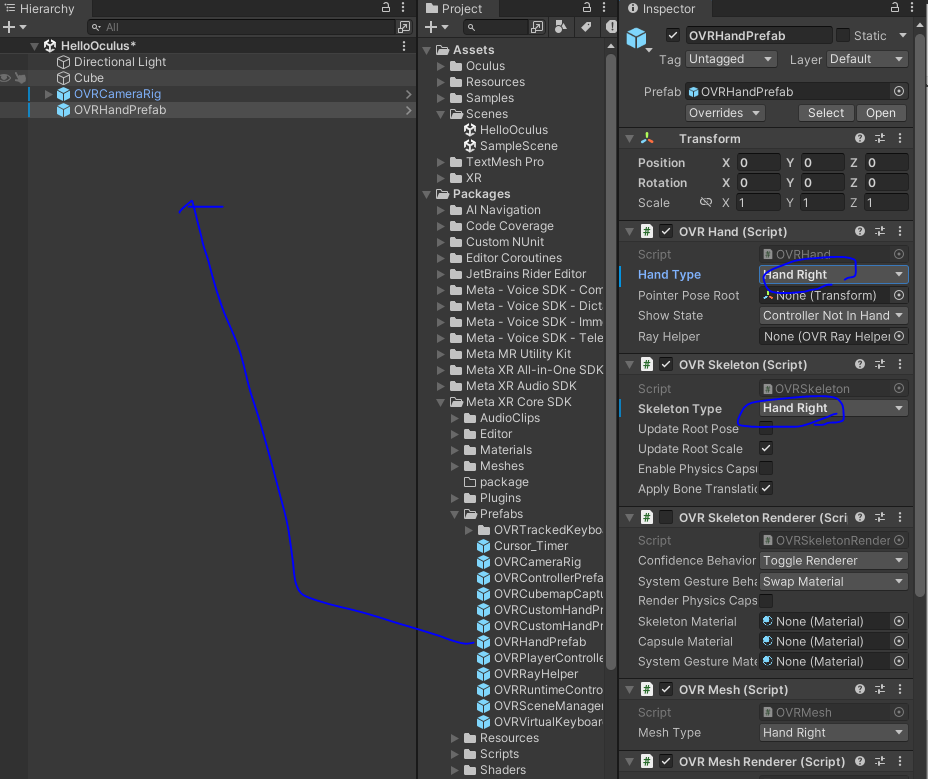
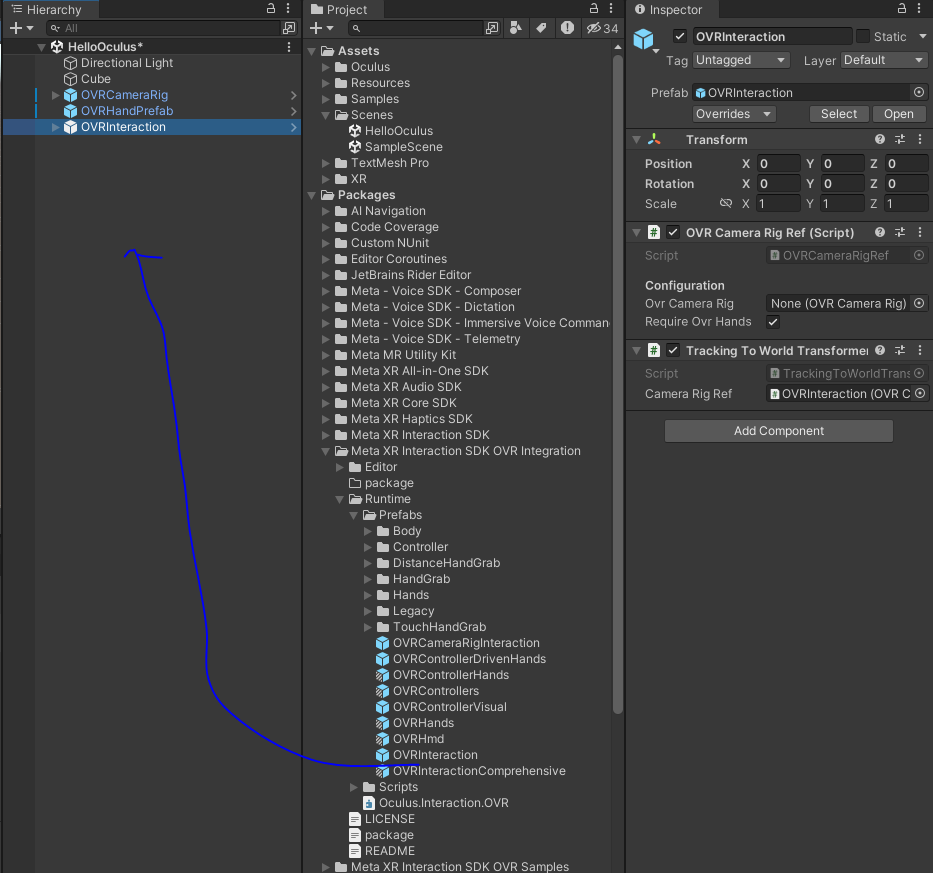
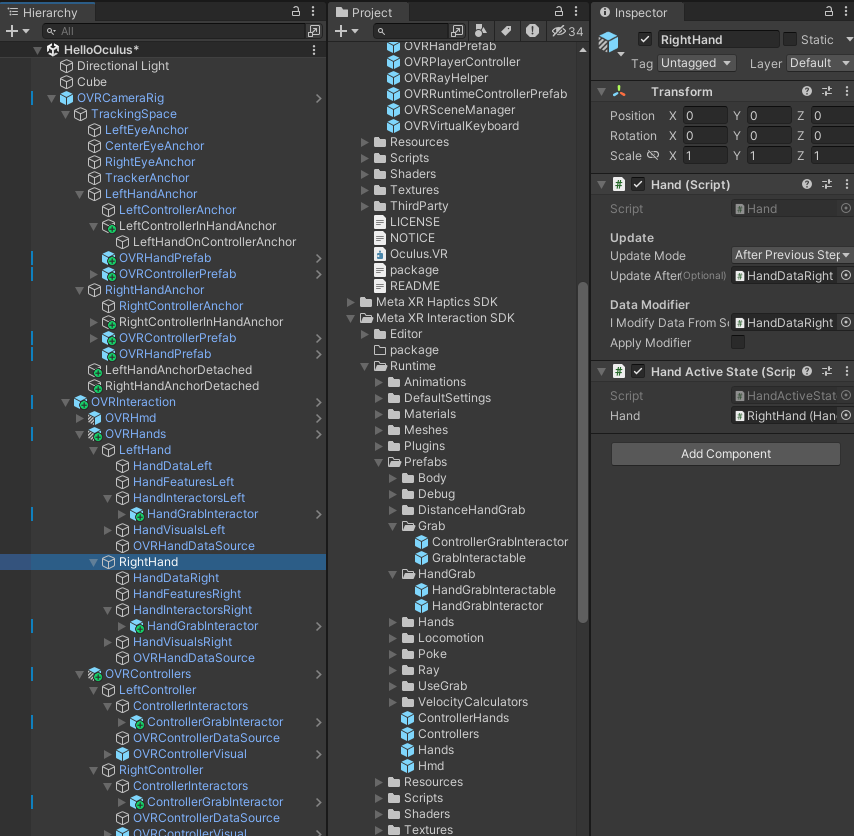
위에 두개는 테스트 씬에서 플레인과 큐브를 만들고 되는지 확인 후 프리팹으로 뽑아와서 부착하였다.


https://developer.oculus.com/documentation/unity/unity-isdk-create-ghost-reticles/

Option A에 관한 설명을 읽으면 된다.


Create Ghost Reticles | Oculus Developers


developer.oculus.com


큐브의 색이 흰색이면 레티클이 흰색 이미지이므로 안보일 수 있다.

임의로 메터리얼을 생성하여 큐브의 색을 변화시키면

레티클을 보다 가시적으로 확인할 수 있다.


https://developer.oculus.com/documentation/unity/unity-isdk-creating-handgrab-poses/


Create a Hand Grab Pose (PC) | Oculus Developers


developer.oculus.com


왼손이나 오른손으로 지정후

플레이를 한다.

1. 구체에 손을 얹고 Record HandGrabPose를 누르면 흰색으로 스캔이 된다.

2. 그 후 아래에 있는 Save To Collection을 누르면 에셋에 저장이 된다.


이렇게 에셋에 새로운 폴더와 함께 저장이된다.

새로 만들어진 컬렉션을 열어보면 이러한 프로퍼티를 볼 수 있다.

하이어라이키에는 이런식으로 생긴다.


Sphere안에있는 인터렉터를 지우고

HandGrabInteractable를 누른채로 실행하면 

근처에서 잡으면 저장된 손모양이 적용된다.


세이브한 모양이 마음에 들지 않으면 관절을 직접 조절해서 모양을 맞춰줄 수 있다.

'산대특 > VRAR' 카테고리의 다른 글

[VR]반대손 복사와 회전 및 던지기  (0) 2024.04.19
[VR]총 잡기 - HandGun Grab  (1) 2024.04.18
Oculus Settings and Grab  (0) 2024.04.17
Reticle  (0) 2024.04.16
VR로 360도 동영상 다운로드 후 적용하기 + 오큘러스 적용  (0) 2024.04.16

https://developer.oculus.com/documentation/


Oculus Documentation | Oculus Developers


developer.oculus.com

https://developer.oculus.com/documentation/unity/unity-isdk-interaction-sdk-overview/


Interaction SDK Overview | Oculus Developers


developer.oculus.com


https://docs.unity3d.com/560/Documentation/Manual/OculusControllers.html


Unity - Manual: Input for Oculus

Input for OpenVR controllers Input for Oculus Oculus Rift has three inputs: two Oculus Touch Controllers, and one Oculus Remote. To allow native Unity Editor support for Oculus Rift input hardware, the Unity VR subsystem presents these three inputs as sepa

docs.unity3d.com


인덱스 트리거는 누르면 0~1까지의 값으로 변한다. (검지에 위치한 버튼)

핸드 트리거(중지에 위치한 버튼)

같이 누르거나 버튼하나를 다르게 하면 손의 모양을 바꿀 수 있다.


메인카메라를 지우고

OVR Camera를 찾아서 넣어준다.


해당하는 기기에 체크


1번 방법

2번 방법


프로젝트 셋팅에서 이 화면에 Fix 할 거 있다면 Fix하면 된다.


이 안에있는 앵커들은 모두 카메라이고

VR로 양안을 조절하는 카메라들이다.


OVRCameraRig에 있는 속성들로

위에 저 세개 핸드트래킹을 설정하는 것을

습관화 하자


Left Hand로 되있는것을 Right Hand로 바꿔준다.


https://developer.oculus.com/documentation/unity/unity-isdk-quick-actions/


Add an Interaction with QuickActions | Oculus Developers


developer.oculus.com


여기에는 자동으로 해준다고 나와있지만, 수동으로 처리 할 것이다.


조금 복잡하지만 필요한 부분을 캡쳐 및 녹화를 하였다.


컨트롤러를 두번 치고 내려 놓으면 내 손을 인지한다.


이제 메시렌더러를 끄면 보다 깔끔하게 손 모양이 나온다.


'산대특 > VRAR' 카테고리의 다른 글

[VR]총 잡기 - HandGun Grab  (1) 2024.04.18
Create Ghost Reticles  (0) 2024.04.18
Reticle  (0) 2024.04.16
VR로 360도 동영상 다운로드 후 적용하기 + 오큘러스 적용  (0) 2024.04.16
캐릭터 이동지점 변경시 VR시점 변경  (0) 2024.04.12

+ Recent posts