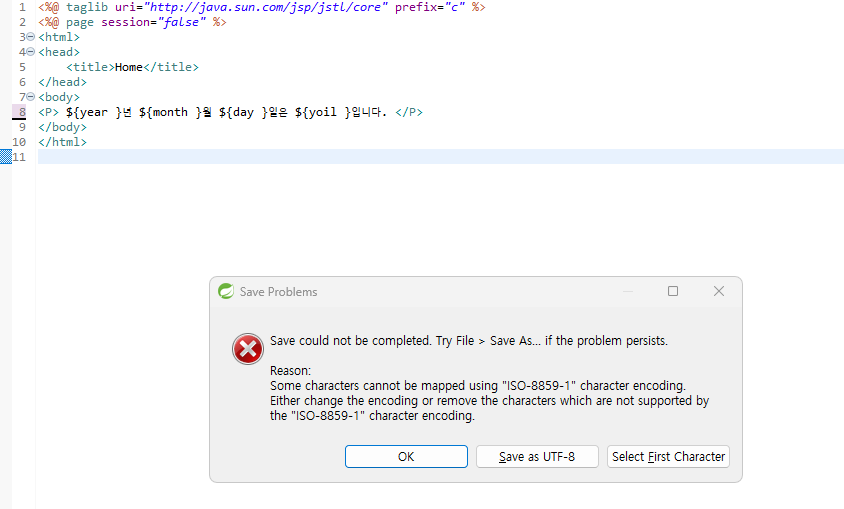
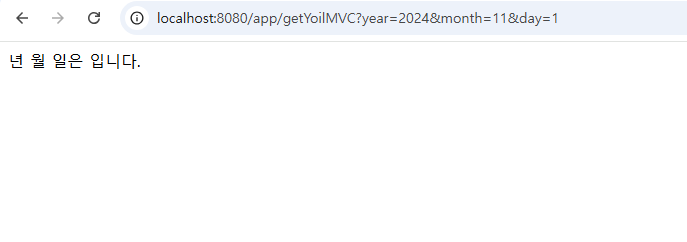
프로그램의 실행결과를 톰캣이 아닌 브라우저에 출력할 것이다.

년월일을 말하면 요일을 출력할 것이다.


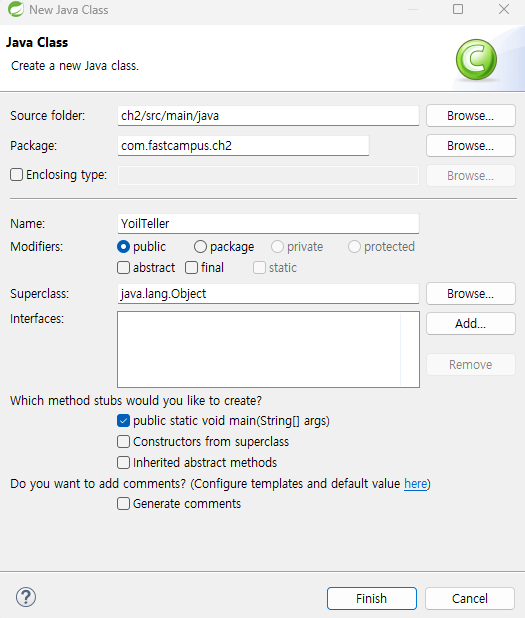
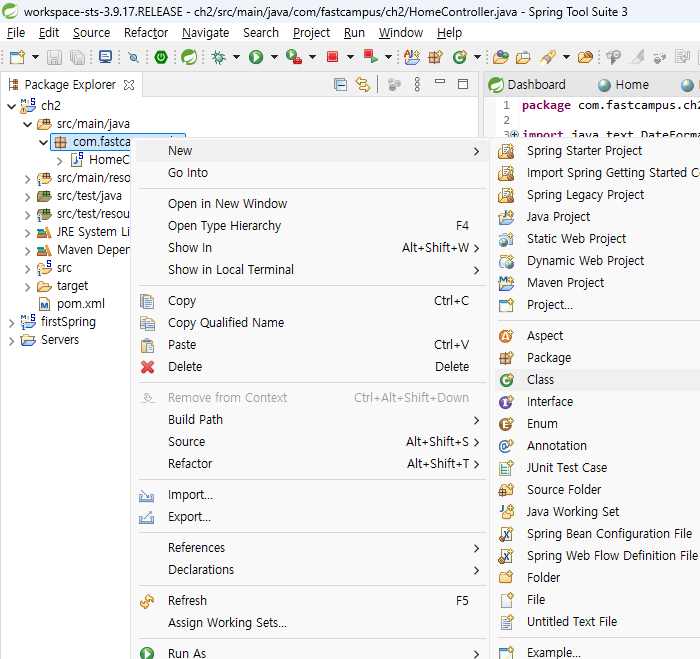
새로운 클래스를 만든다.


package com.fastcampus.ch2;

import java.util.Calendar;

public class YoilTeller {

	public static void main(String[] args) {
		// TODO Auto-generated method stub
		
		// 1. 입력
		String year = args[0];
		String month =args[1];
		String day = args[2];
		
		int yyyy = Integer.parseInt(year); //문자열이니 숫자로 변경
		int mm = Integer.parseInt(month);
		int dd = Integer.parseInt(day);
		
		// 2. 작업
		Calendar cal = Calendar.getInstance(); //날짜 셋팅
		cal.set(yyyy, mm-1, dd);
		
		int dayOfweek = cal.get(Calendar.DAY_OF_WEEK); //1:일요일, 2:월요일 ...
		char yoil = " 일월화수목금토".charAt(dayOfweek); //다시 문자열로 변경
		
		// 3. 출력
		System.out.println(year + "년" + month + "월" + day + "일은");
		System.out.println(yoil + "요일입니다");
		
	}

}


매개변수로 받아야해서 콘솔에서 실행해야 한다.

cd classes

java com.fastcampus.ch2.YoilTeller 2024 10 29

입력하면 요일이 출력됨


package com.fastcampus.ch2;

import org.springframework.stereotype.Controller;
import org.springframework.web.bind.annotation.RequestMapping;

import javax.servlet.http.HttpServletRequest;

@Controller
public class RequestInfo {
    @RequestMapping("/requestInfo")
    public void main(HttpServletRequest request) {
        System.out.println("request.getCharacterEncoding()="+request.getCharacterEncoding()); // 요청 내용의 인코딩
        System.out.println("request.getContentLength()="+request.getContentLength());  // 요청 내용의 길이. 알수 없을 때는 -1
        System.out.println("request.getContentType()="+request.getContentType()); // 요청 내용의 타입. 알 수 없을 때는 null

        System.out.println("request.getMethod()="+request.getMethod());      // 요청 방법
        System.out.println("request.getProtocol()="+request.getProtocol());  // 프로토콜의 종류와 버젼 HTTP/1.1
        System.out.println("request.getScheme()="+request.getScheme());      // 프로토콜

        System.out.println("request.getServerName()="+request.getServerName()); // 서버 이름 또는 ip주소
        System.out.println("request.getServerPort()="+request.getServerPort()); // 서버 포트
        System.out.println("request.getRequestURL()="+request.getRequestURL()); // 요청 URL
        System.out.println("request.getRequestURI()="+request.getRequestURI()); // 요청 URI

        System.out.println("request.getContextPath()="+request.getContextPath()); // context path
        System.out.println("request.getServletPath()="+request.getServletPath()); // servlet path
        System.out.println("request.getQueryString()="+request.getQueryString()); // 쿼리 스트링

        System.out.println("request.getLocalName()="+request.getLocalName()); // 로컬 이름
        System.out.println("request.getLocalPort()="+request.getLocalPort()); // 로컬 포트

        System.out.println("request.getRemoteAddr()="+request.getRemoteAddr()); // 원격 ip주소
        System.out.println("request.getRemoteHost()="+request.getRemoteHost()); // 원격 호스트 또는 ip주소
        System.out.println("request.getRemotePort()="+request.getRemotePort()); // 원격 포트
    }
}


서버를 실행해서 url에 검색했다.


Main클래스의 이름을 PrivateMethodCall로 변경


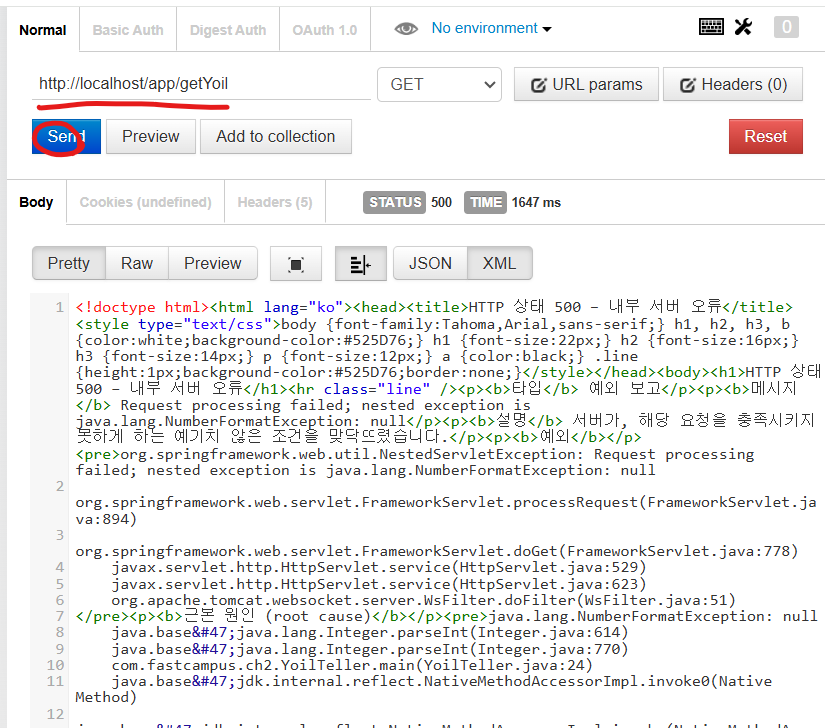
다시 YoilTeller 클래스에 들어가서 원격으로 request받기 위해 코드 수정

package com.fastcampus.ch2;

import java.util.Calendar;

import javax.servlet.http.HttpServletRequest;

import org.springframework.stereotype.Controller;
import org.springframework.web.bind.annotation.RequestMapping;

@Controller
public class YoilTeller {
	@RequestMapping("/getYoil")
	public void main(HttpServletRequest request) {
		// TODO Auto-generated method stub
		
		// 1. 입력
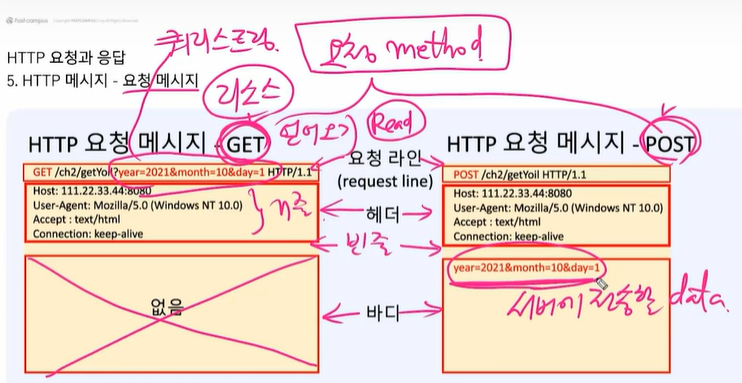
		String year = request.getParameter("year");
		String month =request.getParameter("month");
		String day = request.getParameter("day");
		
		int yyyy = Integer.parseInt(year); //문자열이니 숫자로 변경
		int mm = Integer.parseInt(month);
		int dd = Integer.parseInt(day);
		
		// 2. 작업
		Calendar cal = Calendar.getInstance(); //날짜 셋팅
		cal.set(yyyy, mm-1, dd);
		
		int dayOfweek = cal.get(Calendar.DAY_OF_WEEK); //1:일요일, 2:월요일 ...
		char yoil = " 일월화수목금토".charAt(dayOfweek); //다시 문자열로 변
		
		// 3. 출력
		System.out.println(year + "년" + month + "월" + day + "일은");
		System.out.println(yoil + "요일입니다");
		
	}

}


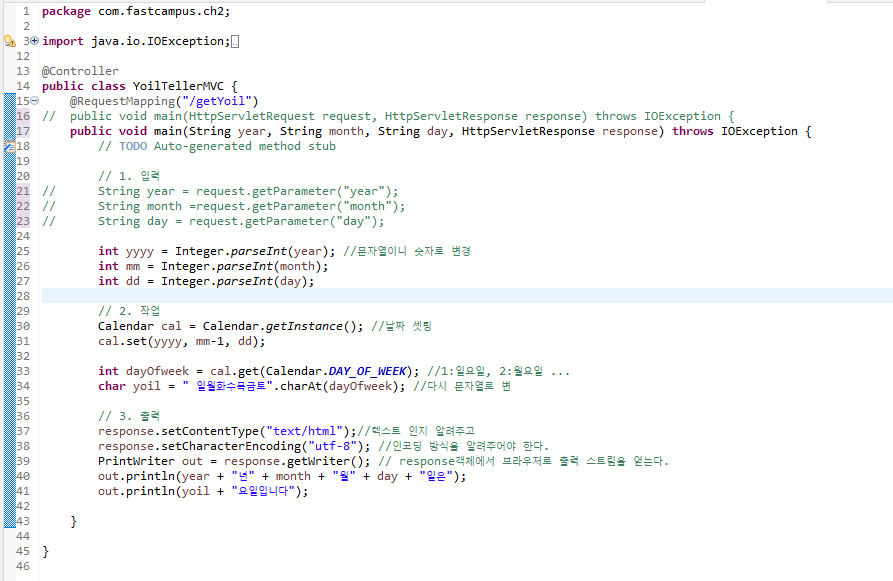
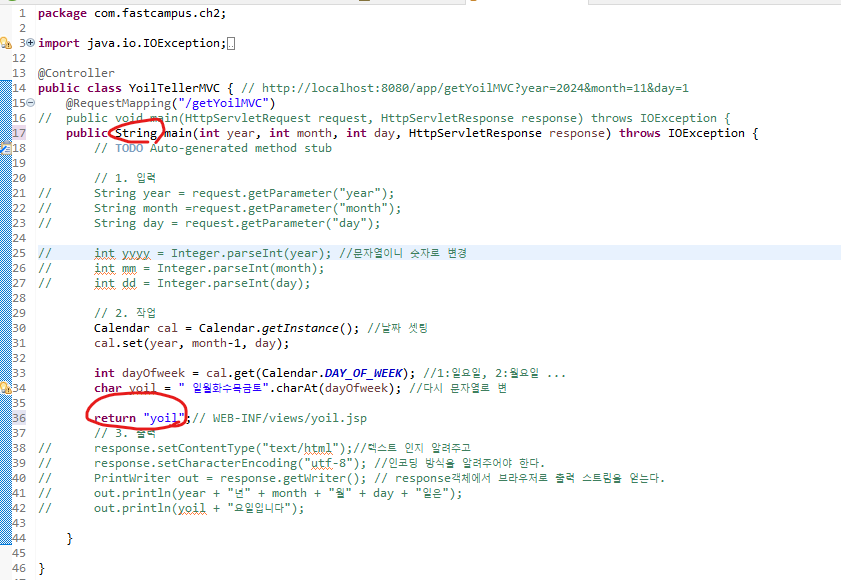
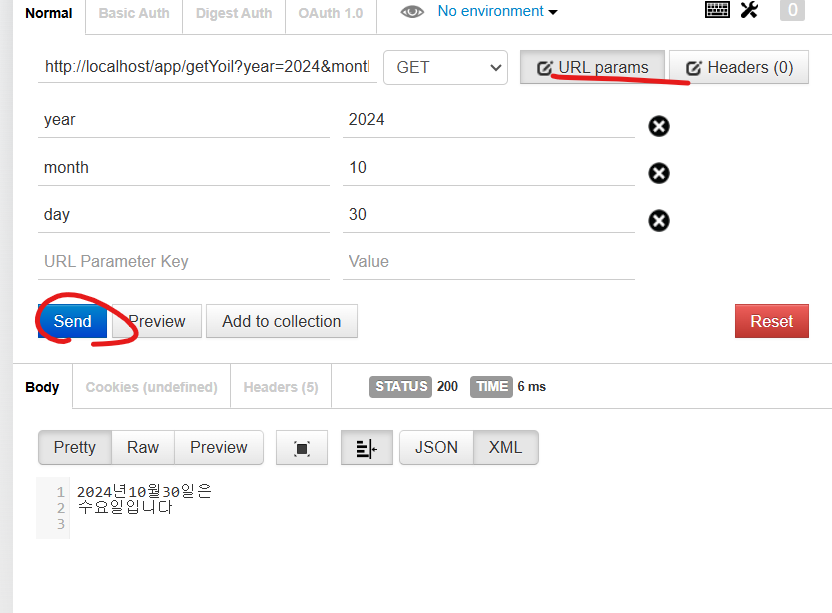
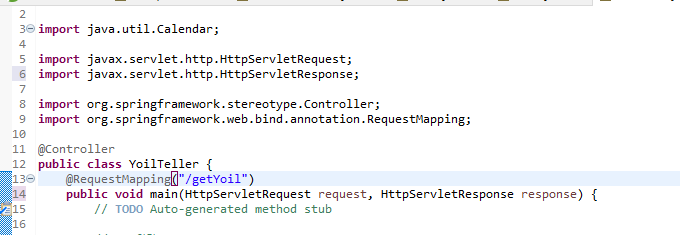
브라우저에 결과 나오기 위해 리스폰스 객체를 매개변수로 추가 해야한다.


또한 println으로 출력된 것을 브라우저로 맞춰서 변환 + 예외처리


package com.fastcampus.ch2;

import java.io.IOException;
import java.io.PrintWriter;
import java.util.Calendar;

import javax.servlet.http.HttpServletRequest;
import javax.servlet.http.HttpServletResponse;

import org.springframework.stereotype.Controller;
import org.springframework.web.bind.annotation.RequestMapping;

@Controller
public class YoilTeller {
	@RequestMapping("/getYoil")
	public void main(HttpServletRequest request, HttpServletResponse response) throws IOException {
		// TODO Auto-generated method stub
		
		// 1. 입력
		String year = request.getParameter("year");
		String month =request.getParameter("month");
		String day = request.getParameter("day");
		
		int yyyy = Integer.parseInt(year); //문자열이니 숫자로 변경
		int mm = Integer.parseInt(month);
		int dd = Integer.parseInt(day);
		
		// 2. 작업
		Calendar cal = Calendar.getInstance(); //날짜 셋팅
		cal.set(yyyy, mm-1, dd);
		
		int dayOfweek = cal.get(Calendar.DAY_OF_WEEK); //1:일요일, 2:월요일 ...
		char yoil = " 일월화수목금토".charAt(dayOfweek); //다시 문자열로 변
		
		// 3. 출력
		response.setContentType("text/html");//텍스트 인지 알려주고
		response.setCharacterEncoding("utf-8"); //인코딩 방식을 알려주어야 한다.
		PrintWriter out = response.getWriter(); // response객체에서 브라우저로 출력 스트림을 얻는다.
		out.println(year + "년" + month + "월" + day + "일은");
		out.println(yoil + "요일입니다");
		
	}

}


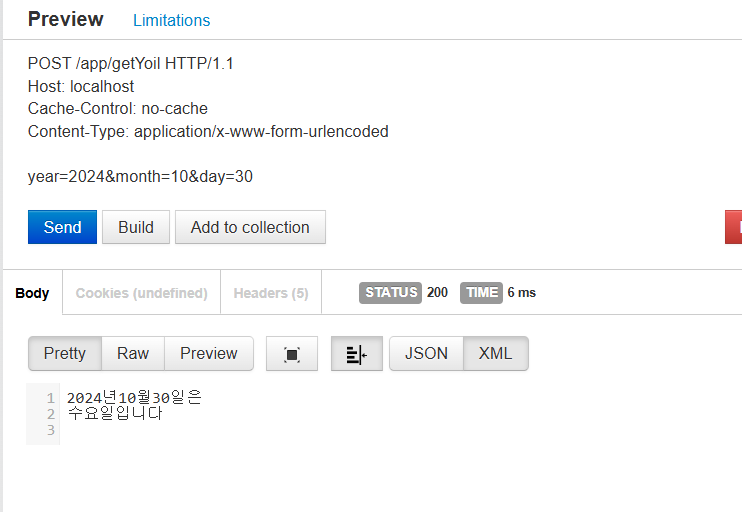
utf-8로 인코딩 방식을 알려줌으로서 한글 깨짐 방지


다시 url 에 입력

같은 컴퓨터 안에 브라우저와 톰캣을 띄어봤으니

이제 본격적으로 AWS에 올려 볼 것이다.


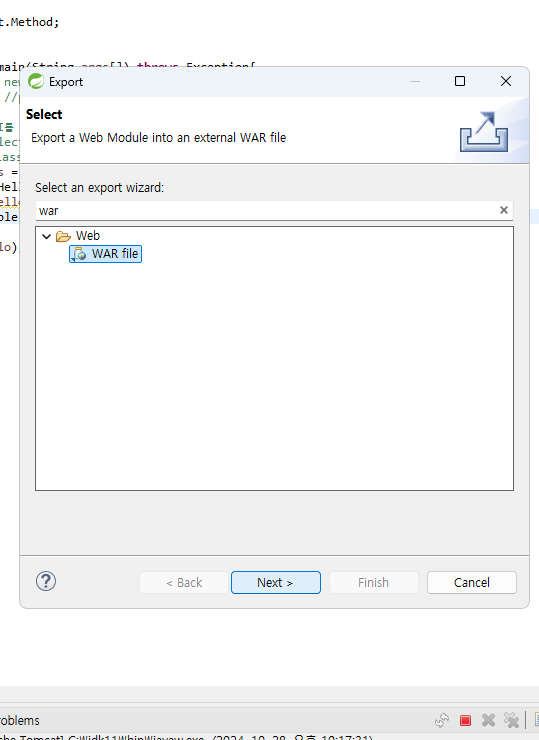
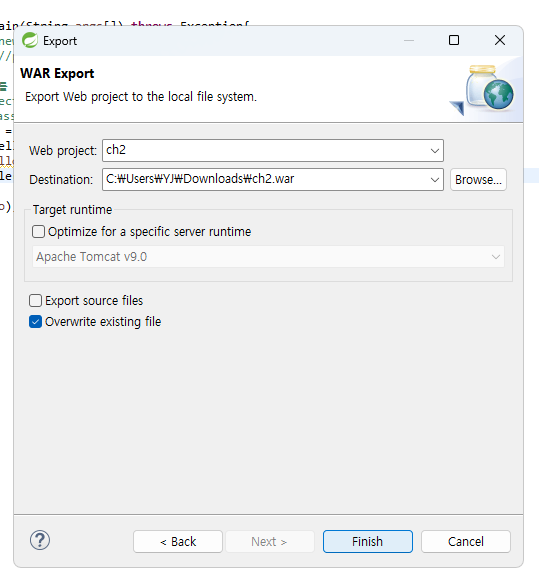
그러기 위핸 우리가 만든 프로젝트를 export해야 한다.


war파일 선택 후


프로젝트이름과 경로를 저장하는데 이때 중요한 것은

확장자를 .war로 해야 한다.

압축파일로 만들어질 수도 있고 war자체로 만들어질 수 있는데 상관 없다.


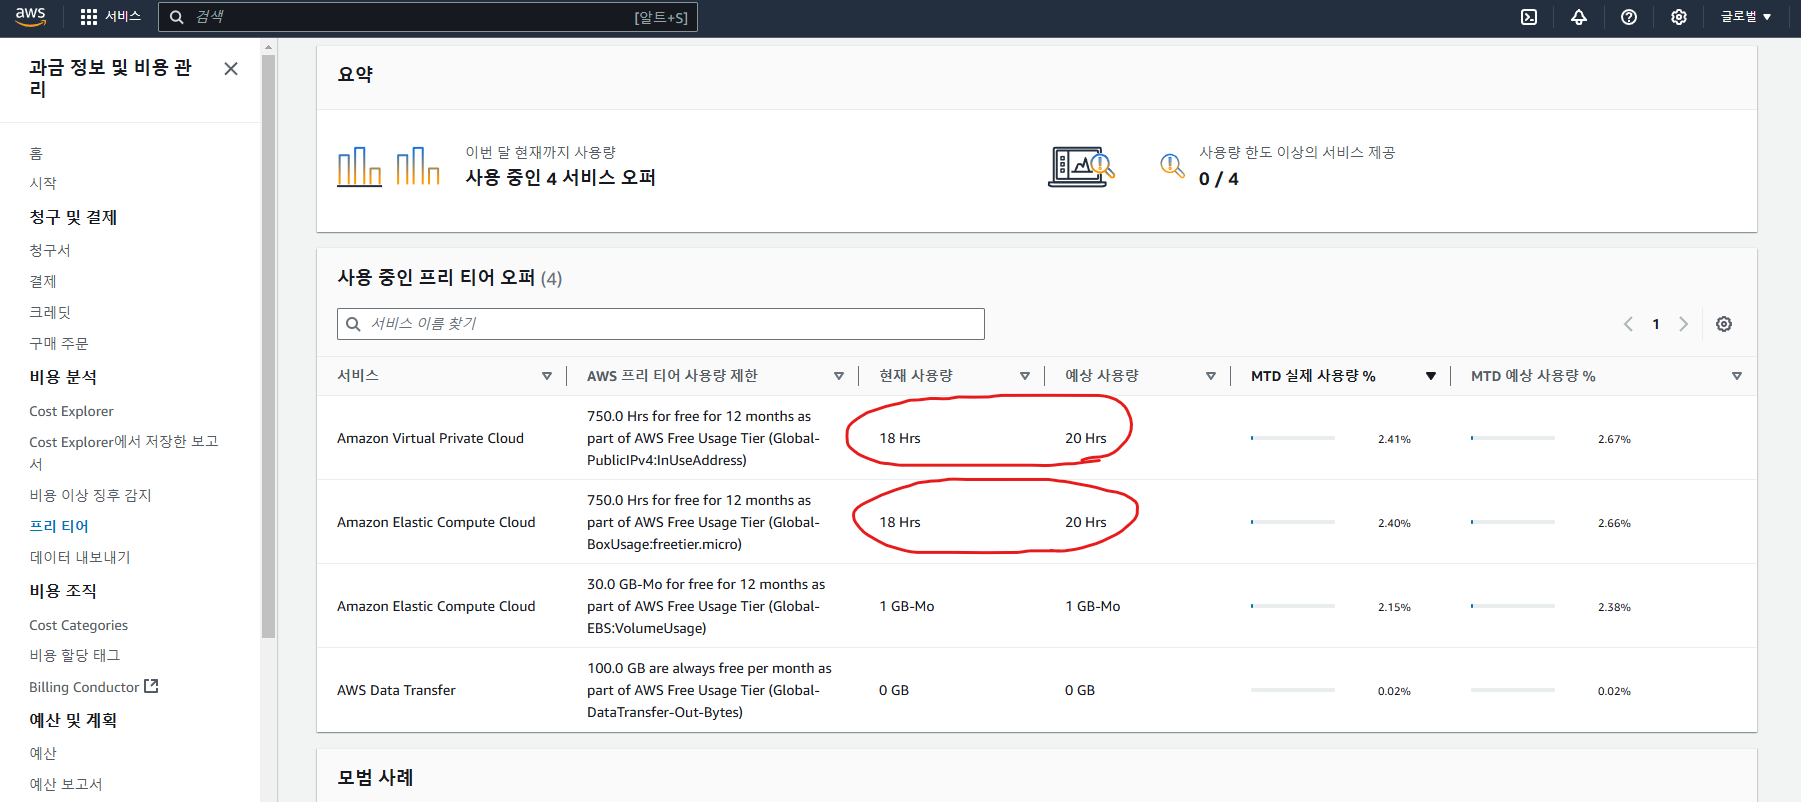
aws에 들어가서 프리티어 서비스 사용량을 확인 할 수 있다.

오른쪽 상단에 본인 아이디 클릭 후 - 계정 - 프리티

인스턴스가 실행중이라면 사용하지 않을 경우 중지를 하자


원격을 다시 시작하려니 갑자기 만들었던 인스턴스가 보이지 않았다.

알고보니 지역선택이 바뀌어져 있으니 원래 지정했던 것으로 돌려놓으니 해결된다.


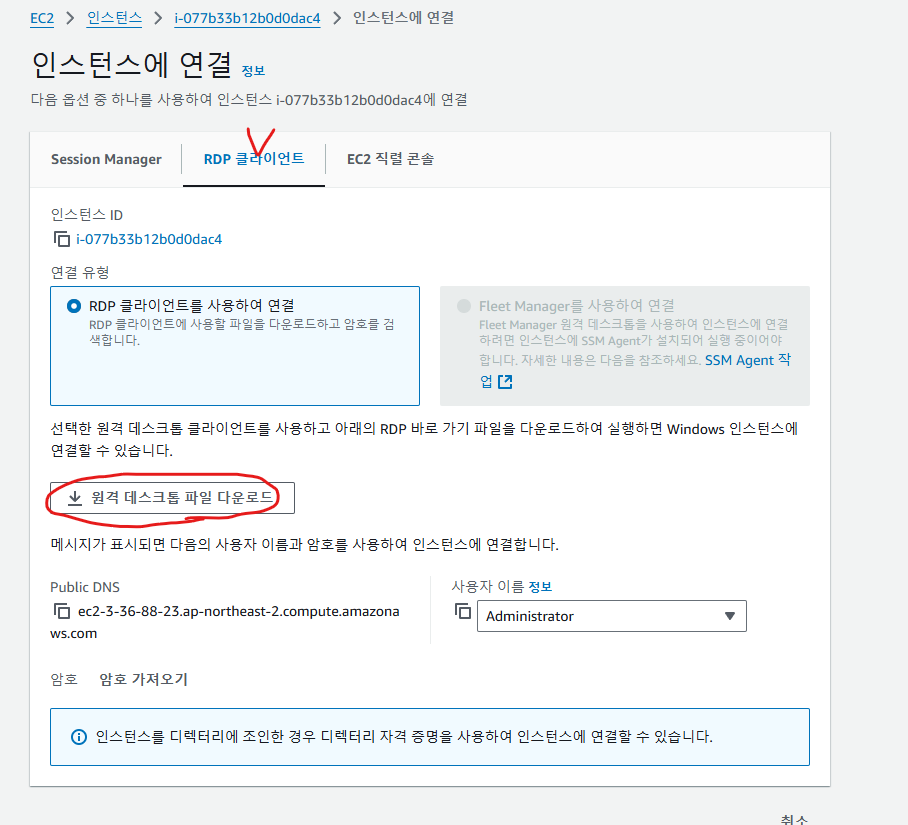
연결


중지했다 시작하면 ip가 바뀌므로 원격 데스크톱 다운로드를 다시 해주어야 한다.


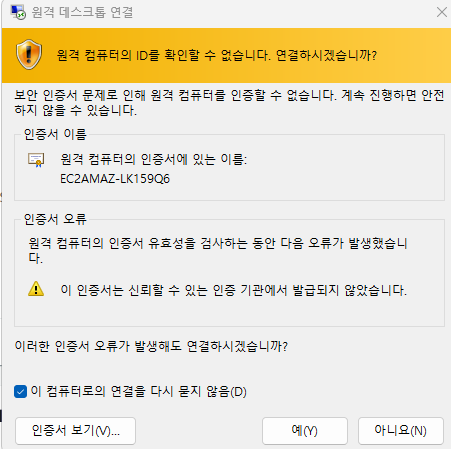
기존의 만들었던 key를 가져오고 해독한 후 복붙


아까 만들었던 ch2.war 파일을 apache-tomcat - webapps에 복붙하면 자동으로 압축이 풀린다.


createshortcut 후 바탕화면으로 이동


실행을 하면 압축이 풀리면서 ch2 폴더가 만들어진다.


이제 로컬에서 원격 aws서버를 접속할 것인데

IPv4 퍼블릭 ip를 복사


로컬PC에서 localhost 대신 복사한 IPv4를 붙여 넣으면 이렇게 나오는데 


IPv4 + :8080/ch2/hello 하니 접속이 된 것을 확인할 수 있다.


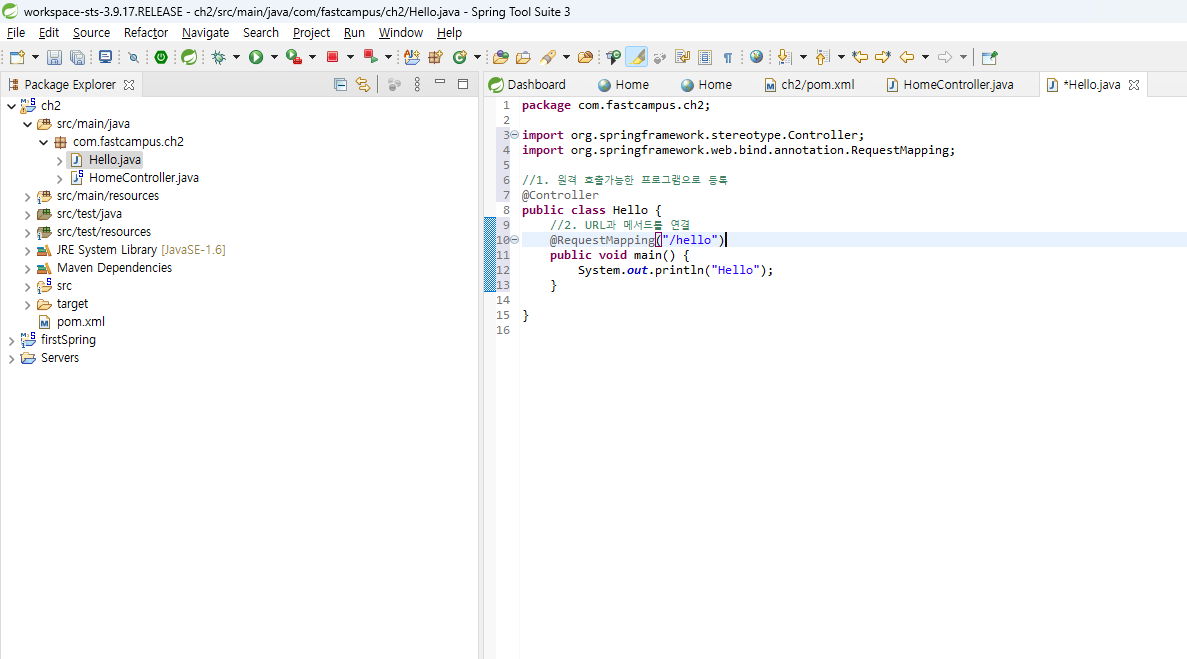
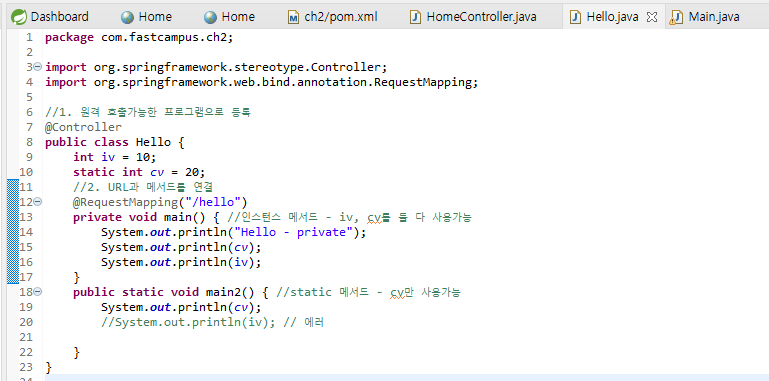
클래스를 새로 만들었다.


원격 호출가능하도록 @Controller와

URL과 메서드를 연결가능하도록 @RequestMapping을 만들었고 /hello로 지정하였다.


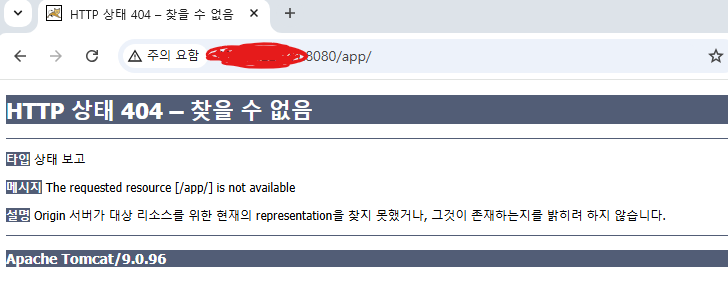
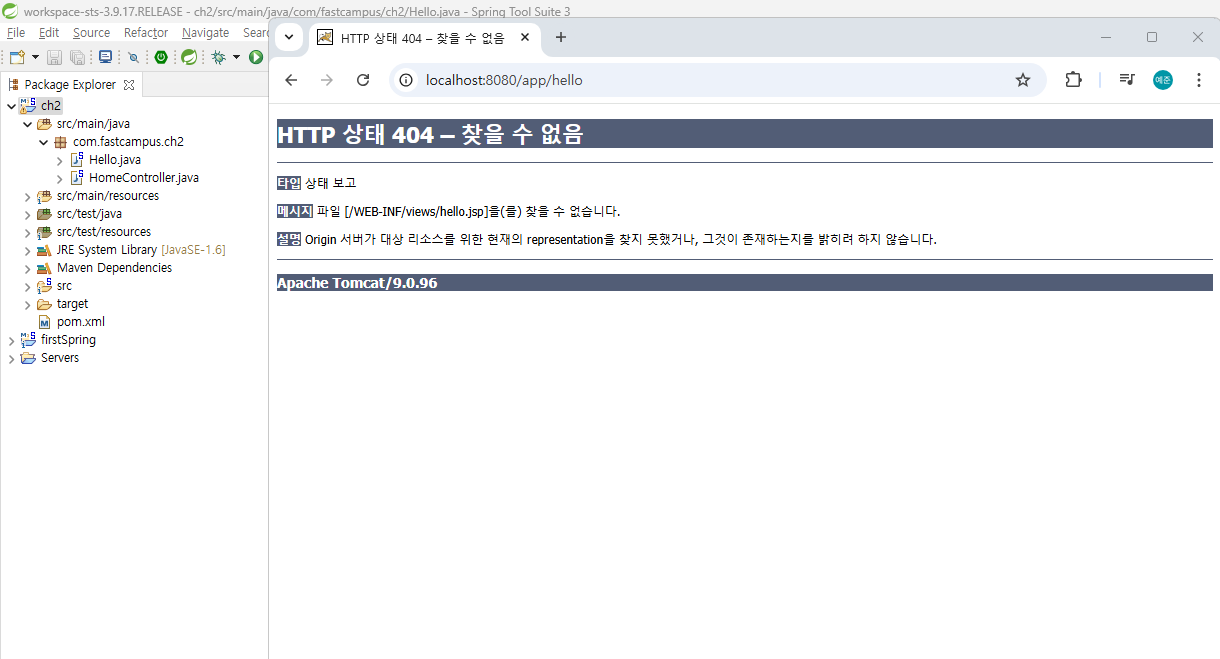
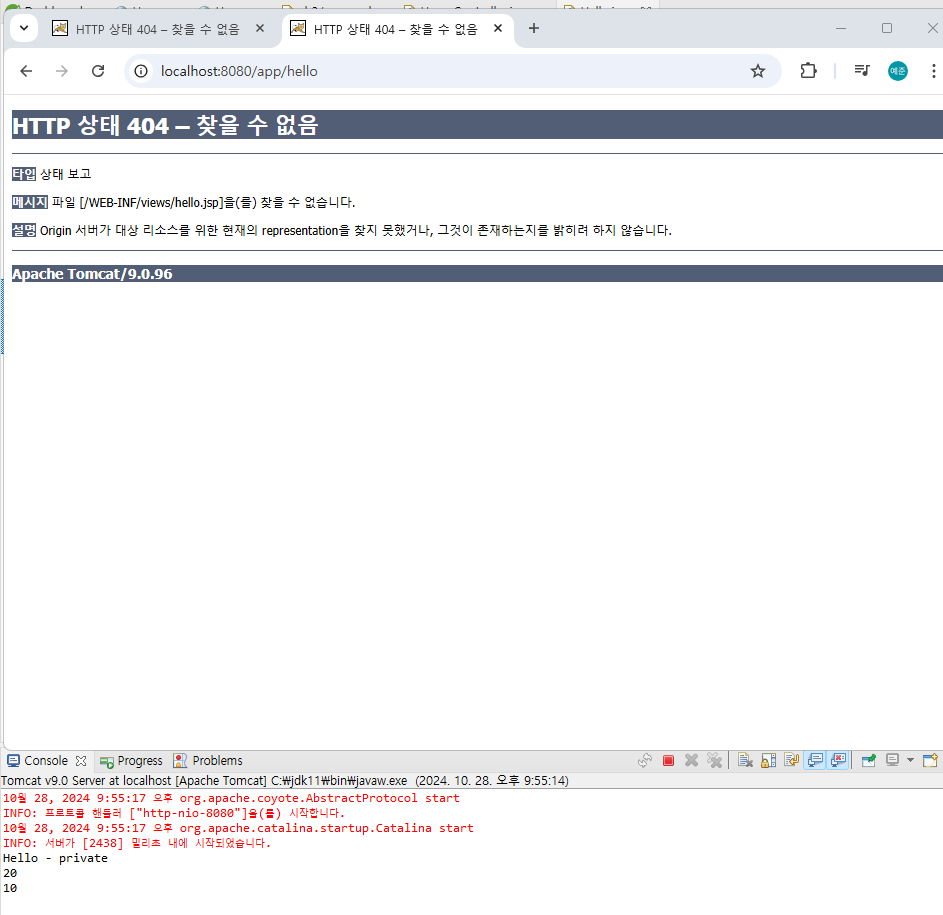
서버를 실행 시켜보니 보기와 같이 404 Not Found가 나와서 에러인가?


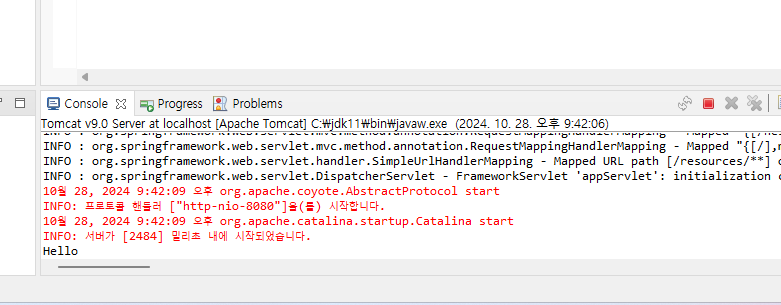
하지만 Console창을 확인해보니 Hello가 출력됨을 알 수 있었다.

즉, 호출이 잘 된 것이고 새로고침을 해보면 Hello가 한번 더 출력된다.


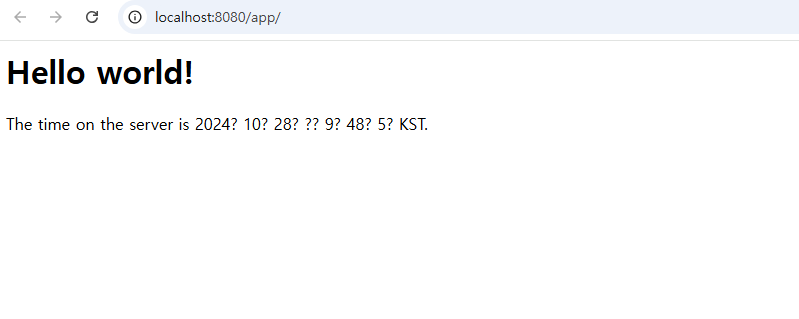
url의 /hello를 지우니 원래처럼 잘 호출한다.


코드를 아래와 같이 수정해보았다.


출력 결과

url에 /hello를 추가하여 main2는 호출되지 않았는데

main2를 호출하고 싶으면 매핑을 추가하면 된다.

main이 static이 아니라서 static변수와 인스턴스 변수를 모두 사용할 수 있기에 권장된다.


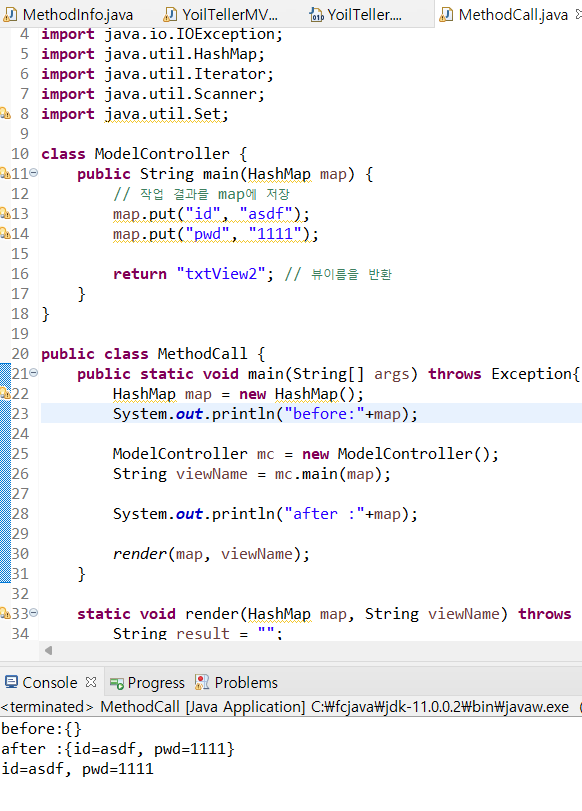
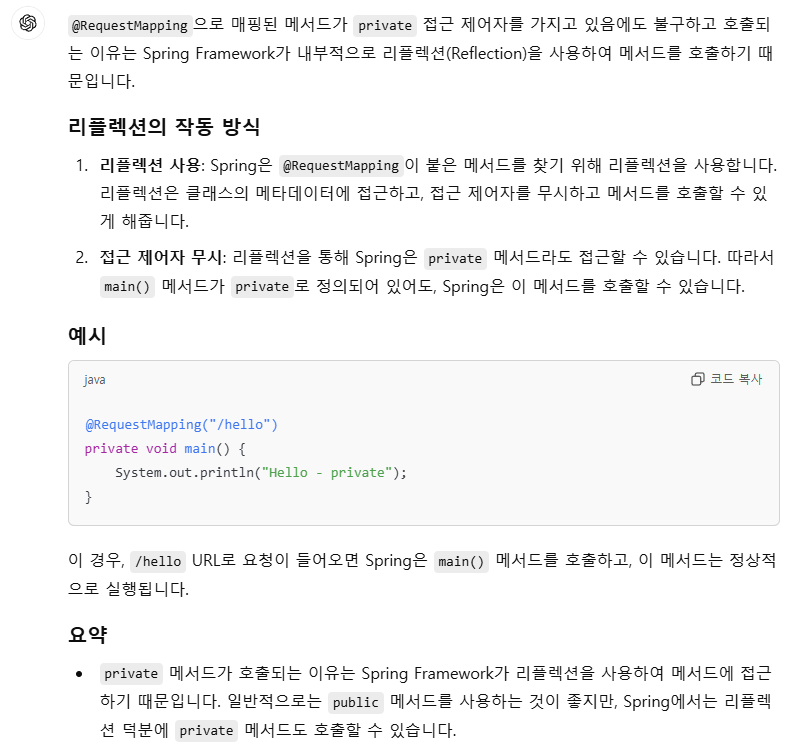
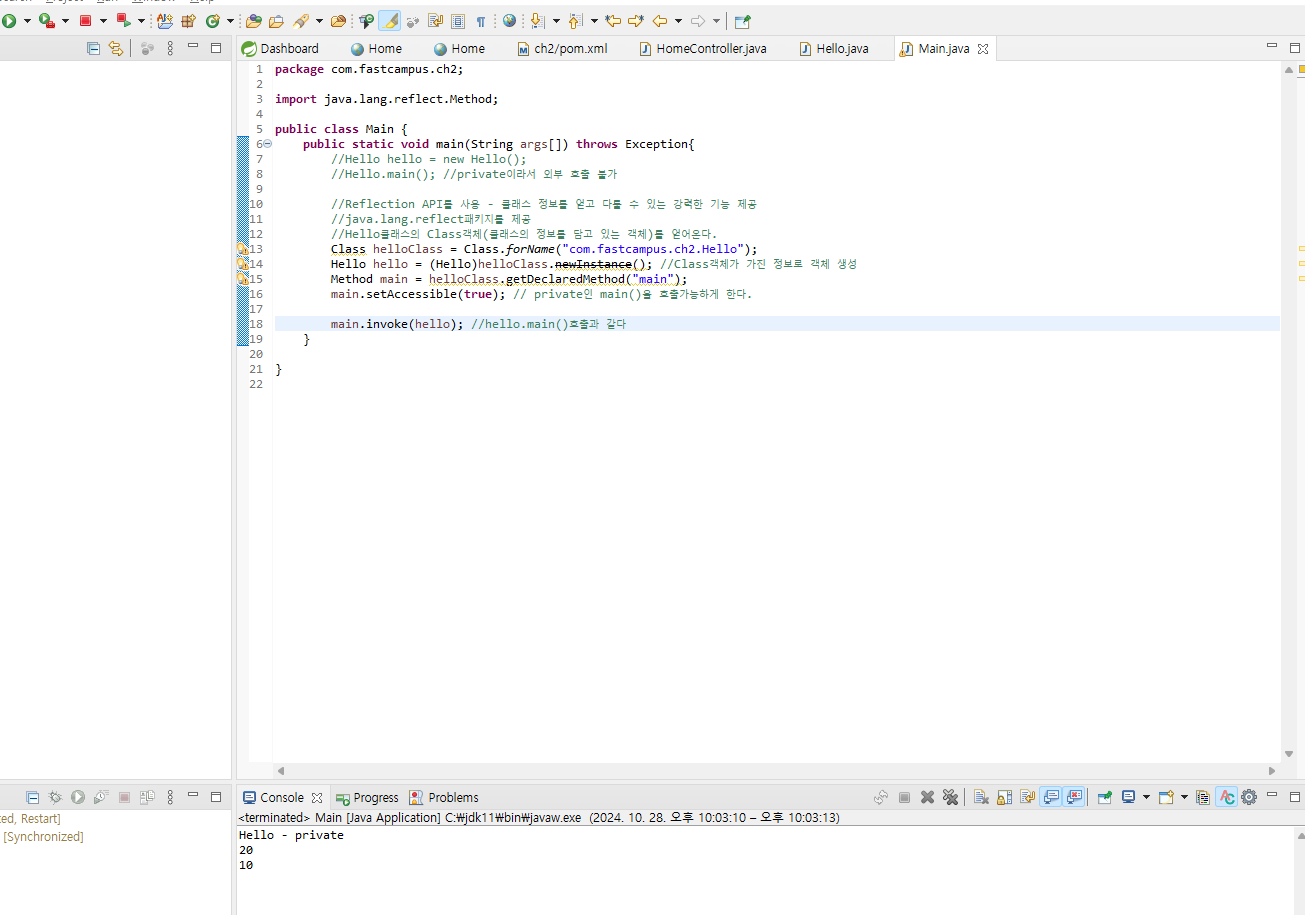
그런데 private은 접근제한자 중에 숨기는 것인데 어떻게 호출이 될 수 있을가? 


chatgpt


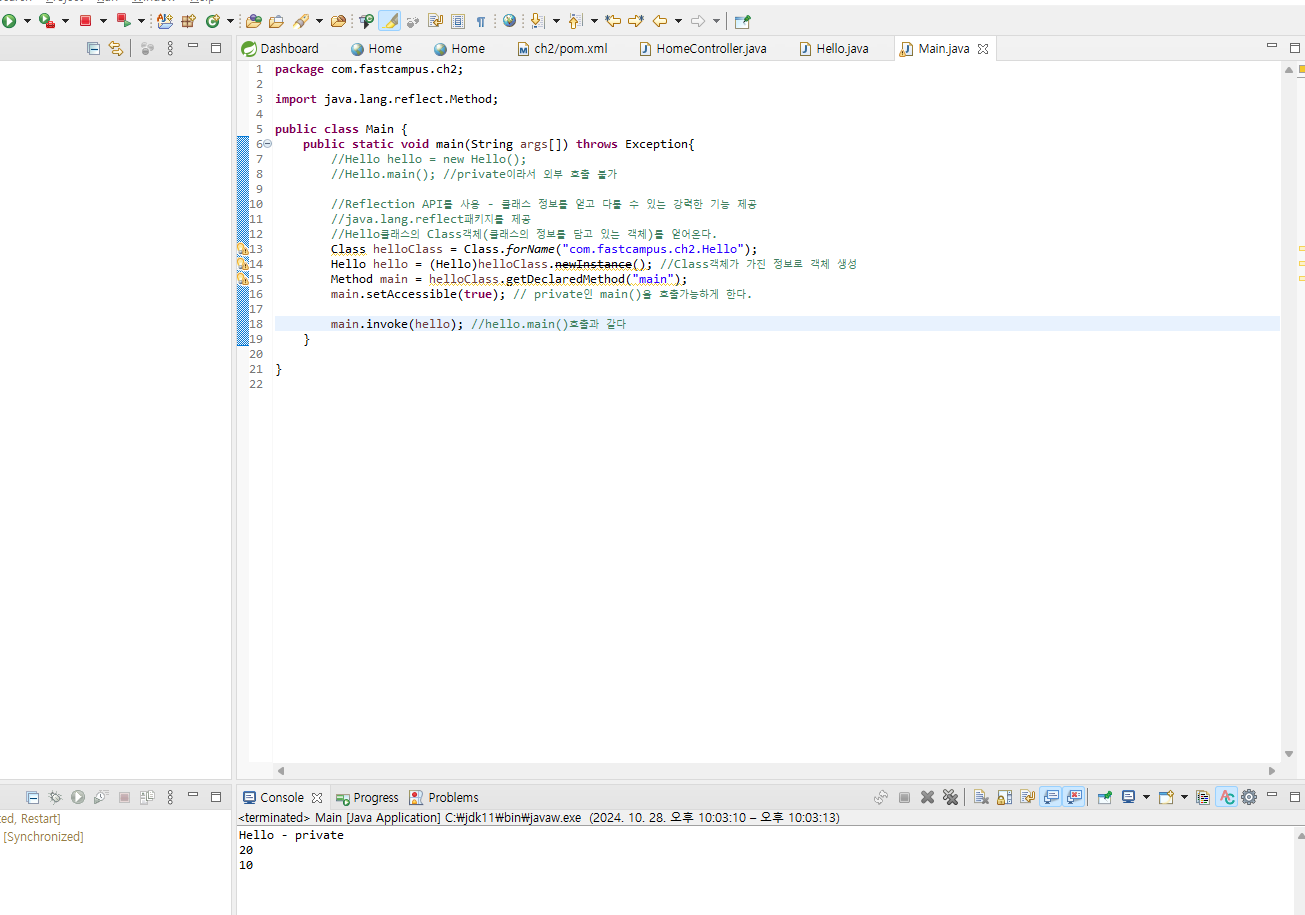
다른 클래스에서 private에 접근하는 것은 원래는 불가능하나

다음과 같이 java에서 제공하는 reflect API를 활용하면 접근이 가능하다.


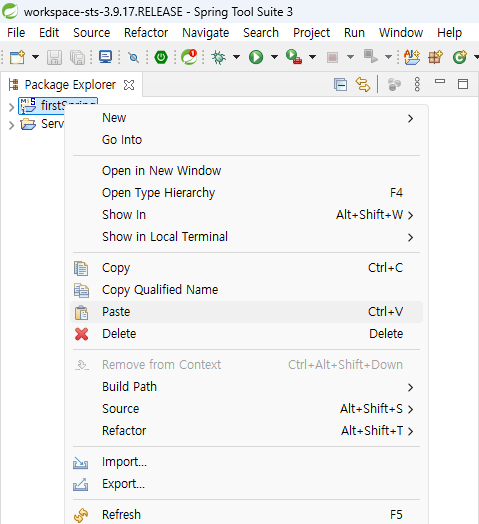
MVC project를 로컬에서 만들수 없기에


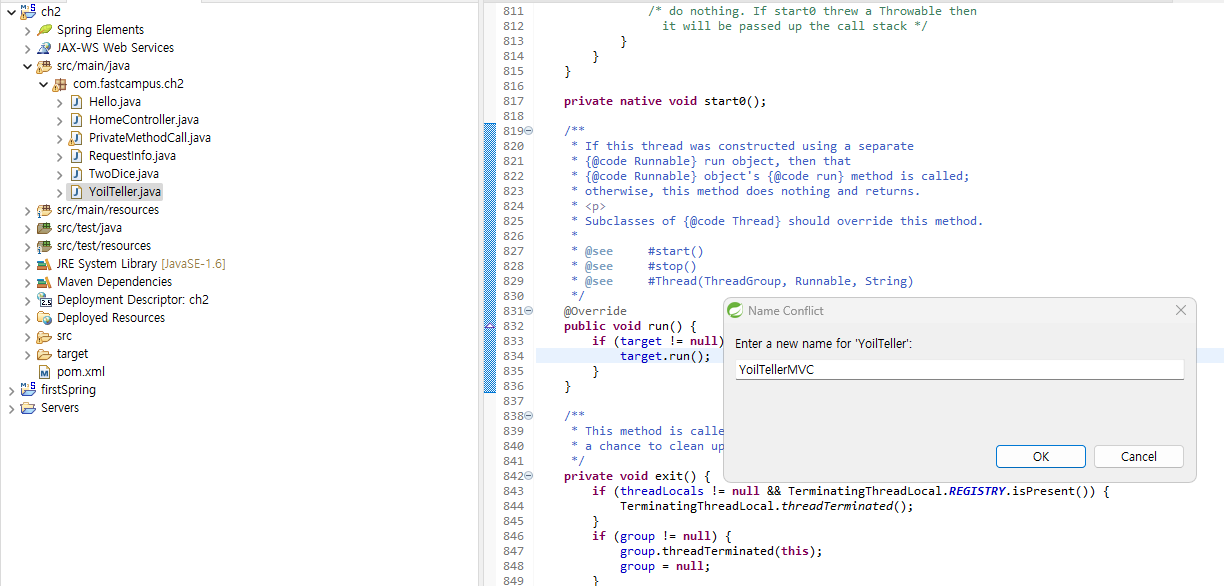
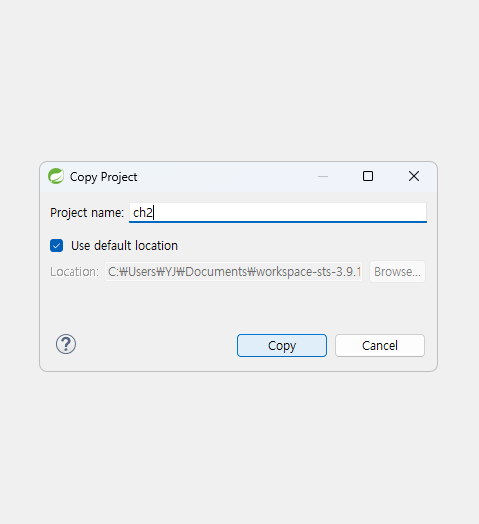
기존의 firstSpring 폴더를 복사 +붙여넣기해서 새로 만들었다.


그리고 나서 붙여 넣기할때 프로젝트 이름을 변경하여 생성했다.


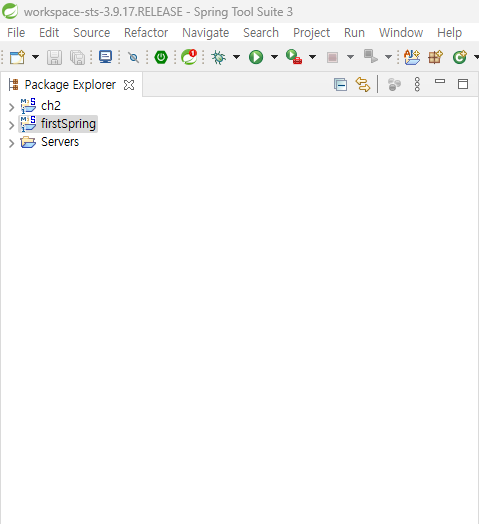
잘 만들어진 모습


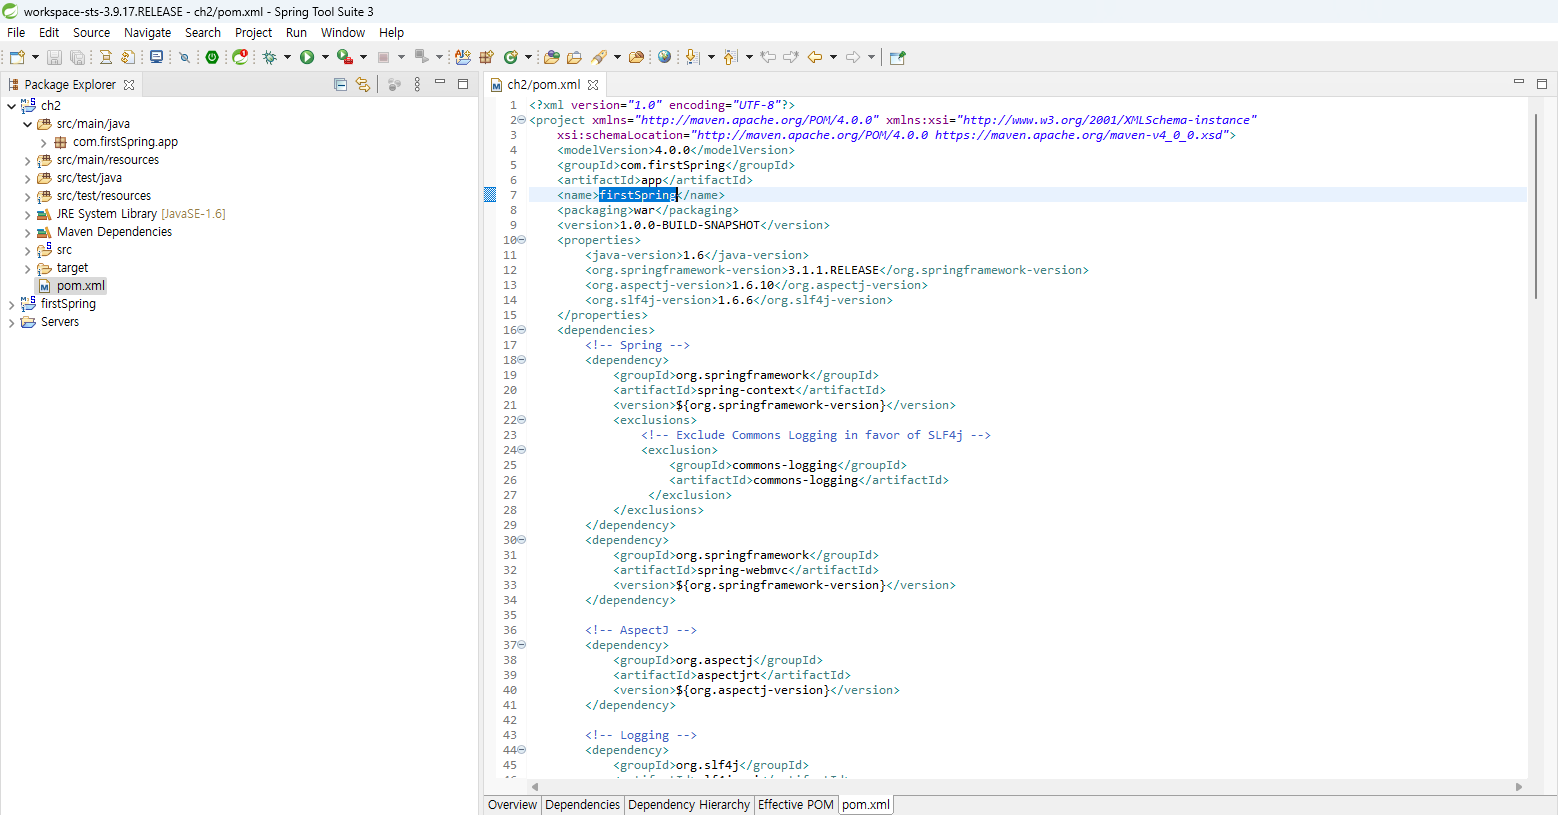
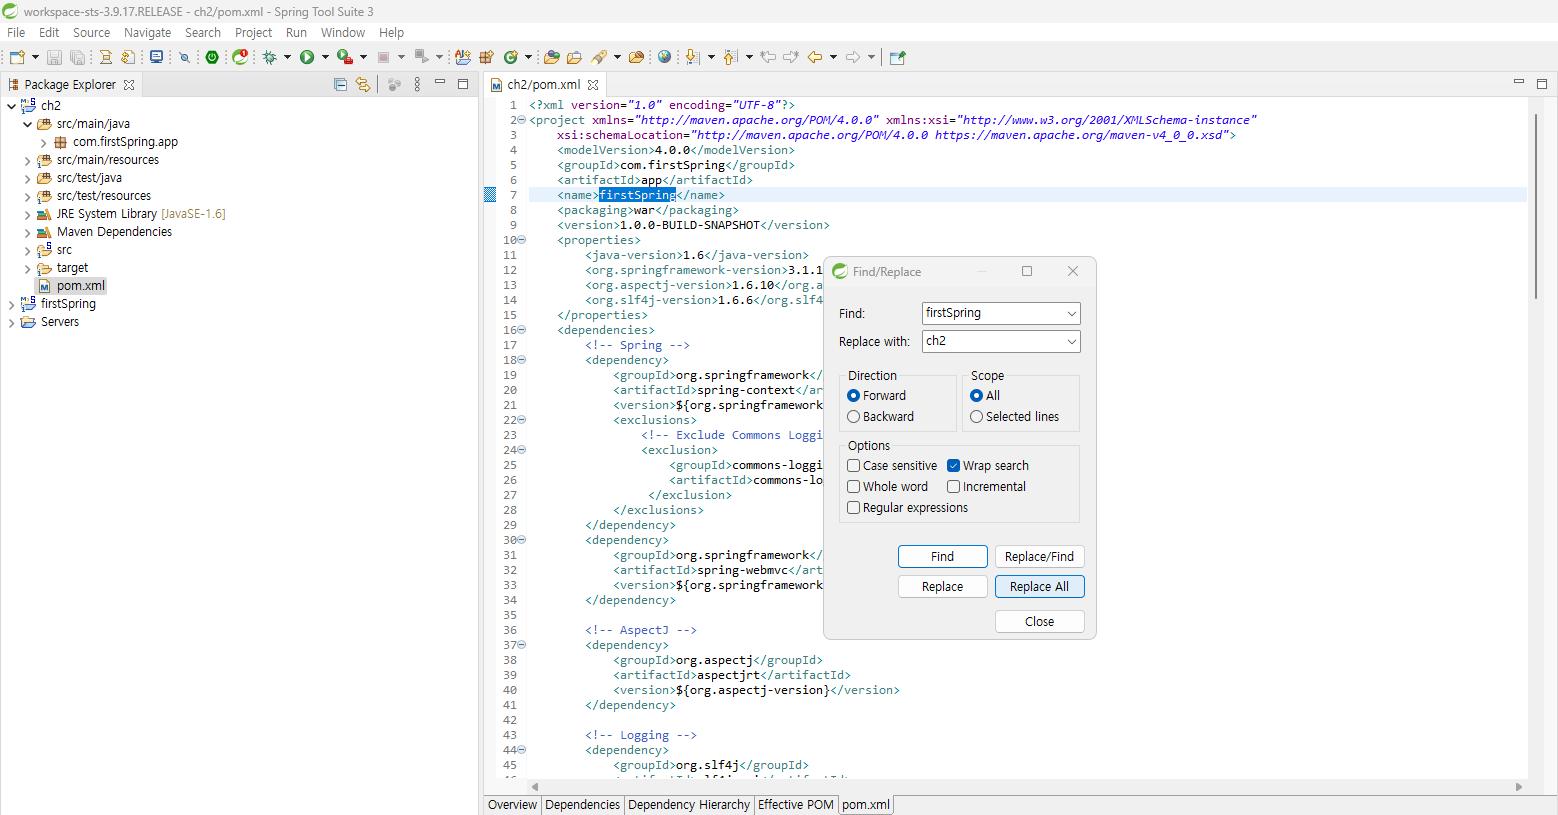
새로 만들어진 ch2폴더의 pom.xml에 들어가서


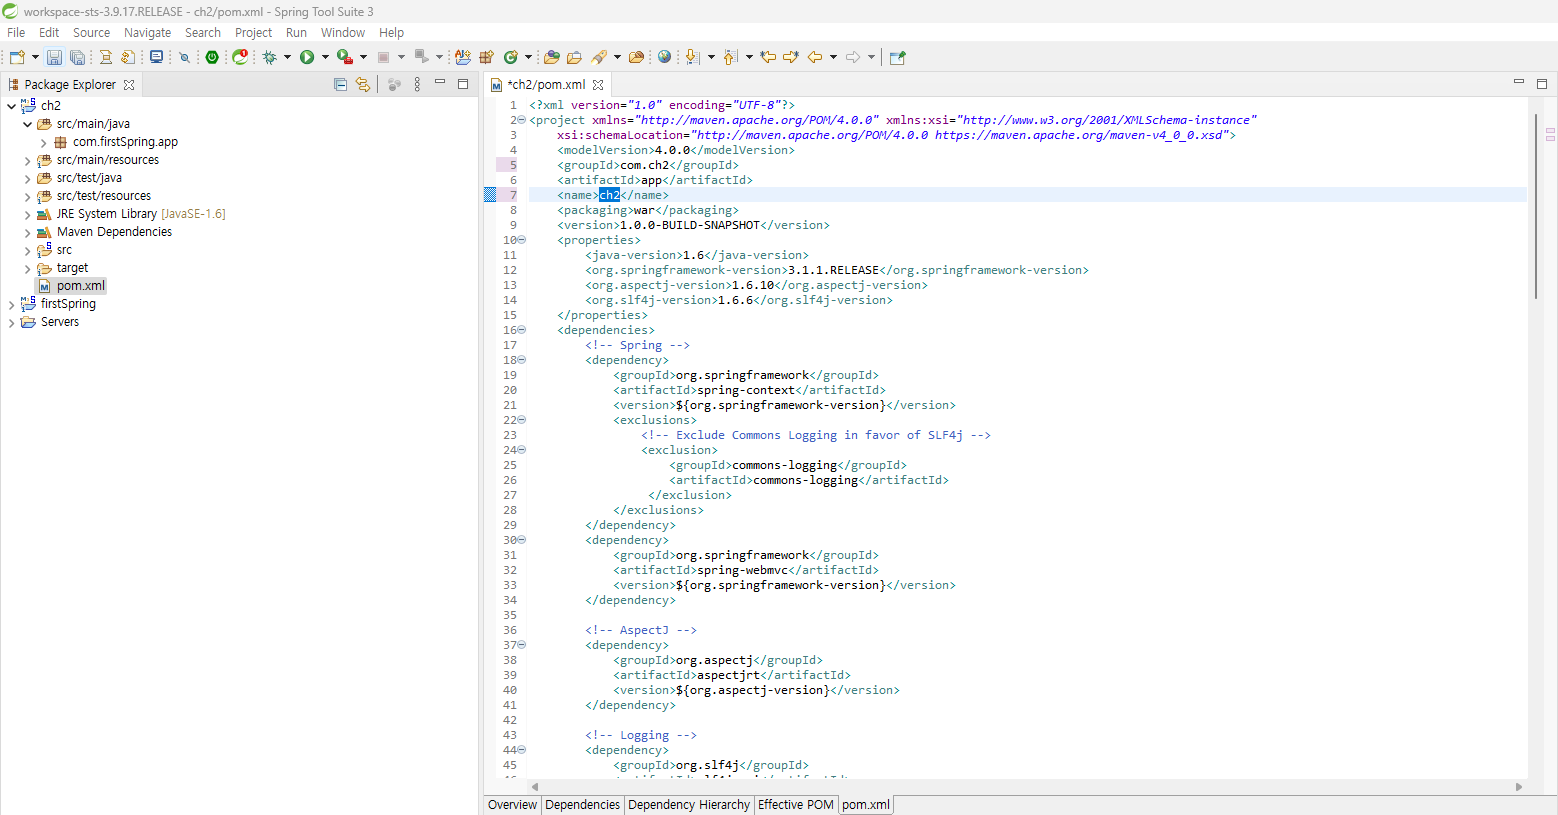
firstSpring의 이름을 모두 찾아서 ch2로 replace 하였다.


하지만 다시 서버를 실행시켜보면 ch2가 아닌 firstSpring이 동작함을 알 수 있다.


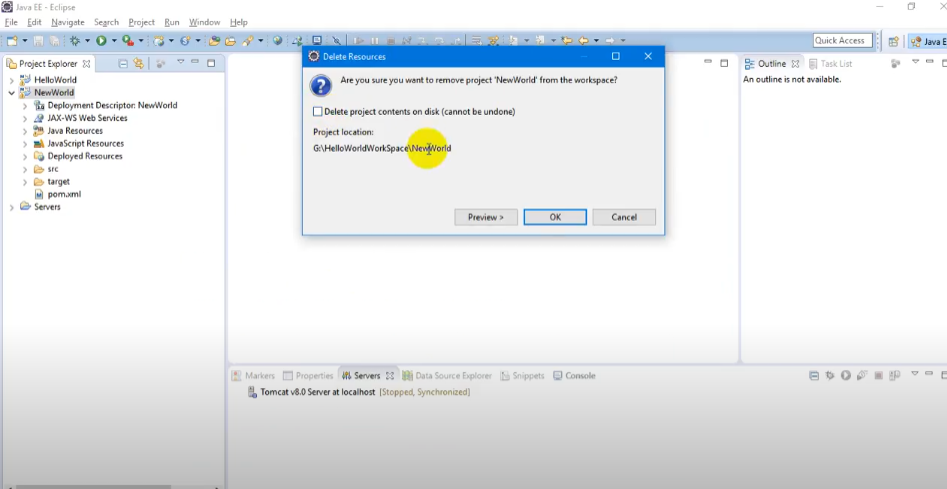
이를 해결하기 위한 방법으로는 우선 패키지뷰에서 폴더를 삭제하는 데

중요한건 저 체크표시를 하면 안된다. (그러면 전부 사라지는 것? 같다)

출처 :https://www.youtube.com/watch?v=DRJojJvWuFo


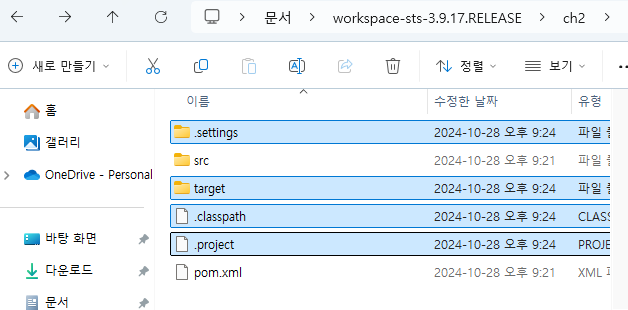
그리고 원래 폴더가 저정되었던

생성된 경로에 들어가서 src와 pom.xml을 제외하고 모두 삭제


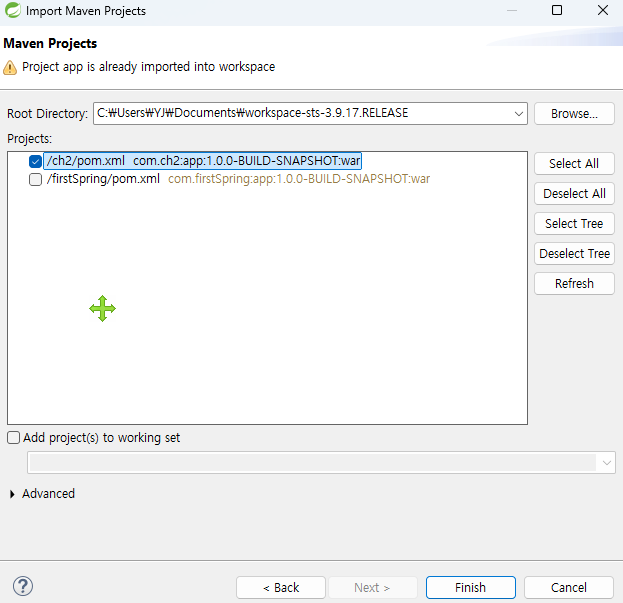
그리고 STS에 들어가서 import - Maven - Existing Maven Projects에서 Browse로 폴더를 찾아주고

import할 것만 클릭해서 가져온다.


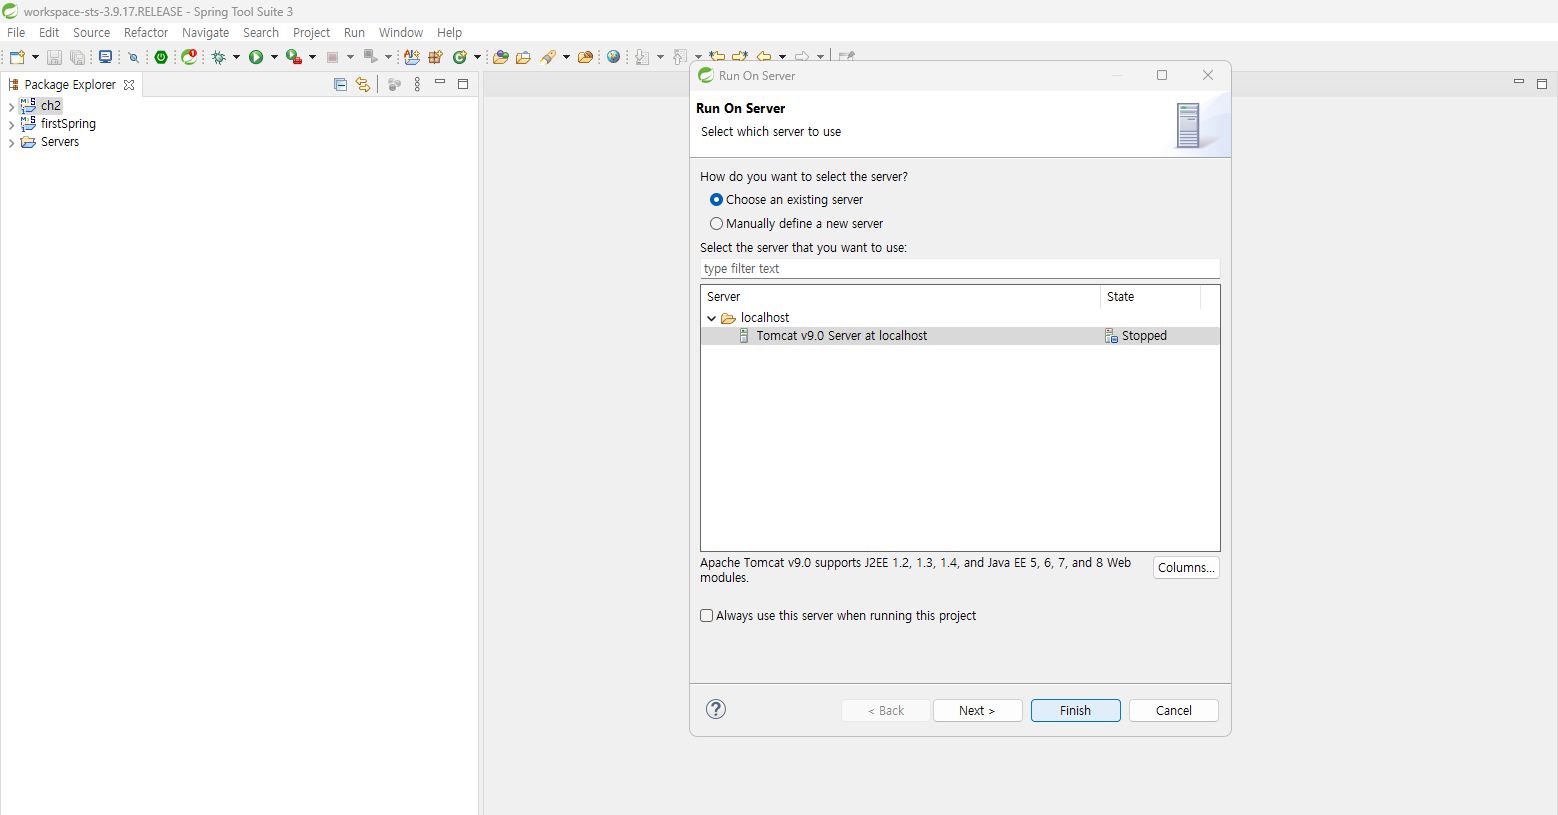
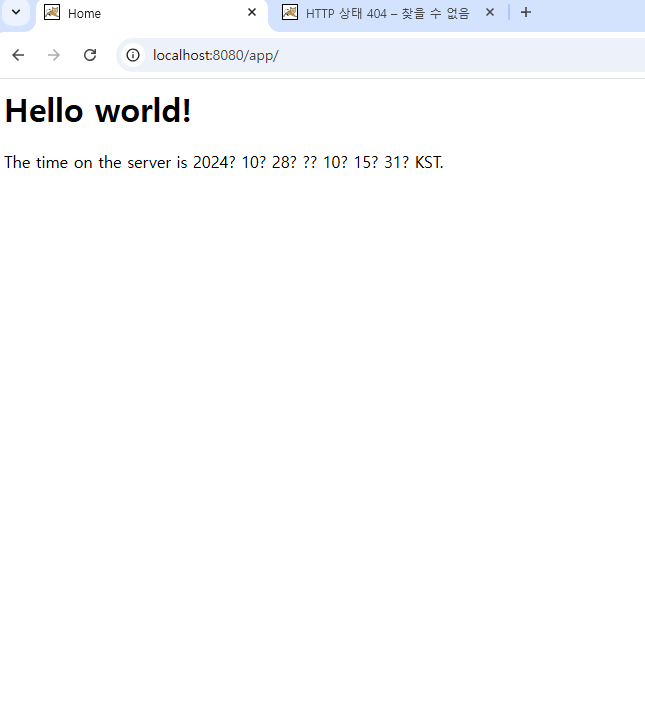
그리고 서버를 다시 실행하면

실행도 잘 되고 기존의 firstSpring으로 시작 되었던 것이 ch2로 실행하게 된다.


만약에 마지막 과정에서 에러가 날 경우

서버가 한번에 동시에 두개를 실행하려 한 것일 수 있으니

서버를 중지했다가 다시키면서 ch2를 선택하자

https://aws.amazon.com/ko/free/?all-free-tier.sort-by=item.additionalFields.SortRank&all-free-tier.sort-order=asc&awsf.Free%20Tier%20Types=*all&awsf.Free%20Tier%20Categories=*all


무료 클라우드 컴퓨팅 서비스 - AWS 프리 티어

이러한 프리 티어 혜택은 AWS 신규 고객에게만 제공되며 AWS 가입일로부터 12개월 동안 유효합니다. 12개월의 무료 사용 기간이 만료되거나 애플리케이션 사용량이 프리 티어 범위를 초과할 경우

aws.amazon.com


쭉 가입을 하다 보면 이 화면이 나온다.

AWS Management Console로 이동 클릭


검색에 ec2검색 후 클릭


오하이오를 아시아 태평양(서울)로 변경


인스턴스 시작 클릭


본인이 원하는 이름으로 키 이름 지정후 인스턴스 시작


인스턴스 시작이란? 가상 컴퓨터를 새로 만드는 것


상태 검사를 하는 데 시간이 조금 걸리므로 기다렸다가 새로고침을 누르고

저렇게 상태 검사가 확인되면 연결 버튼을 누른다.


그 후 생성된 암호 복사 후 붙여넣기


가상 컴퓨터가 만들어짐을 확인 할 수 있다.


브라우저를 열고 깃허브로 들어간다.


그 후 나오는 팝업은 open -> close

https://github.com/castello/spring_basic


GitHub - castello/spring_basic: 남궁성의 스프링 기본 강의 @fastcampus.co.kr

남궁성의 스프링 기본 강의 @fastcampus.co.kr. Contribute to castello/spring_basic development by creating an account on GitHub.

github.com


이제 JDK랑 Tomcat을 설치 할 것이다.

보안때문에 설치가 안될 것인데


톱니바퀴 클릭후 Internet Options 클릭 -> Security -> Custom level -> File download(enabel) -> ok


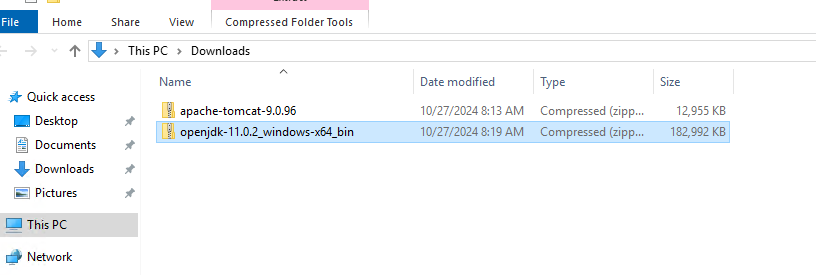
이제 OpenJDK, Tomcat 이 설치 가능하다.


https://jdk.java.net/archive/


Archived OpenJDK GA Releases

Archived OpenJDK General-Availability Releases This page is an archive of previously released builds of the JDK licensed under the GNU General Public License, version 2, with Classpath Exception. WARNING: These older versions of the JDK are provided to he

jdk.java.net


https://tomcat.apache.org/download-90.cgi


Apache Tomcat® - Apache Tomcat 9 Software Downloads

Welcome to the Apache Tomcat® 9.x software download page. This page provides download links for obtaining the latest version of Tomcat 9.0.x software, as well as links to the archives of older releases. Unsure which version you need? Specification version

tomcat.apache.org


톰캣 다운로드 들어가서 zip 클릭 후 save


설치가 잘 됬음을 확인


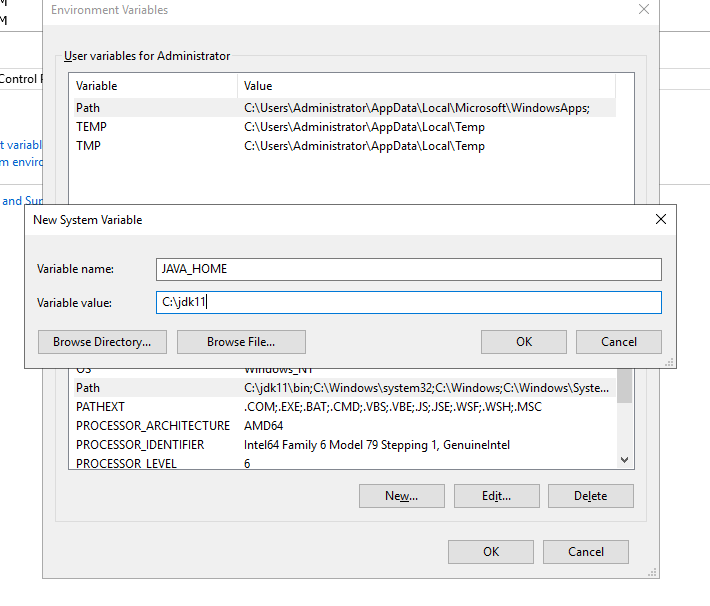
파일 이름을 jdk-11.0.2 -> jdk11로 변경


bin 경로 복사


control panel 검색 후 이동 (제어판)


아까 복사한 jdk의 bin 폴더의 경로를 복사 후 넣어준다.

이번에는 bin을 빼고 넣어준다.


이러면 환경변수 설정 끝

설정이 잘 되었는지 확인한다.

cmd로 들어간후 javac -version


톰캣도 jdk와 같이 c드라이브로 옮겨주면 자동으로 압축이 풀린다.

톰캣의 bin의 startup클릭

톰캣이 실행된다.


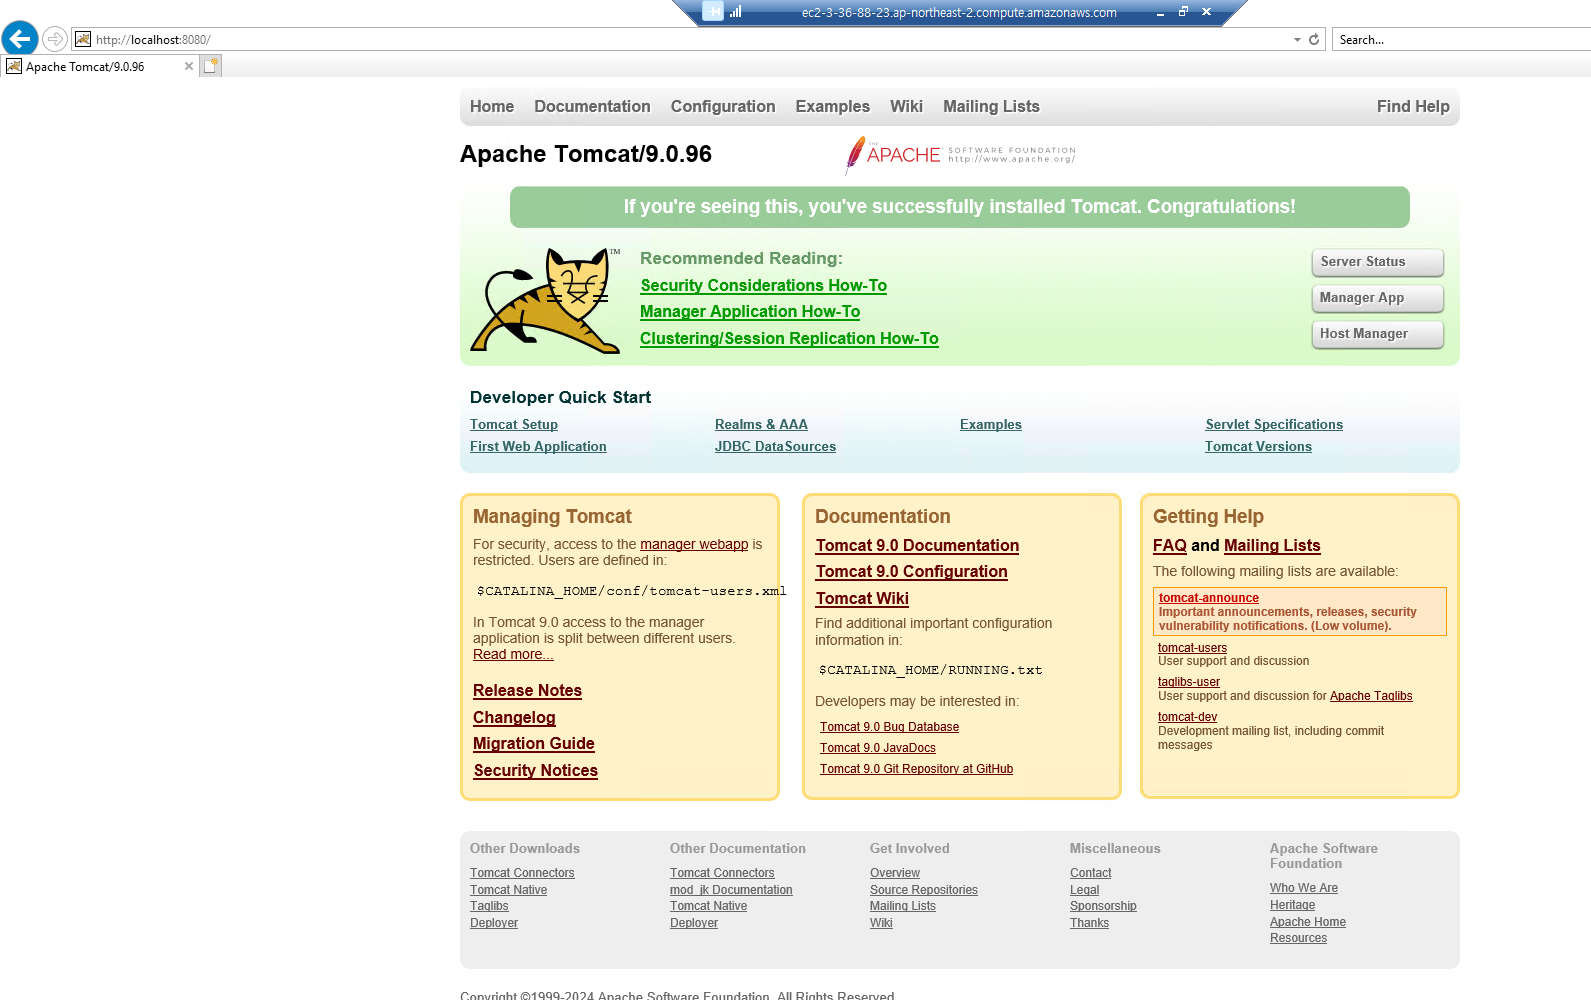
톰캣도 잘 실행이 되었는지 확인하기 위해 브라우저를 열고

http://localhost:8080 입력 후

톰캣이 잘 열리는 지 확인


이제 가상 컴퓨터에 직접 접속하기 위해 방화벽설정에서

내부로 들어오는 것을 열어주어야 한다.

Inbounded Rules -> New Rule


AWS에서도 방화벽을 열어주어야 한다.


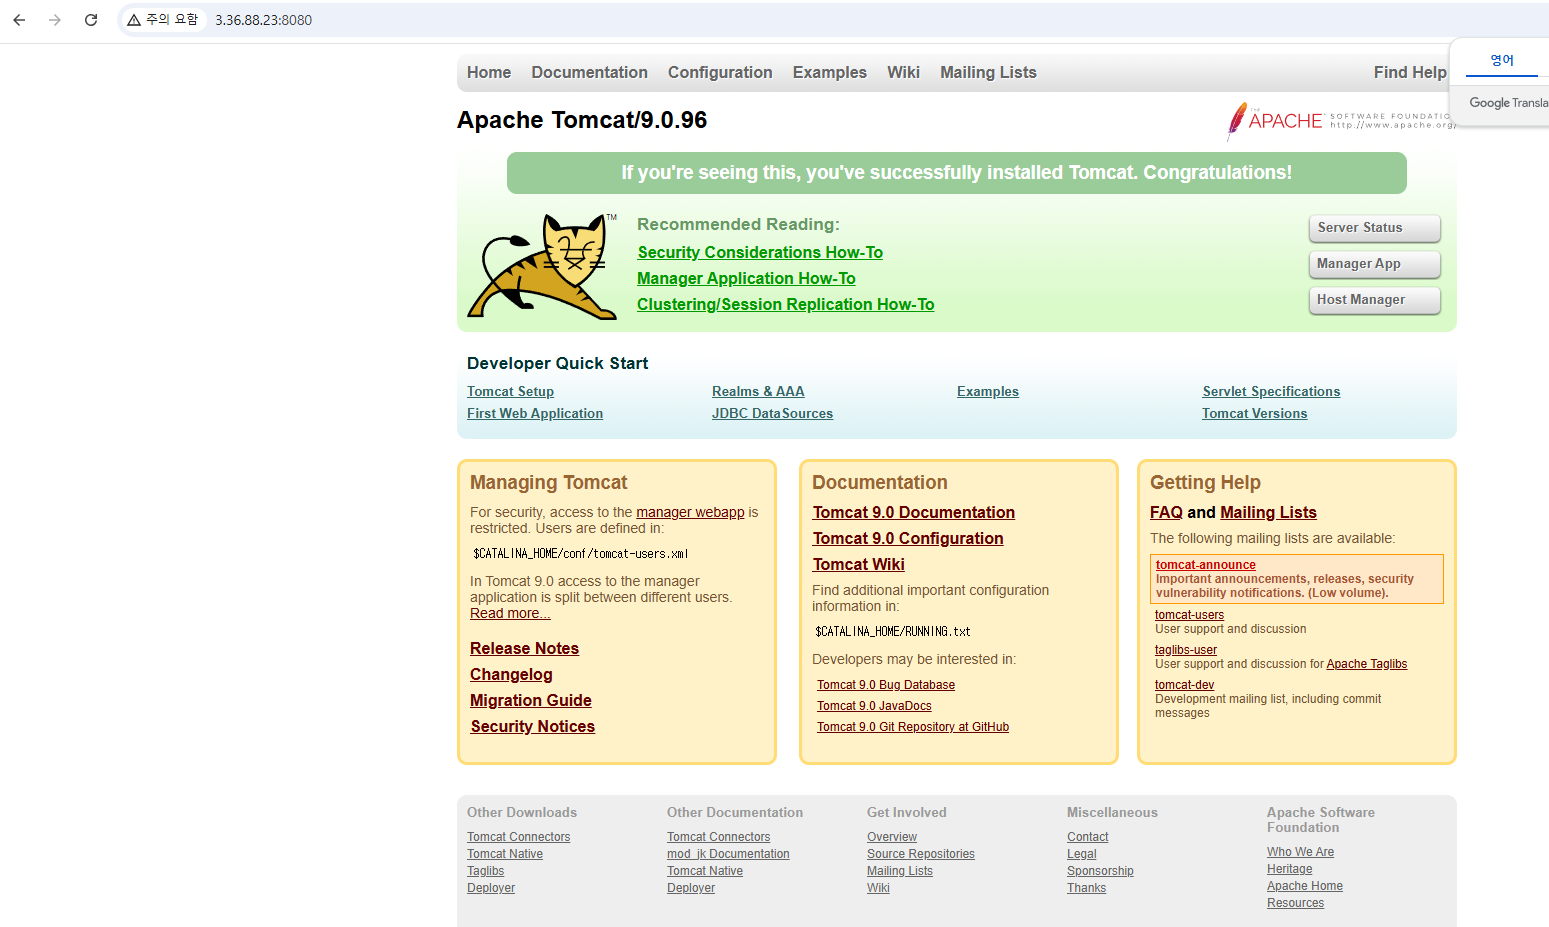
이제 마지막으로 내 pc에서 가상pc의 톰캣으로 접속이 되는지 확인 할 것이다.

ec2의 대시보드에 들어가서 인스턴스(실행 중) 클릭


체크를 한 후 퍼블릭 IPv4 주소를 복사

그 후 :8080 을 붙여주면 접속된다.


VisualStudio Code의 셋업파일을 더블클릭하여 설치 후 

Extension을 추가로 설치할 것이다.


이런식으로 설치 후 제거가 보이면 설치가 완료된 것이다.


이렇게 우선 총 5개를 설치하였다.

Korean, Prettier, Open in browser, indent-rainbow, Auto Rename Tag


깃 설치 중에


이 부분이 master 에서 main으로 바뀌고 있는 추세인데 이것만 체크하고 나머지는 모두 Next 한 후 설치


아파치도 압축을 해제한 후 폴더 그대로 C드라이브로 옮긴다.


해당 폴더의 bin에 들어가서 폴더 경로를 복사후

cmd에서 cd + 경로 후

startup하면 아래와 같은 창이 열린다.

1080은 1.08초 시간이 들었다는 것이다.

한글


그 후 localhost:8080 으로 들어갔을때 이 화면이 나오면 잘 작동되는 것이다.


이제 마지막으로 STS를 설치할 것인데


압축파일 안에서 이것을 꺼내어 C드라이브로 옮겨주면 된다.


STS런처를 실행한다.


이 화면이 나오면 성공이다.


File -> New -> Spring Legacy Project


아래에 템플릿이 다 보이지 않는다면

Configure templates 클릭

가운데 것을 제외 하고 두가지를 Remove 한 후 Apply and Close하면 생긴다고 하는데 필자는 되지 않아서

몇시간 동안 찾아본 결과


몇년 전부터 이 기능을 이제 지원하지 않는다 한다.

따라서 기존에 빈프로젝트를 만들어 놓은 것을 임포트 해야 한다고 한다.


이러면 생성된다. 아래의 폴더를 설치하자(압축해제X)

firstSpring.zip
0.02MB


이렇게 잘 만들어짐을 확인할 수 있다.


만약 이렇지 않고 원할하게 MVC project를 생성했을 경우

여기에 이런식으로 넣어주면


이렇게 패키지 이름이 만들어진다.


이제 서버를 연결해줄 것이다.

이 아래 버튼을 누르고 tomcat검색후 설치했던 9버전 next


그 후 Finish 하면 완료가 되어 있는 상태


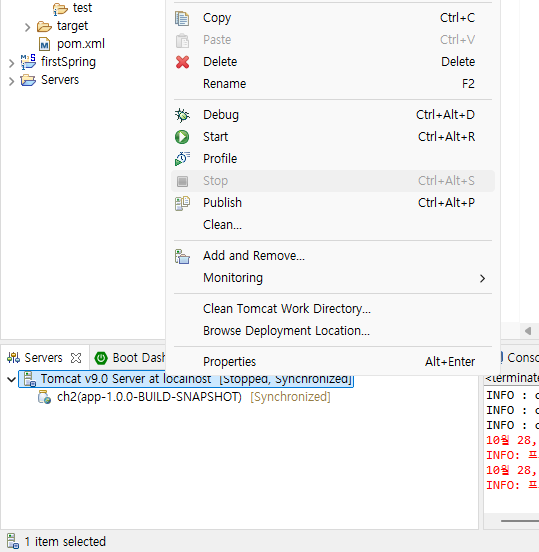
이제 서버를 실행 시켜 볼 것 이다.


한글은 현재 깨지고 현재 시간이 출력된다.


외부 브라우저로 변경할 것이다.

돋보기를 클릭


web browser 선택후 external로 변경 후 chrome을 클릭후 apply


그리고 다시 Run on Server를 하면 Chrome으로 실행됨을 확인 할 수 있다.

https://jdk.java.net/archive/


Archived OpenJDK GA Releases

Archived OpenJDK General-Availability Releases This page is an archive of previously released builds of the JDK licensed under the GNU General Public License, version 2, with Classpath Exception. WARNING: These older versions of the JDK are provided to he

jdk.java.net


개인의 컴퓨터에 맞게 버전을 설치해 줄 것인데,

필자는 11.0.2 윈도우 버전을 설치했다.


스프링으로 개발하기 위해 필요한 도구들

자바 개발 도구 : Java11

통합개발 환경 : STS, IntelliJ(Ultimate 유료버전만)

웹 서버 : Tomcat 9

웹 브라우저 : Chrome

데이터 베이스 : MySQL 5.7

기타 : VS code, Git, AWS, Maven


우선 STS를 설치할 것이다.

https://github.com/spring-attic/toolsuite-distribution/wiki/Spring-Tool-Suite-3


Spring Tool Suite 3

the distribution build for the Spring Tool Suite and the Groovy/Grails Tool Suite - spring-attic/toolsuite-distribution

github.com


IntelliJ 유료 설치(30일 무료)

https://www.jetbrains.com/ko-kr/idea/download/?section=windows


최고의 Java 및 Kotlin IDE인 IntelliJ IDEA를 다운로드하세요


www.jetbrains.com


Tomcat 9 다운로드

톰캣은 EE에 포합된다(Enterprise Edition)

https://tomcat.apache.org/download-90.cgi


Apache Tomcat® - Apache Tomcat 9 Software Downloads

Welcome to the Apache Tomcat® 9.x software download page. This page provides download links for obtaining the latest version of Tomcat 9.0.x software, as well as links to the archives of older releases. Unsure which version you need? Specification version

tomcat.apache.org


VisualStudio Code 설치

https://code.visualstudio.com/download


Download Visual Studio Code - Mac, Linux, Windows

Visual Studio Code is free and available on your favorite platform - Linux, macOS, and Windows. Download Visual Studio Code to experience a redefined code editor, optimized for building and debugging modern web and cloud applications.

code.visualstudio.com


Git 다운로드

https://git-scm.com/downloads


Git - Downloads

Downloads macOS Windows Linux/Unix Older releases are available and the Git source repository is on GitHub. Latest source Release 2.47.0 Release Notes (2024-10-06) Download Source Code GUI Clients Git comes with built-in GUI tools (git-gui, gitk), but ther

git-scm.com


for문은 단순해 보이나 중요한 것이 있다.

for문이 돌아가는 순서에 대해서 이다.


초기식 -> 조건식 -> 증감식 순이 아닌

초기식 -> 조건식 -> 중괄호 안에 있는 문 -> 증감식 순으로 이어진다.


위의 잘못된 로직으로 생각할 시 코딩을 했을 때

마지막 변수가 출력되지 않은 적을 다들 경험해 봤을 것이다.

필자 또한 그런 경험이 있다.


아래 코드에서 주석 처리 된 부분은 일반적인 for문인데

자바에서는 아래와 같이 향상된 for문을 이용하여

코드의 길이를 줄일 수 있다.


public class ForLoopTest {
    public static void main(String[] args) {
        int[] numbers = {1,2,3,4,5,6,7,8,9,10};

//        for(int i=0; i<numbers.length; i++){
//            System.out.println(numbers[i]);
//        }
        //foreach문 (향상된 for문)
        for(int su : numbers){
            System.out.println(su);
        }
    }
}

import java.util.*을 사용함으로써 scan을 사용할 수 있는데

이는 사용자가 키보드로 수치를 입력할 수 있다.

정수형이면 scan.nextInt()

실수형이면 scan.nextFloat()를 사용한다.

근데 아래의 출력을 보면

마지막 str1을 입력하지 않았는데 자동으로 Hello와 World 잘려서 바로 출력됨을 알 수 있다.

import java.util.*;
public class ScannerTest {
    public static void main(String[] args) {
        Scanner scan = new Scanner(System.in);
        System.out.print("정수를 입력하세요:");
        int num =scan.nextInt();
        System.out.println("num = " + num);
        
        System.out.print("실수를 입력하세요:");
        float f = scan.nextFloat();
        System.out.println("f = " + f);

        System.out.print("문자를 입력하세요:");
        String str = scan.next();
        System.out.println("str = " + str);

        //scan.nextLine();//버퍼비우기(스트림 비우기)

        System.out.print("문자를 입력하세요:");
        String str1 = scan.next();
        System.out.println("str1 = " + str1);
    }
}


이에 대한 원인으로

scan.next();
공백을 기준으로 한 단어 또는 한 문자씩 입력받는다.
버퍼에 입력된 문자나 문자열에서 공백 전까지의 단어를 읽는다.


scan.nextLine();
문자 또는 엔터를 치기 전까지의 문장 전체를 입력받는다.
버퍼에 입력된 문자열을 개행 문자까지 다 가져온다.

따라서 이 문제점을 scan.nextLine();을 사용함으로서 문제를 해결할 수 있다.

앞에 Hello가 출력되고 나서 그 다음 버퍼에 World가 출력되어야 하는데

scan.nextLine(); 을 사용하여 버퍼를 비울 수 있기 때문이다.

import java.util.*;
public class ScannerTest {
    public static void main(String[] args) {
        Scanner scan = new Scanner(System.in);
        System.out.print("정수를 입력하세요:");
        int num =scan.nextInt();
        System.out.println("num = " + num);
        
        System.out.print("실수를 입력하세요:");
        float f = scan.nextFloat();
        System.out.println("f = " + f);

        System.out.print("문자를 입력하세요:");
        String str = scan.next();
        System.out.println("str = " + str);

        scan.nextLine();//버퍼비우기(스트림 비우기)

        System.out.print("문자를 입력하세요:");
        String str1 = scan.next();
        System.out.println("str1 = " + str1);
    }
}


이번에는 또 다른 문제가 생겼다.

Hello World를 출력하고 싶은데 앞에 Hello만 잘려서 나온 것이다.

왜냐하면 위에 설명한 것 처럼

그냥 next는 공백을 기준으로 잘라서 출력하고

Line을 이어서 붙어 주어야만 엔터를 했을 때를 기준으로 출력하기 때문이다.

import java.util.*;
public class ScannerTest {
    public static void main(String[] args) {
        Scanner scan = new Scanner(System.in);
        System.out.print("정수를 입력하세요:");
        int num =scan.nextInt();
        System.out.println("num = " + num);
        
        System.out.print("실수를 입력하세요:");
        float f = scan.nextFloat();
        System.out.println("f = " + f);

        System.out.print("문자를 입력하세요:");
        String str = scan.next();
        System.out.println("str = " + str);

        scan.nextLine();//버퍼비우기(스트림 비우기)

        System.out.print("문자를 입력하세요:");
        String str1 = scan.nextLine();
        System.out.println("str1 = " + str1);
    }
}


public class TwoDimArrayInit {
    public static void main(String[] args) {
        int[][] a = {
                {1,2,3,4},
                {5,6,7,8}
        };

        for(int i=0; i<a.length ; i++){
            for(int j=0;j<a[i].length; j++){
                System.out.print(a[i][j] + "\t");
            }
            System.out.println();
        }

        int[][] b = new int[5][];
        b[0] = new int[1];
        b[1] = new int[2];
        b[2] = new int[3];
        b[3] = new int[4];
        b[4] = new int[5];

        for(int i=0; i<b.length ; i++){
            for(int j=0;j<b[i].length; j++){
                b[i][j] = '*';
                System.out.print((char)(b[i][j]) + "\t");
            }
            System.out.println();
        }
    }
}

+ Recent posts