스프라이트 게임을 자르기 위해 설정들을 이렇게 바꾸어 주었다.
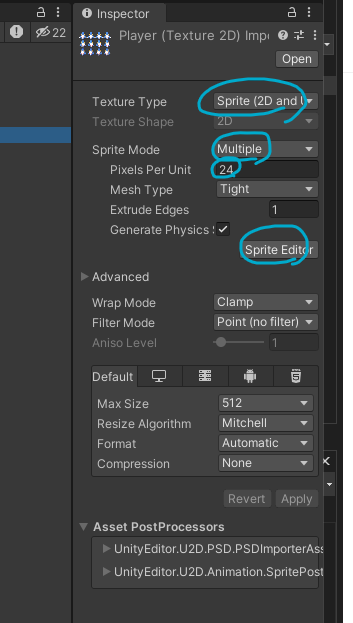
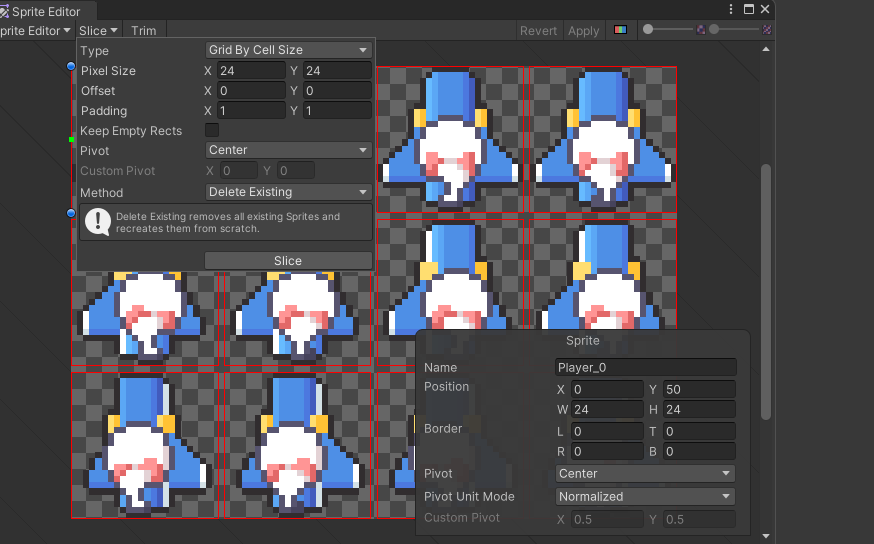
그 후 Sprite Editor를 누르면 여러개의 이미지들이 묶여있는 것을 분할 할 수 있는데
크기로 24*24 여백을 1로 잘랐다.
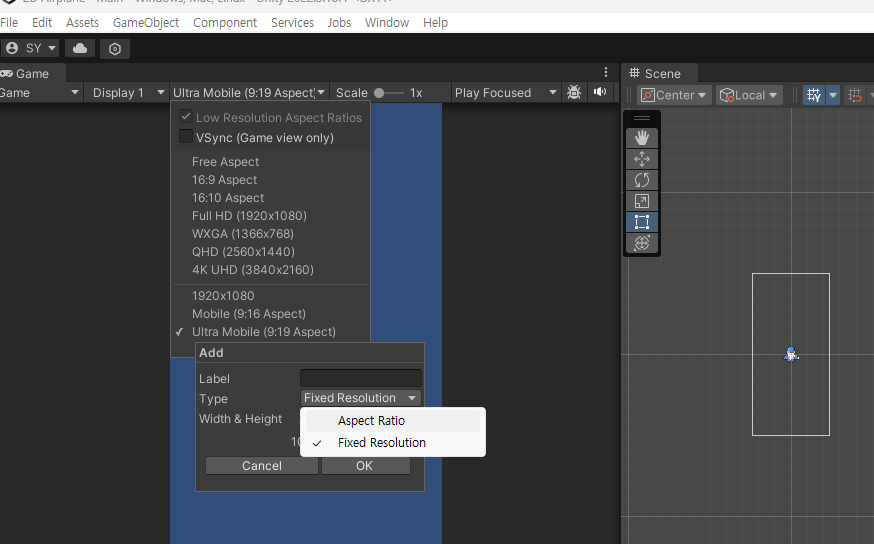
우선 화면의 비율을 선택해주자
필자는 aspect로 하였고 비율을 입력하여 2가지 해상도를 만들었다.
비행기가 움직일 수 있게 코드 작성
transform은 time.deltatime이랑 세트로 생각하자!
현재의 위치에 키보드로 받을 위치를 더해준다.
using System.Collections;
using System.Collections.Generic;
using UnityEngine;

public class Player : MonoBehaviour
{
    public float speed;
    void Update()
    {
        float h = Input.GetAxisRaw("Horizontal");
        float v = Input.GetAxisRaw("Vertical");
        Vector3 curPos = this.transform.position;
        Vector3 nextPos = new Vector3(h, v, 0) * speed * Time.deltaTime;
        transform.position = curPos + nextPos;

    }
}
움직여보면 원하지 않는 배경 밖으로 나가게 된다.

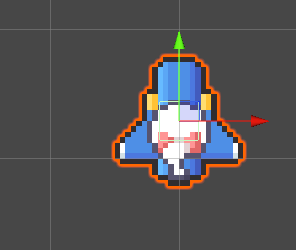
비행기에 Box Collider를 추가하여 부착해주면 초록색 경계가 생긴다.
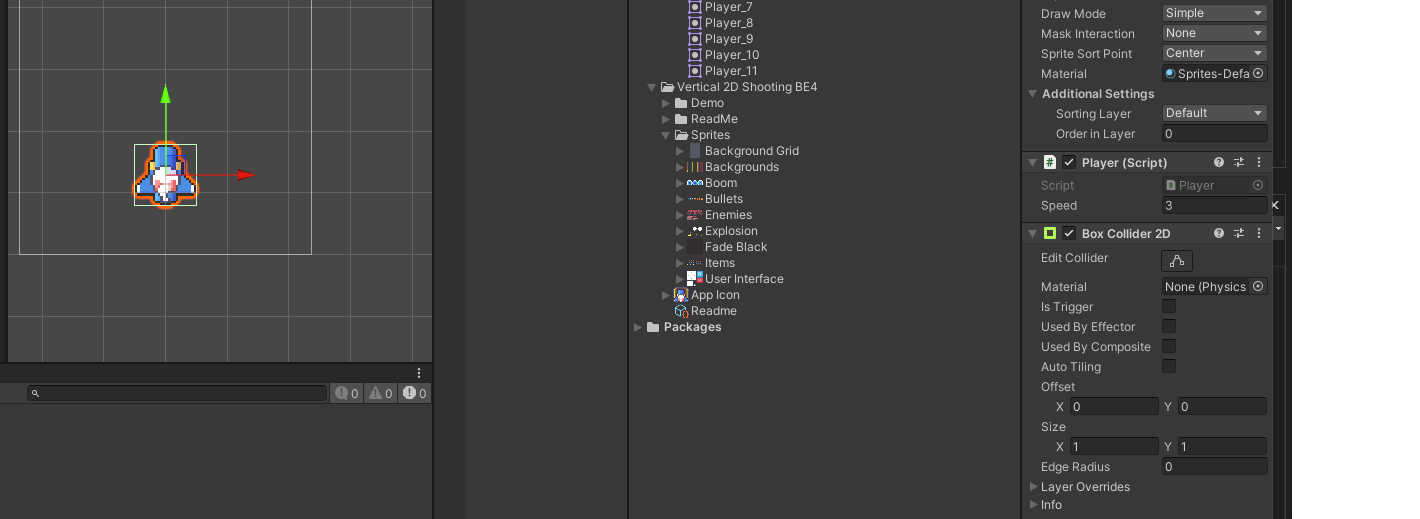
피격 범위로도 사용할 것이므로 콜라이더의 크기를 줄여주었다.

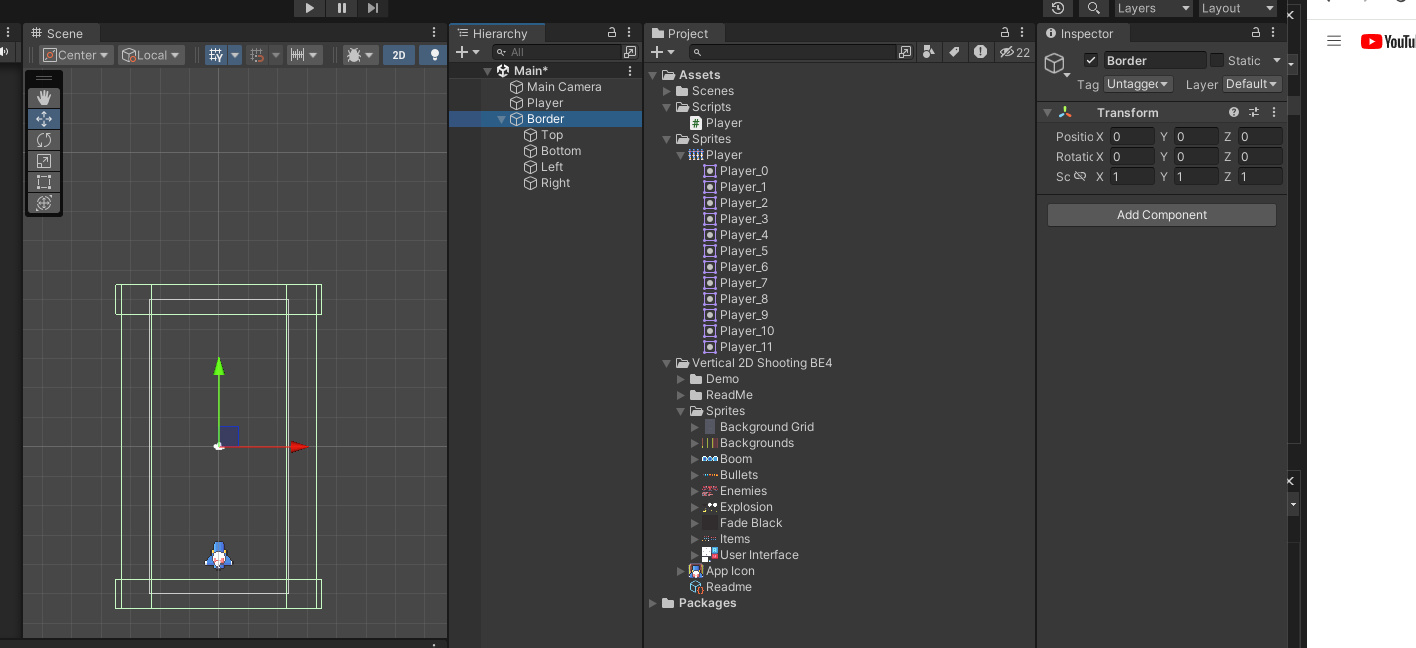
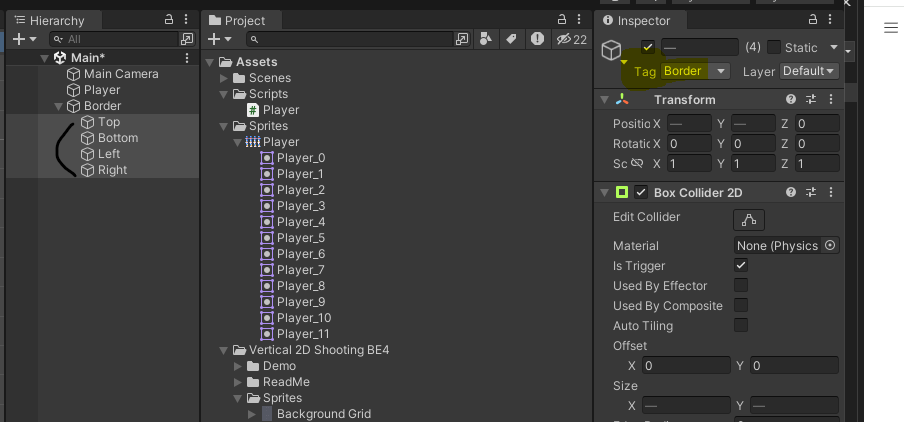
맵의 바깥 부분에 Border라는 빈 오브젝트안에
방향 별로 box collider2D를 붙인 후 범위를 잡아주었다.
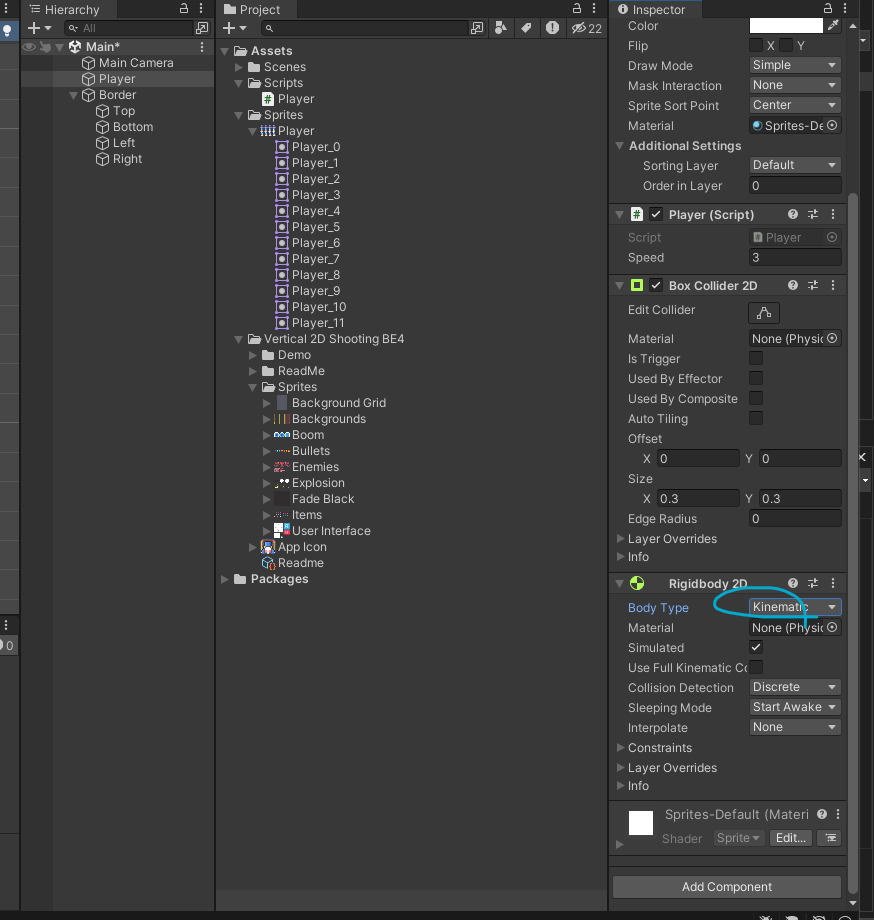
Player :
물리 연산이기에 모두 리지드바디2d적용
물리엔진을 많이 사용하지 않기에 키네틱을 사용
키넥틱이란? 다른 것이랑 충돌이 일어났을 때 영향을 받지 않겠다.
보더들은 고정이기때문에 static 사용

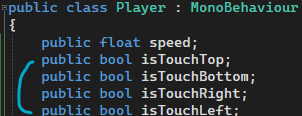
경계들을 각각 인지를 해야하기에 변수 선언
물리적인 힘은 넣을 필요 없으므로 collider대신에 온트리거 사용하였고,
각 경계마다 tag로 Border를 달아줄 것이다.
물체가 닿은 상태에서 h는 좌우 이동이므로 => 이동시 닿을 떄를 처리하는데 이때 각각 0으로 만들어서 이동을 멈춘다.

물체가 닿지 않았을 때 이동해야하므로 그 경우도 처리해야 한다.
태그를 달아준다.
현재 까지의 코드
using System.Collections;
using System.Collections.Generic;
using UnityEngine;
public class Player : MonoBehaviour
{
public float speed;
public bool isTouchTop;
public bool isTouchBottom;
public bool isTouchRight;
public bool isTouchLeft;
void Update()
{
float h = Input.GetAxisRaw("Horizontal");
if ((isTouchRight && h == 1) || (isTouchLeft && h == -1))
h = 0;
float v = Input.GetAxisRaw("Vertical");
if ((isTouchTop && v == 1) || (isTouchBottom && v == -1))
v = 0;
Vector3 curPos = this.transform.position;
Vector3 nextPos = new Vector3(h, v, 0) * speed * Time.deltaTime;
transform.position = curPos + nextPos;
}
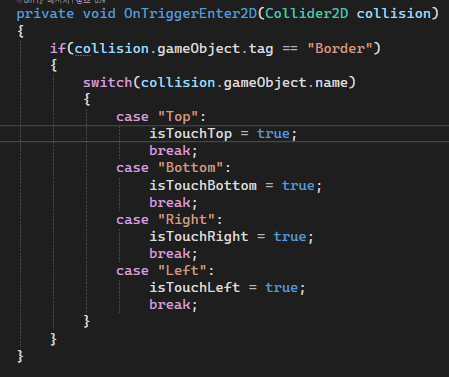
private void OnTriggerEnter2D(Collider2D collision)
{
if(collision.gameObject.tag == "Border")
{
switch(collision.gameObject.name)
{
case "Top":
isTouchTop = true;
break;
case "Bottom":
isTouchBottom = true;
break;
case "Right":
isTouchRight = true;
break;
case "Left":
isTouchLeft = true;
break;
}
}
}
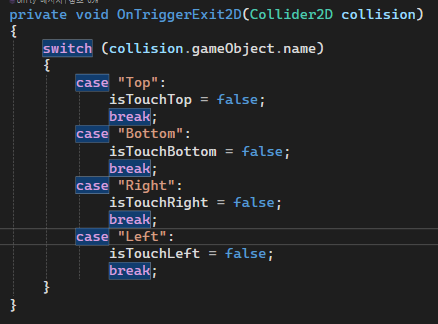
private void OnTriggerExit2D(Collider2D collision)
{
switch (collision.gameObject.name)
{
case "Top":
isTouchTop = false;
break;
case "Bottom":
isTouchBottom = false;
break;
case "Right":
isTouchRight = false;
break;
case "Left":
isTouchLeft = false;
break;
}
}
}
이제 애니메이션을 넣어줄 것이다.
잘라놓은 애니메이션 각각 4개를 클릭해서
하이어라이키에 있는 Player에 드래그해서 넣어주고 애니메이션 폴더를 생성후
각각 Center, Left, Right로 이름을 만들어서 저

플레이어에 애니메이션 컴포넌트가 생성됨

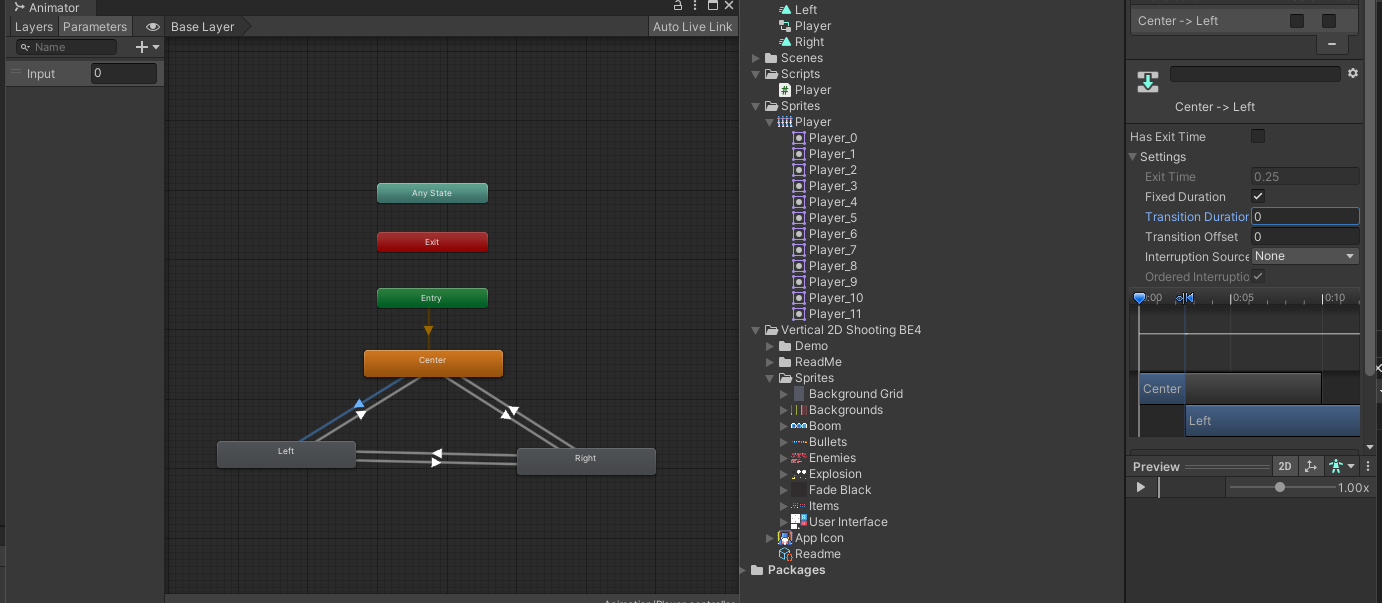
그 후 플레이어(애니메이션 컨트롤러)를 눌러서 이 창을 띄어주고
Make Transition으로 서로의 관계를 만들어 준다.
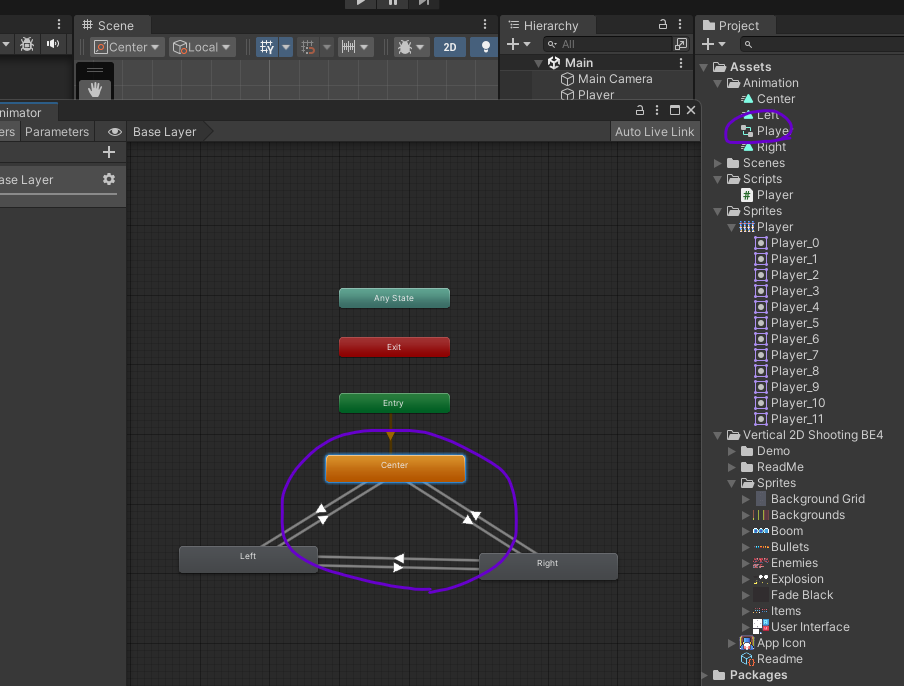
트랜지션은 파라미터로 이동한다.
매개변수 Input.GetAxisRaw() 값 그대로 사

각각의 트랜지션 설정을 해줄것인다.
즉각 반응을 위해 Has Exit Time은 꺼야한다.
Transition Duration은 보통3D에서 모션을 부드럽게 변화시키기 위해 사용하는데
필요 없으므로 0으로 변경
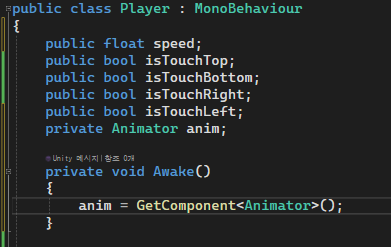
이제 인풋 파라미터를 받을 코드를 작성할 것이다.
그전에 애니메이터 변수 생성 후 초기화 진행
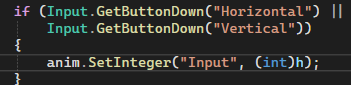
업데이트 문 안에 작성하고 좌우 방향은 h이므로 h를 넣고 float형이므로
(int)로 강제 형변환

배경을 집어 넣을 것인데 넣으면 플레이어가 보이지 않을 수 있다.
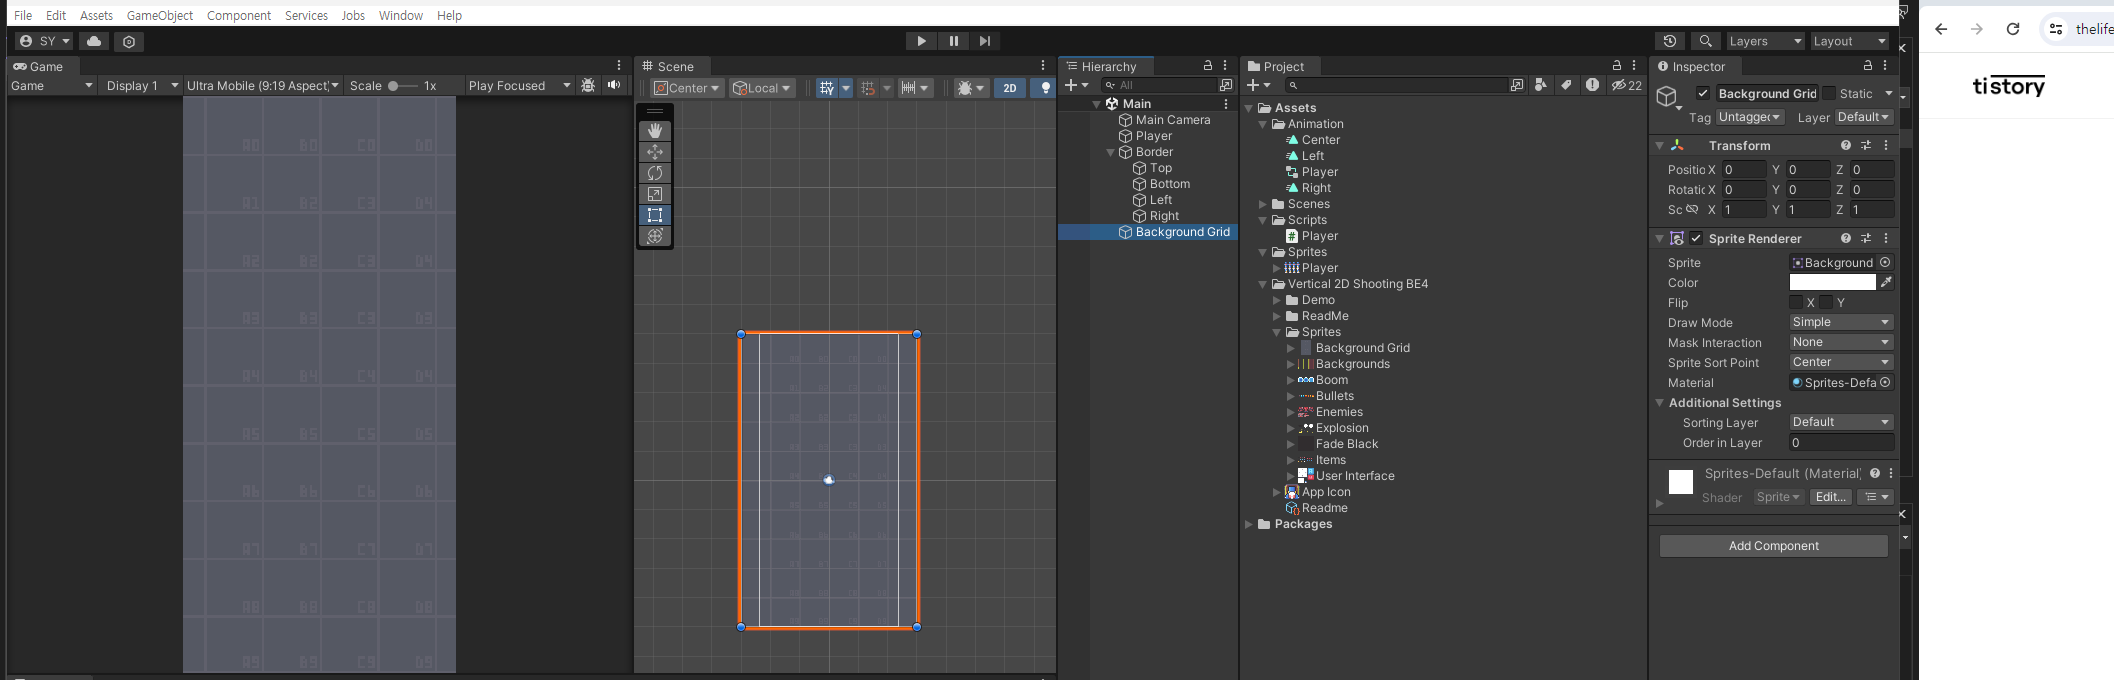
그러면 플레이어를 누르고 Order In Layer를 0에서 1로 변경

그러면 플레이어가 이제 잘보일 것이다.
마지막을 플레이를 해볼것인데 애니메이터 컨트롤러를 클릭하고 실행하면
실시간 애니메이션이 변경되며 사용됨을 눈으로 확인 할 수 있다.
'산대특' 카테고리의 다른 글
| 2D Airplane - 원근감있는 무한 배경 만들 (0) | 2024.03.17 |
|---|---|
| 2D Airplane - 5 (1) | 2024.03.14 |
| 2D Airplane - 4 (0) | 2024.03.12 |
| 2D Airplane - 3 (0) | 2024.03.12 |
| 2D Airplane - 2 (0) | 2024.03.10 |