
'산대특' 카테고리의 다른 글
| Download Python (0) | 2024.05.08 |
|---|---|
| Learn Firebase (0) | 2024.05.02 |
| 팬텀로즈스칼렛 모작 최종 (0) | 2024.04.08 |
| 2D Airplane - 원근감있는 무한 배경 만들 (0) | 2024.03.17 |
| 2D Airplane - 5 (1) | 2024.03.14 |
| Download Python (0) | 2024.05.08 |
|---|---|
| Learn Firebase (0) | 2024.05.02 |
| 팬텀로즈스칼렛 모작 최종 (0) | 2024.04.08 |
| 2D Airplane - 원근감있는 무한 배경 만들 (0) | 2024.03.17 |
| 2D Airplane - 5 (1) | 2024.03.14 |
| Learn Firebase (0) | 2024.05.02 |
|---|---|
| 2D Vertical Shooting Game 모작 최종 (0) | 2024.04.08 |
| 2D Airplane - 원근감있는 무한 배경 만들 (0) | 2024.03.17 |
| 2D Airplane - 5 (1) | 2024.03.14 |
| 2D Airplane - 4 (0) | 2024.03.12 |
https://assetstore.unity.com/packages/tools/animation/dotween-hotween-v2-27676
DOTween (HOTween v2) | 애니메이션 도구 | Unity Asset Store
Use the DOTween (HOTween v2) tool from Demigiant on your next project. Find this & more animation tools on the Unity Asset Store.
assetstore.unity.com
애니메이션 컨트롤러와 애니메이션을 만들지 않고 이 패키지를 설치하면 코드로 애니메이션을 구현할 수 있습니다.
https://dotween.demigiant.com/
DOTween (HOTween v2)
DOTween is a fast, efficient, fully type-safe object-oriented animation engine for Unity, optimized for C# users, free and open-source, with tons of advanced features It is also the evolution of HOTween, my previous Unity tween engine. Compared to it, DOTw
dotween.demigiant.com
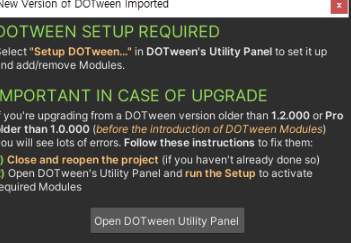
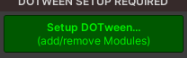
설치 방법
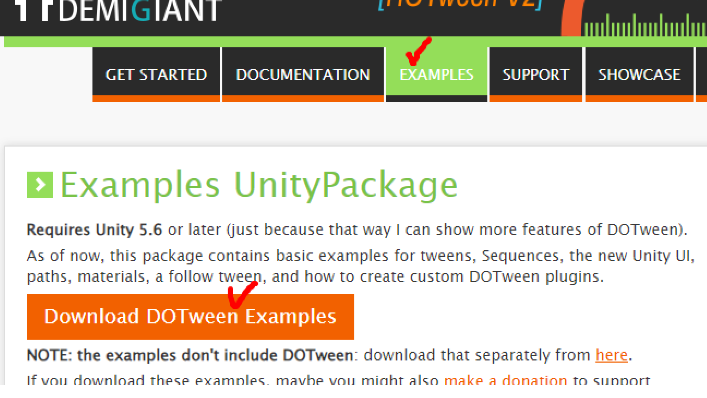
설치를 하고 유니티로 들어가면 이런 창이 뜰텐데
x를 클릭해도 계속 창이 나오니 이 순서대로 해주시면 됩니다.
사용방법
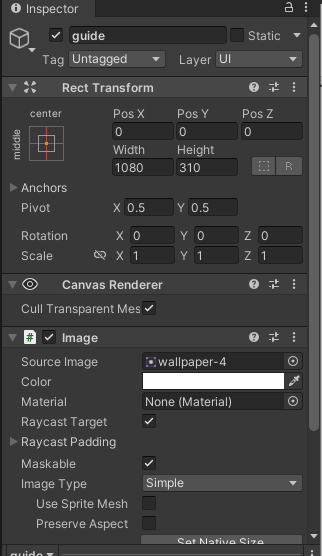
우선 테스트를 하기 위해 셋팅은 이런 식으로 했습니다.
코드 설명
using 에 DG.Tweening

여기서 주의깊게 봐야할 곳은 DOLocalMoveY입니다.

여기에 endValue, duration을 인자로 받는데
이것은 targetPosition.y 가 200으로 맞춰져 있고
y좌표로 10초동안 이동됩니다.
그리고 디버그가 출력된 후 삭제됩니다.

그 다음으로 봐야할 곳은 DOScale 입니다.
앞에 인자는 기존 사이즈를 1이라 보고 몇배로 크게 할것인가
그리고 뒤에 인자는 몇초동안 그 사이즈를 만들 것인가 입니다.
'한 줄로 풀어 해석하면 기존사이즈를 5초동안 2배로 만든다' 입니다.
그러면 아래는 5초동안 0.1의 사이즈로 축소됩니다.
위의 코드는 10초 이동 후 삭제
아래 코드는 5초간 커지고 5초간 작아지고
그러면 이동중에 커졌다 작아지며
사라지는 시간은 10초 후 크기 변화도 5+5=10 초니깐
사이즈가 0.1이 되자마자 사라질 것입니다.

알파(희미해지고 선명해지는)값을 조절해주는 코드입니다.
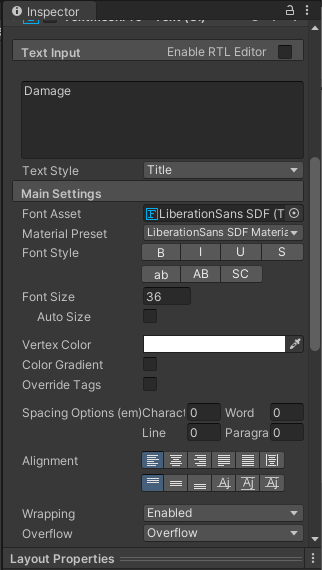
우선 TextMeshProUGUI 컴포넌트를 불러와야 합니다.
x를 y로 바꾸어보았는데 별 차이가 없는 것을 보아
흔히 변수를 선언할 때 int x = 1; int y = 1;
상관없듯이 그런 것 같지만 확실한 것은 아닙니다.
뒤에 0f, 7f는 첫번째는 알파값을 조절 뒤에 값은 똑같이 몇동안이므로
(알파 값이 0이면 보이지 않습니다, 반대로 1이면 있는 그대로 색을 띄웁니다.)
이러면 이 코드는 '7초동안 알파를 0으로 만든다' 입니다.

using DG.Tweening;
using System.Collections;
using System.Collections.Generic;
using TMPro;
using UnityEngine;

    public class test : MonoBehaviour
    {
        private TMP_Text damageText;
        void Start()
        {
            damageText = GetComponent<TMP_Text>();

            Debug.Log(this.transform.localPosition);

            Vector3 targetPosition = this.transform.localPosition;

            targetPosition.y += 200;

            this.transform.DOLocalMoveY(targetPosition.y, 10).OnComplete(() =>
            {
                Debug.Log("MoveY Complete!");
                Destroy(this.gameObject);
            });

            this.transform.DOScale(2, 5f).OnComplete(() =>
            {
                Debug.Log("DoScale Complete 1 -> 2");
                this.transform.DOScale(0.1f, 5f).OnComplete(() =>
                {
                    Debug.Log("DoScale Complete 2 -> 0.1");
                });

            });

            var tmpUGUI = this.damageText.GetComponent<TextMeshProUGUI>();

            DOTween.ToAlpha(() => tmpUGUI.color, x => tmpUGUI.color = x, 0f, 7f);
        }

    }
10초간 위로 이동하면서
5초간 커지고, 5초간 작아지고
7초동안 알파값이 0이 되므로
보이지 않더라도 실제로 10초 - 7초 = 3초 후에
이 오브젝트는 Destroy됩니다.
| [GitHub] Sprites-Outline (0) | 2024.05.20 |
|---|
