우선 textures에 새로운 사진들을 첨부한후
Texture Type을 Sprite(2D and UI)로 변경후 Apply

배경을 덮은 후
캐릭터를 가져오는데 뒤에 가려져서 보이지 않으면
다음과 같이 Order in Layer을 1로 변경하면 앞에 배치된다.

캐릭터에 적용 할 c# script의 제목으로 PlayerController로 저장후
이동과 이동시 콘솔에 찍히도록 코드를 작성


using System.Collections;
using System.Collections.Generic;
using UnityEngine;

public class PlayerController : MonoBehaviour
{
    // Start is called before the first frame update
    void Start()
    {

    }

    // Update is called once per frame
    void Update()
    {
        if (Input.GetKeyDown(KeyCode.LeftArrow))
        {
            Debug.Log("왼쪽으로 2유닛만큼 이동");
            this.transform.Translate(-2, 0, 0);
        }
        if (Input.GetKeyDown(KeyCode.RightArrow))
        {
            Debug.Log("오른쪽으로 2유닛만큼 이동");
            this.transform.Translate(2, 0, 0);
        }
    }
}
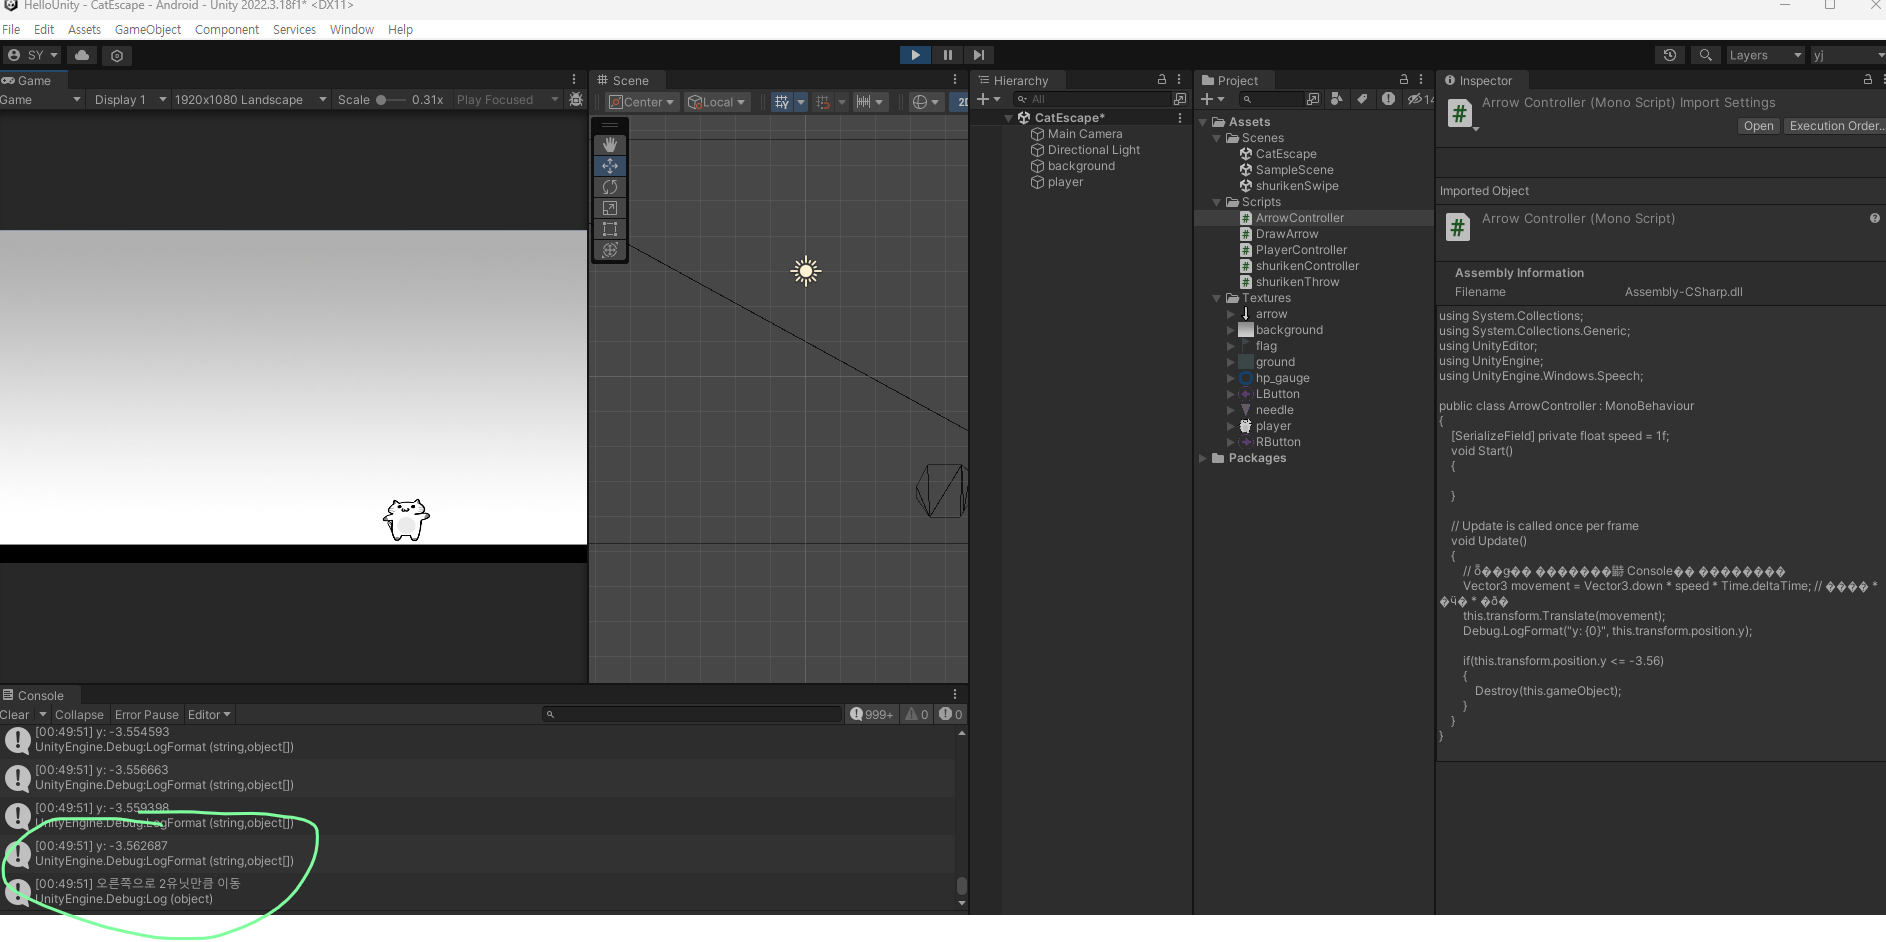
그 후 화살표가 땅에 닿으면 사라지게 작성
아래 콘솔을 보면 arrow의 좌표가 찍히다가 사라지는 것을 알 수 있다.
using System.Collections;
using System.Collections.Generic;
using UnityEditor;
using UnityEngine;
using UnityEngine.Windows.Speech;

public class ArrowController : MonoBehaviour
{
    [SerializeField] private float speed = 1f;
    void Start()
    {

    }

    void Update()
    {
        // 화살표가 내려오면서 Console에 찍히도록
        Vector3 movement = Vector3.down * speed * Time.deltaTime; // 방향 * 속도 * 시간
        this.transform.Translate(movement);
        Debug.LogFormat("y: {0}", this.transform.position.y);

        if(this.transform.position.y <= -3.56)
        {
            Destroy(this.gameObject);
        }
    }
}
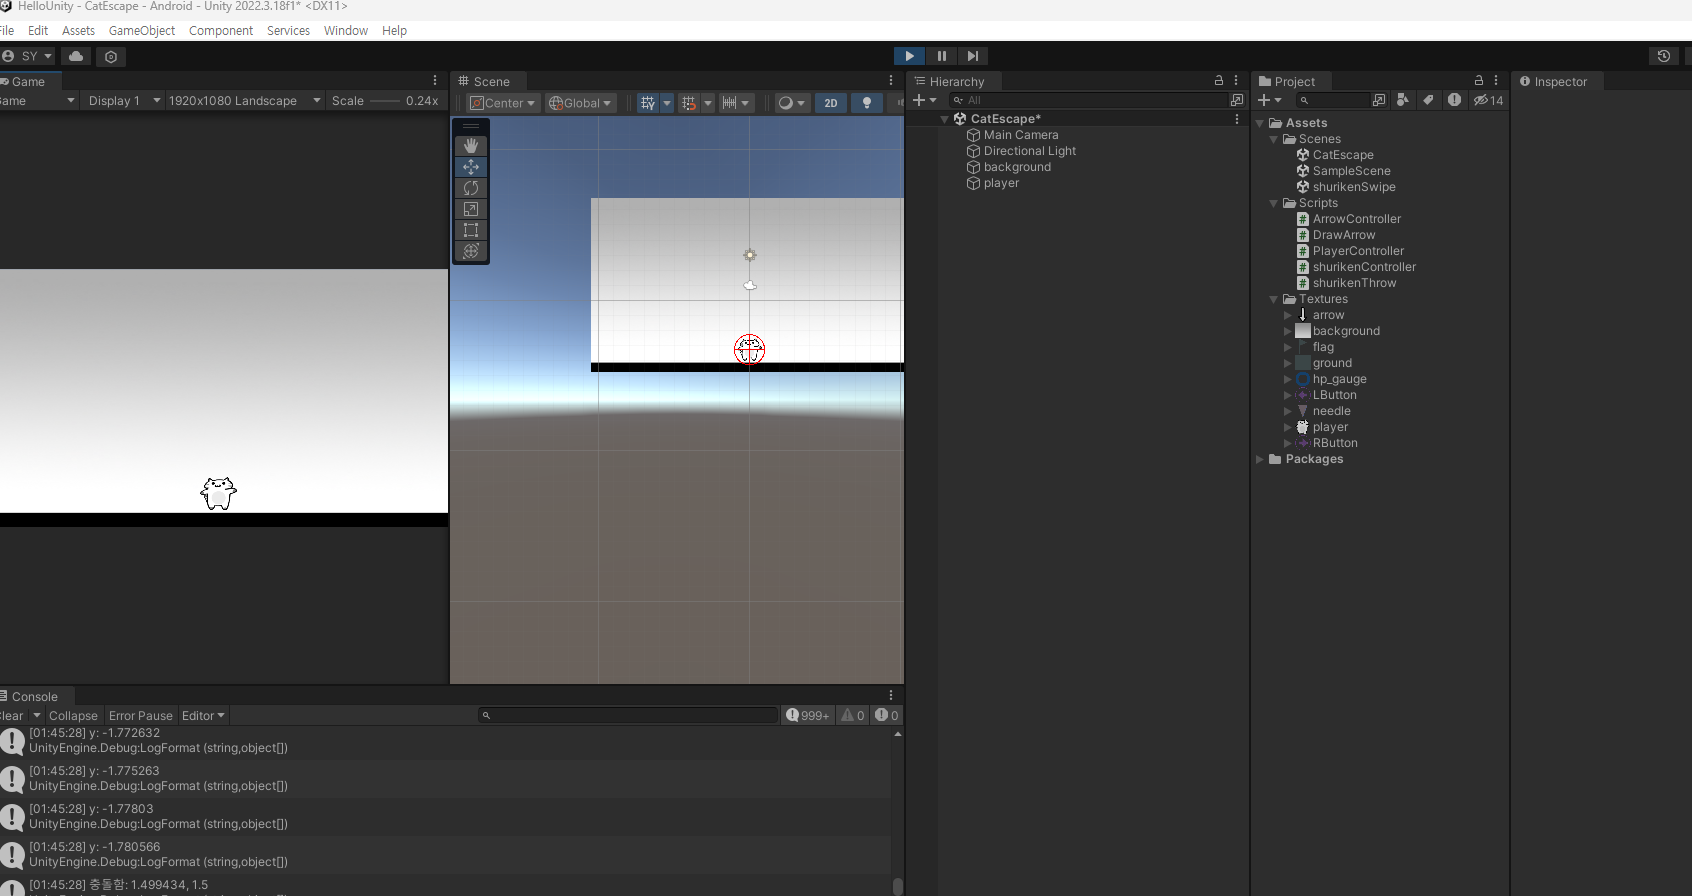
그리고 이제 충돌하면 사라지게 만들 것인데
그러기 위해 두 텍스쳐간의 radius (캐릭터를 중심으로한 테두리 원이라 생각하면 편하다.)을 보이는 선을 지정해주고
두 텍스쳐간의 거리가 두텍스쳐간의 radius의 합보다 가까워 지면 arrow가 사라지게 할 것이다.
https://docs.unity3d.com/ScriptReference/Gizmos.DrawWireSphere.html
using System.Collections;
using System.Collections.Generic;
using UnityEngine;

public class PlayerController : MonoBehaviour
{
    public float radius = 1f; // radius를 개발자가 인스펙터에서 바꿀수 있도록 선언
    void Start()
    {

    }

    // Update is called once per frame
    void Update()
    {
        if (Input.GetKeyDown(KeyCode.LeftArrow))
        {
            Debug.Log("왼쪽으로 2유닛만큼 이동");
            this.transform.Translate(-2, 0, 0);
        }
        if (Input.GetKeyDown(KeyCode.RightArrow))
        {
            Debug.Log("오른쪽으로 2유닛만큼 이동");
            this.transform.Translate(2, 0, 0);
        }
    }
    private void OnDrawGizmos()
    {
        Gizmos.color = Color.red;
        Gizmos.DrawWireSphere(this.transform.position, this.radius);
    }

}
using System.Collections;
using System.Collections.Generic;
using UnityEditor;
using UnityEngine;
using UnityEngine.Windows.Speech;

public class ArrowController : MonoBehaviour
{
    [SerializeField] private float speed = 1f;
    [SerializeField] private float radius = 1f;

    private GameObject playerGo;
    void Start()
    {
        this.playerGo = GameObject.Find("player");
    }

    void Update()
    {
        // 화살표가 내려오면서 Console에 찍히도록
        Vector3 movement = Vector3.down * speed * Time.deltaTime; // 방향 * 속도 * 시간
        this.transform.Translate(movement);
        Debug.LogFormat("y: {0}", this.transform.position.y);

        if(this.transform.position.y <= -3.56)
        {
            Destroy(this.gameObject);
        }
        // 두 텍스쳐(arrow, player) 간의 거리
        Vector2 p1 = this.transform.position;
        Vector2 p2 = this.playerGo.transform.position;
        Vector2 dir = p1 - p2; // 방향
        float distance = dir.magnitude; // 거리
        // float distance = Vector2.Distane(p1,p2); // => 거리만 알고 싶을 때

        // 두 radius 간의 거리
        float r1 = this.radius;
        PlayerController controller = this.playerGo.GetComponent<PlayerController>();
        float r2 = controller.radius;// 여기서 보호 수준 때문에 PlayController.cs 의 radius를 퍼블릭으로 변경
        float sumRadius = r1 + r2;

        // 두 텍스쳐간의 거리가 두텍스쳐간의 radius의 합보다 가까워 지면 arrow가 충돌이라 인지하고 arrow를 사라지게 할 것이다.
        if(distance < sumRadius)
        {
            Debug.LogFormat("충돌함: {0}, {1}", distance, sumRadius);
            Destroy(this.gameObject) ;
        }
    }
    private void OnDrawGizmos()
    {
        Gizmos.color = Color.red;
        Gizmos.DrawWireSphere(this.transform.position, this.radius);
    }

}
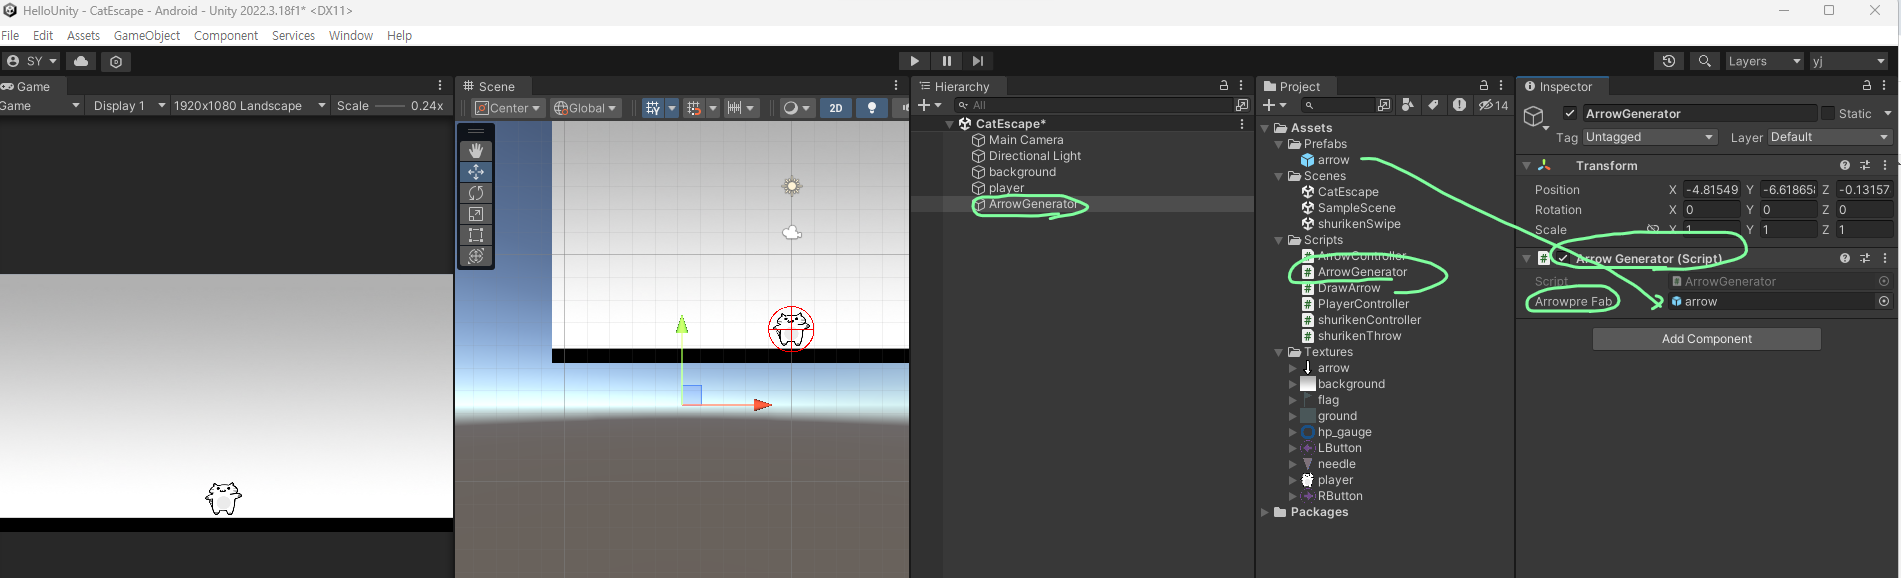
프리팹
프리팹 : 게임 오브젝트를 파일화 시킨것 (에셋)
https://docs.unity3d.com/kr/2018.4/Manual/Prefabs.html
프리팹 - Unity 매뉴얼
Unity의 프리팹 시스템을 이용하면 게임 오브젝트를 생성, 설정 및 저장할 수 있으며, 해당 게임 오브젝트의 모든 컴포넌트, 프로퍼티 값, 자식 게임 오브젝트를 재사용 가능한 에셋으로 만들 수
docs.unity3d.com
아래와 같이 하이어라이키에 있는 arrow를 새폴더(Prefabs)를 만들어 넣어주었고,
그러면 하이어라이키에 있는 arrow는 삭제해도 된다.
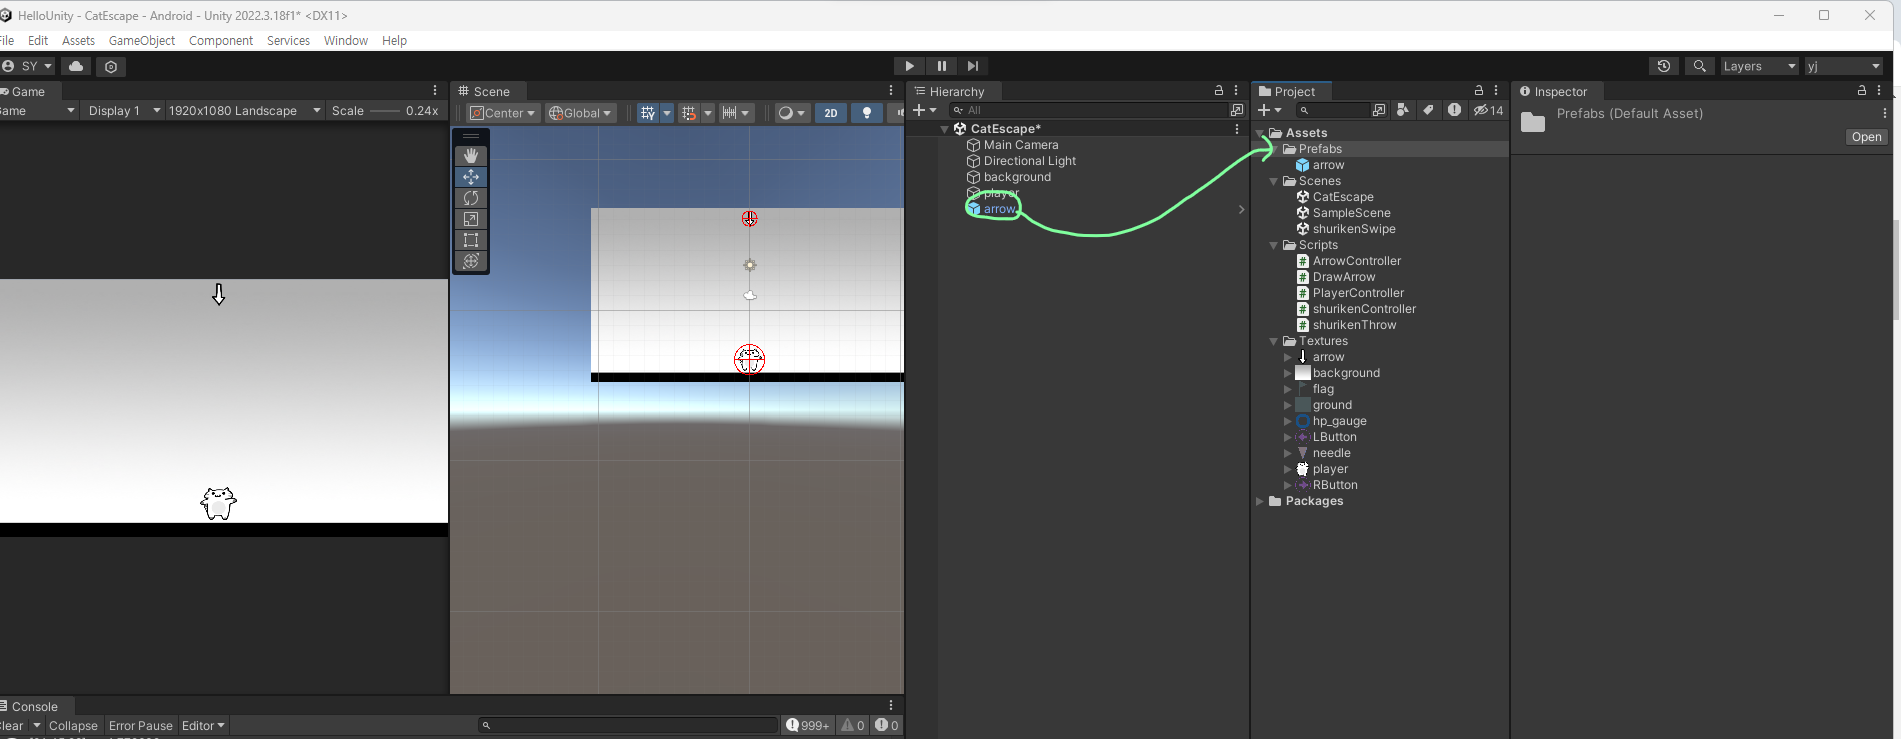
그 후 c# script를 만들어서 아래와 같은 선언
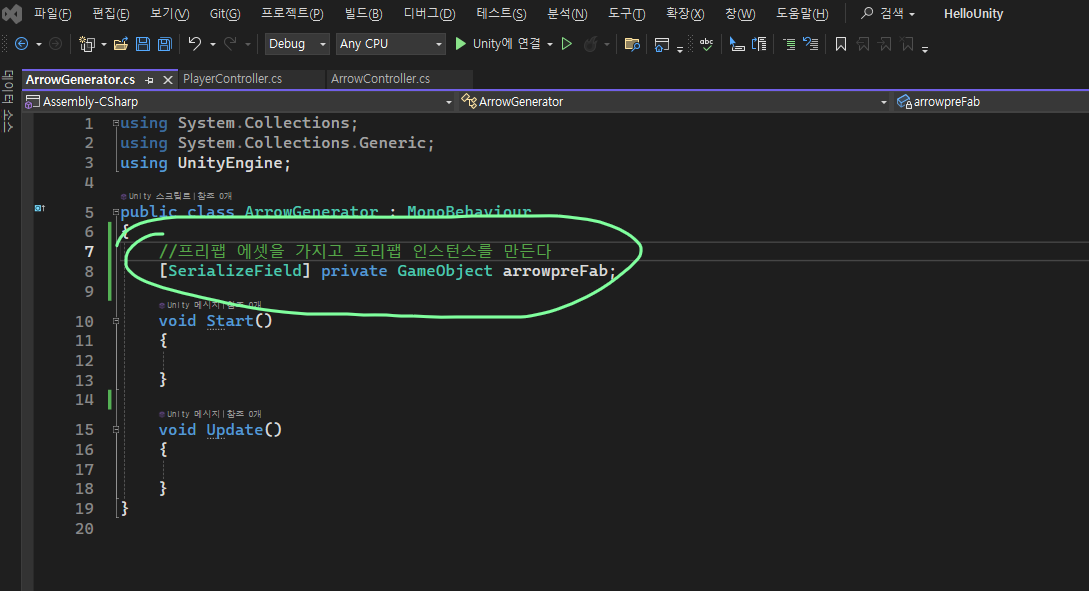
그러고 나서 생성된 gameObject의 arrowPrefab에 Prefabs에 있는 arrow를 할당
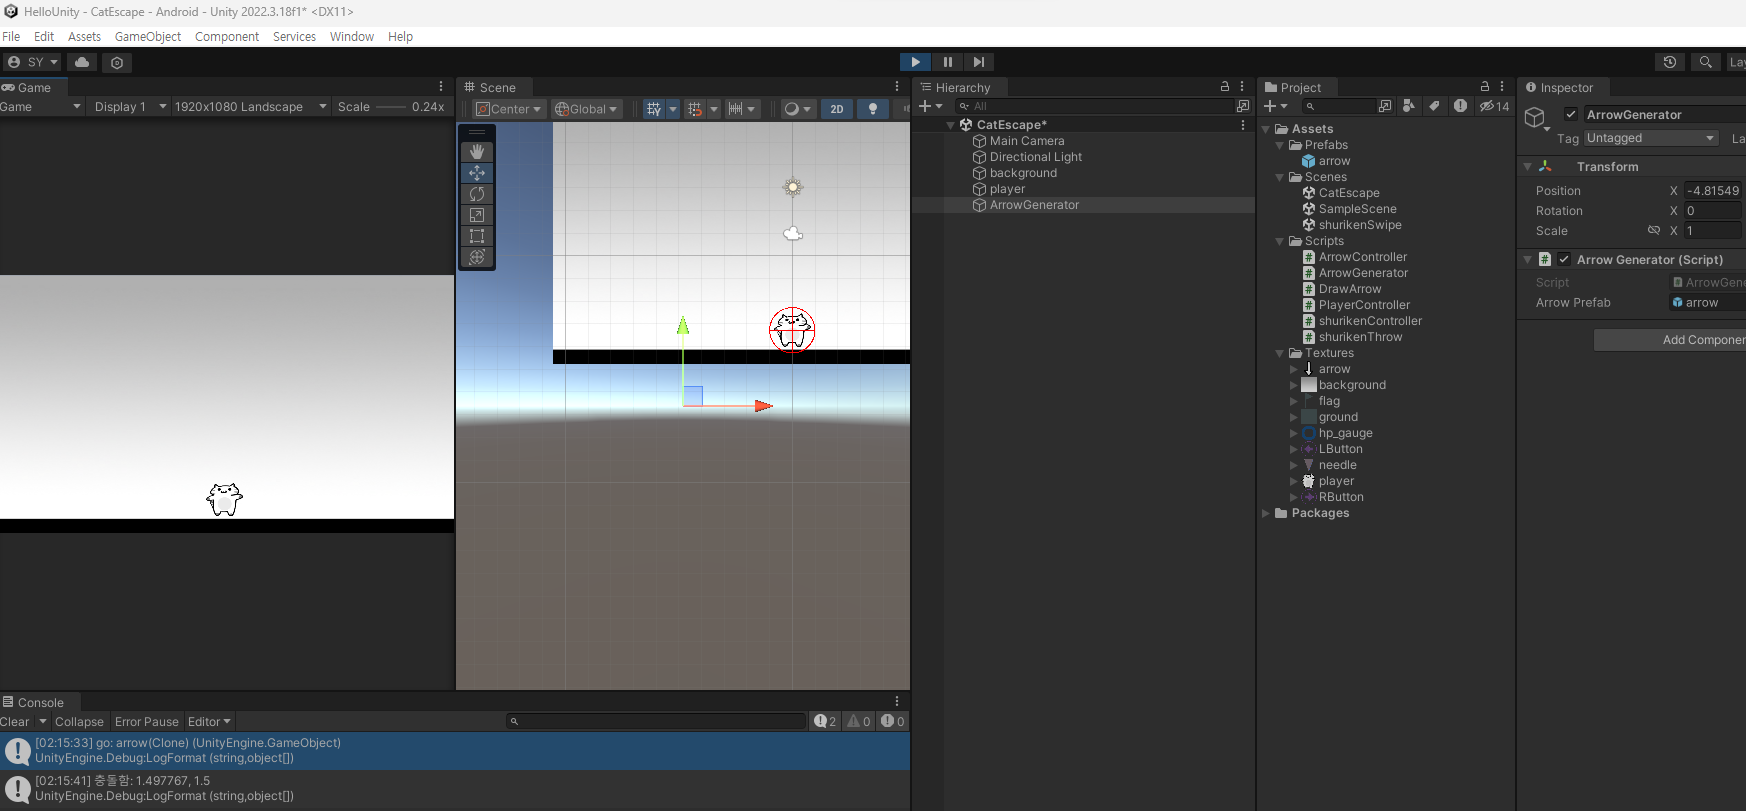
클론한 arrow가 떨어지게 한다.
using System.Collections;
using System.Collections.Generic;
using UnityEngine;

public class ArrowGenerator : MonoBehaviour
{
    //프리팹 에셋을 가지고 프리팹 인스턴스를 만든다
    [SerializeField] private GameObject arrowPrefab;

    void Start()
    {
        GameObject go = Instantiate(this.arrowPrefab);  //프리팹 인스턴스
        //위치는 프리팹 에셋에 설정된 위치
        //위치를 재설정
        Debug.LogFormat("go: {0}", go);
    }

    void Update()
    {

    }
}
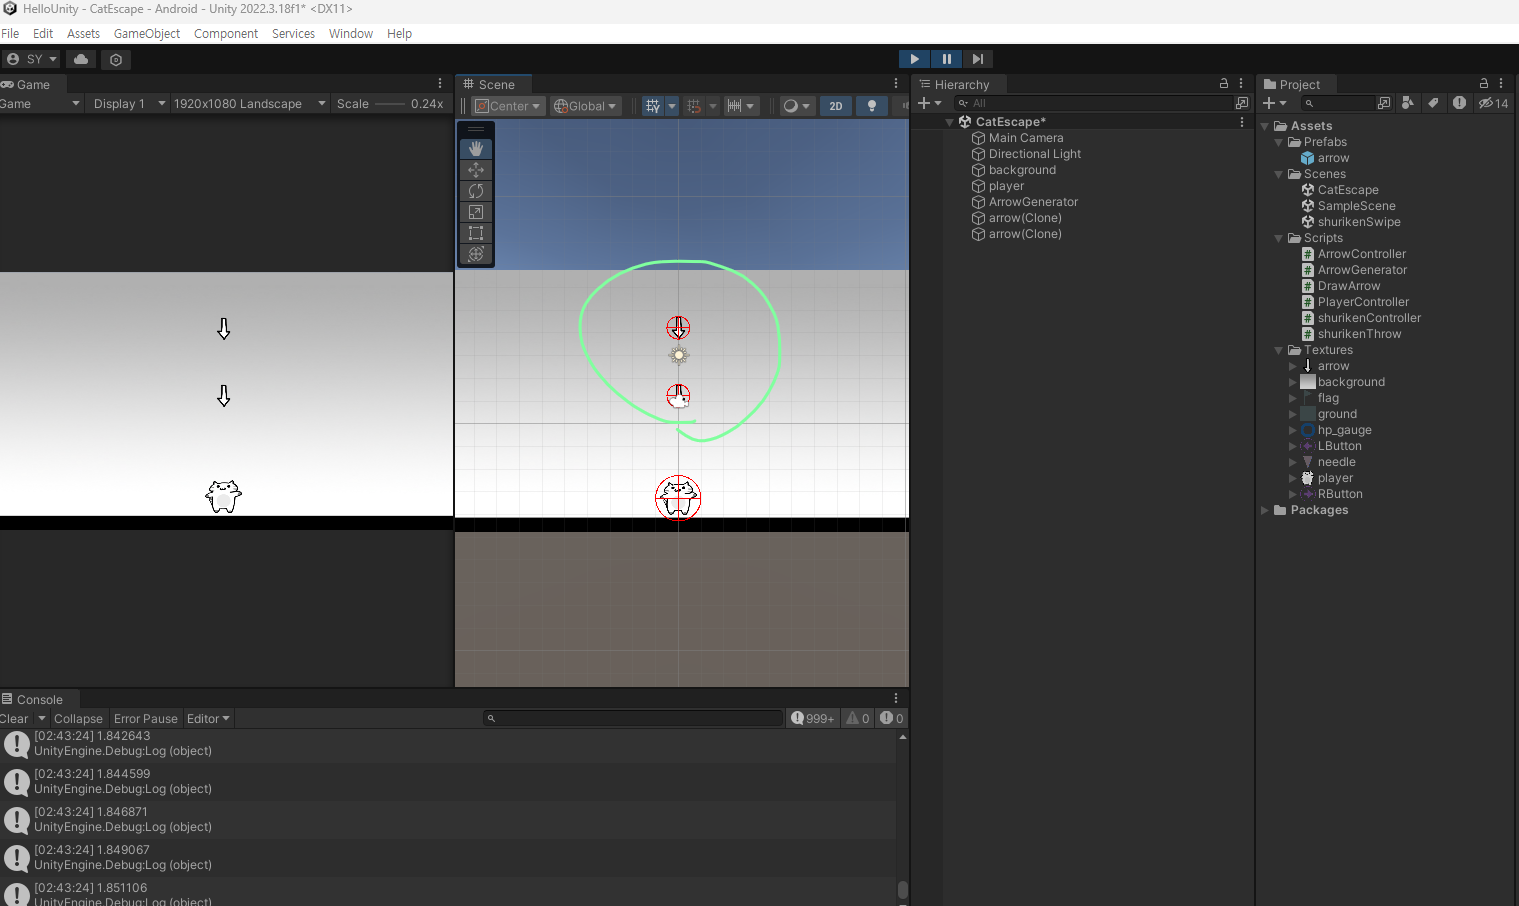
델타를 선언한후 3이될때마다 새로운 arrow 출력
using System.Collections;
using System.Collections.Generic;
using UnityEngine;

public class ArrowGenerator : MonoBehaviour
{
    //프리팹 에셋을 가지고 프리팹 인스턴스를 만든다
    [SerializeField] private GameObject arrowPrefab;
    private float delta;
    void Start()
    {

    }

    void Update()
    {
        delta += Time.deltaTime;
        Debug.Log(delta);
        if (delta >= 3)
        {
            GameObject go = Instantiate(this.arrowPrefab);  //프리팹 인스턴스
                                                            //위치는 프리팹 에셋에 설정된 위치
                                                            //위치를 재설정
            delta = 0;
        }
    }
}
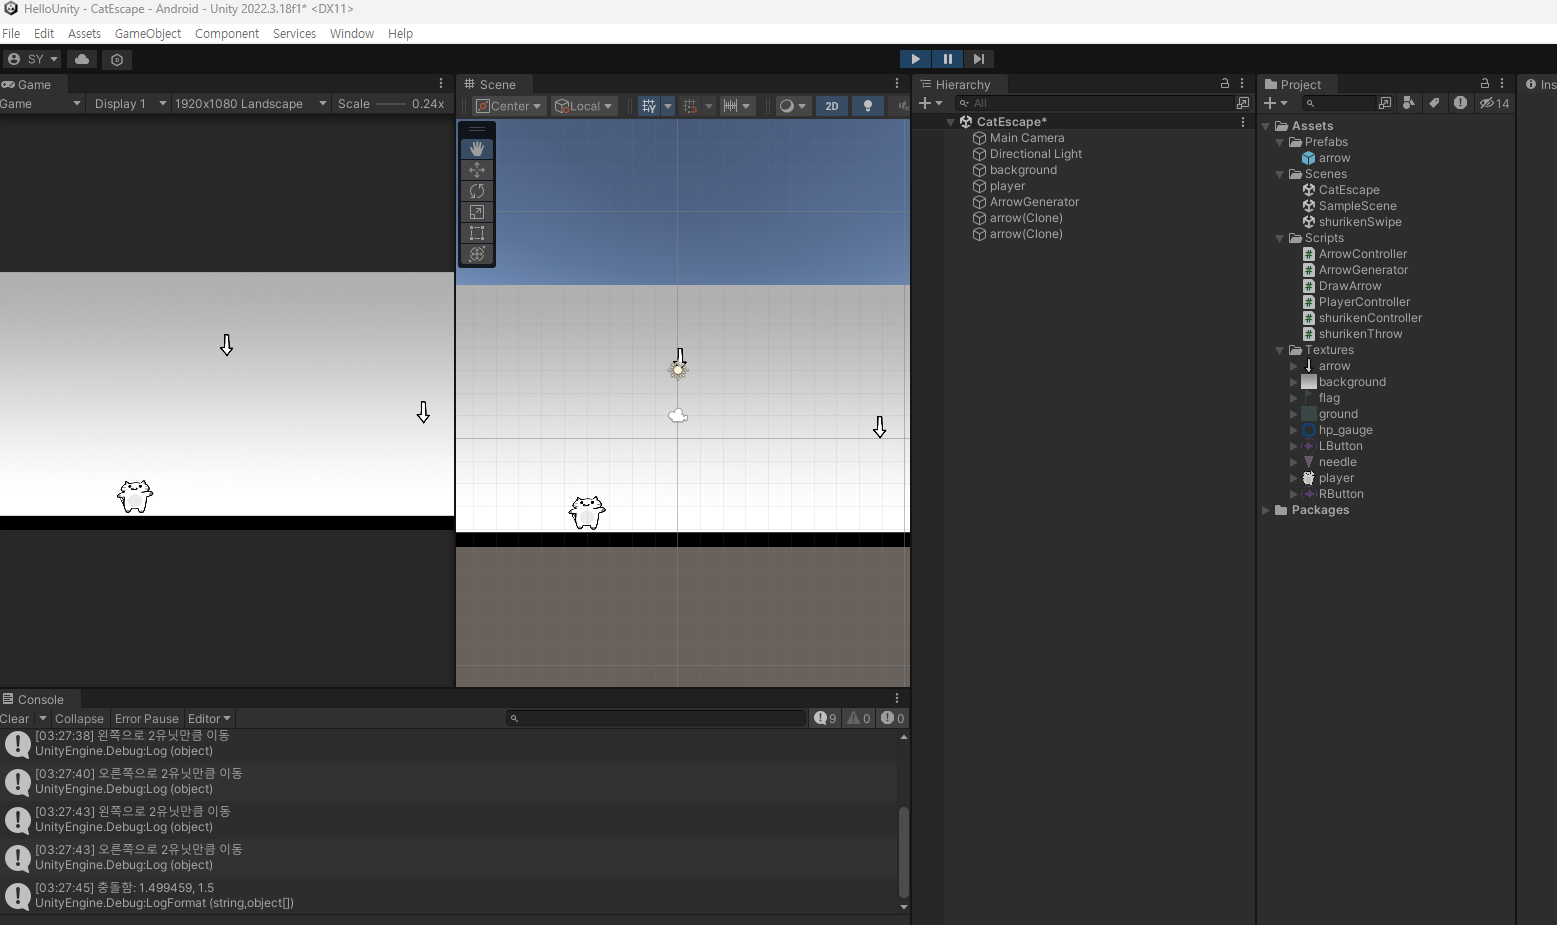
이제 기즈모의 테두리를 볼 필요 없으니 기즈모 부분만 주석처리하고
화살표 떨어지는것의 방향 Vector3는 구조체 이므로 x좌표만 랜덤으로 지정하였다.
(y, z는 기존에 ArrowController에서 0으로 지정하였기에 좌표만 찍어주면 된다.)
using System.Collections;
using System.Collections.Generic;
using UnityEngine;

public class ArrowGenerator : MonoBehaviour
{
    //프리팹 에셋을 가지고 프리팹 인스턴스를 만든다
    [SerializeField] private GameObject arrowPrefab;
    private float delta;
    void Start()
    {

    }

    void Update()
    {
        delta += Time.deltaTime;  //이전 프레임과 현재 프레임 사이 시간
        //Debug.Log(delta);
        if (delta > 3)  //3초보다 크다면
        {
            GameObject go = Object.Instantiate(this.arrowPrefab); // 생성
            float randX = Random.Range(-9.7f, 9.7f); // 화살표가 화면 상에 떨어질 범위
            go.transform.position = new Vector3(randX, go.transform.position.y, go.transform.position.z); // x축 위치만 랜덤하게
            delta = 0;  //경과 시간을 초기화
        }
    }
}
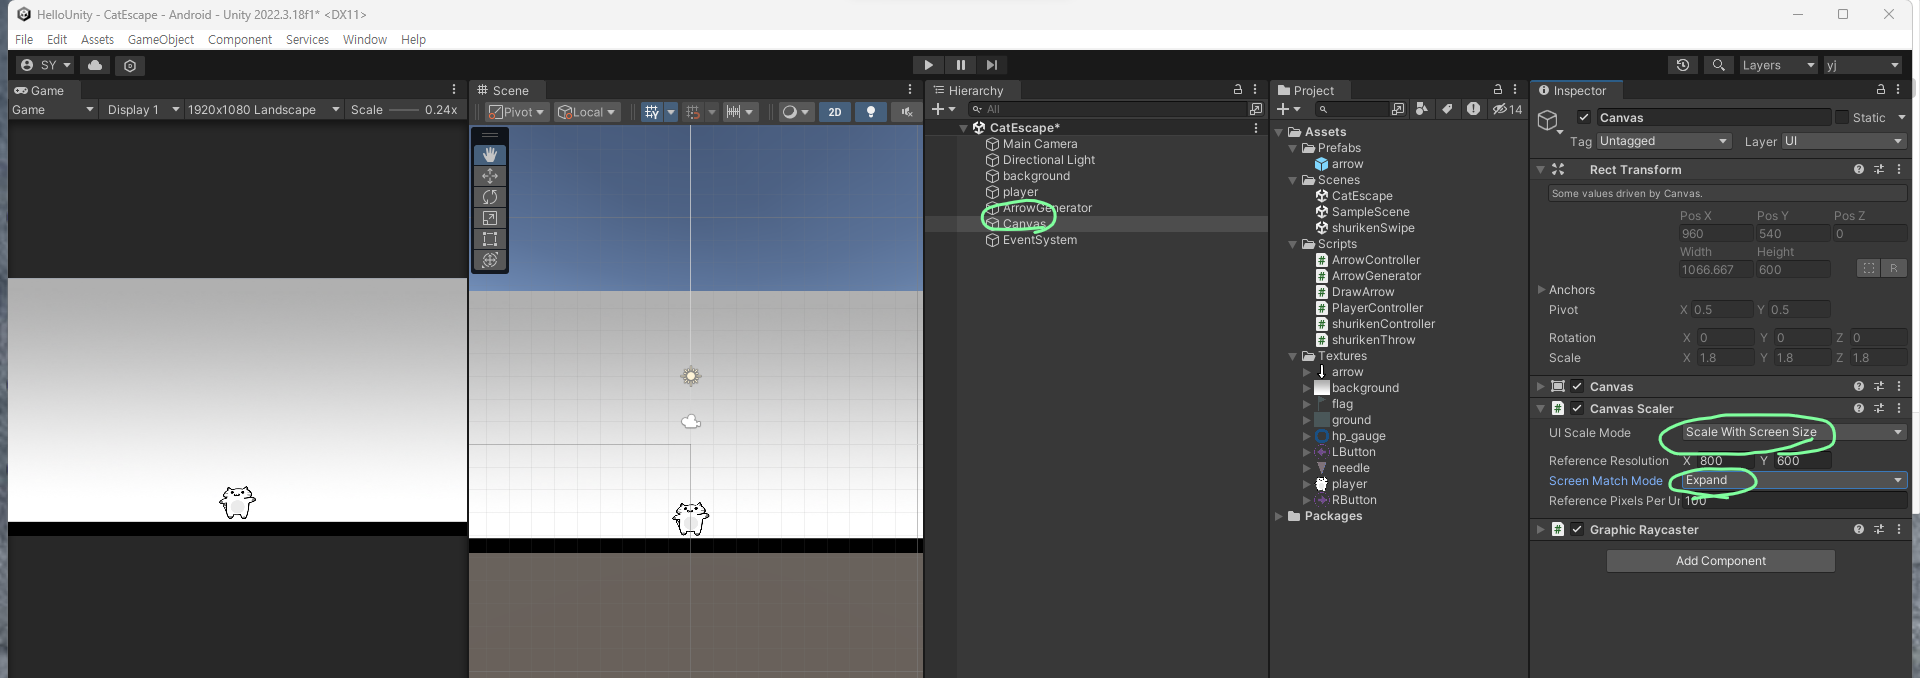
이제 체력바를 만들어줄건데
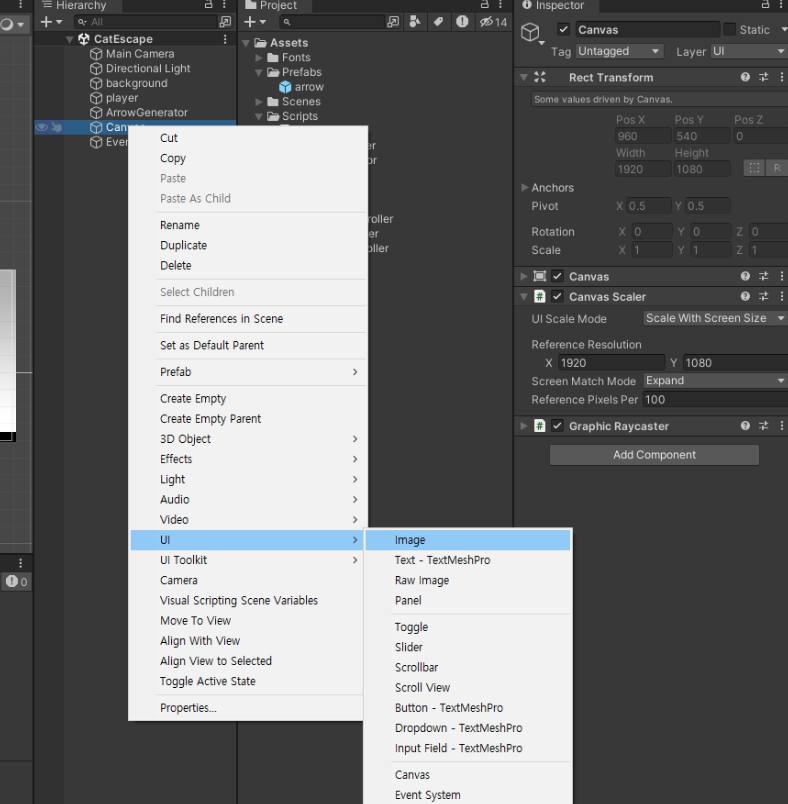
하이어라이키에 우클릭후 ui-canvas 로 만들어주고
저렇게 두군데를 canvas scaler에 있는 scale with screen size, expand를 해줘야
각각의 다른 매체에서 열 때 화면 사이즈 최적화가 된다.
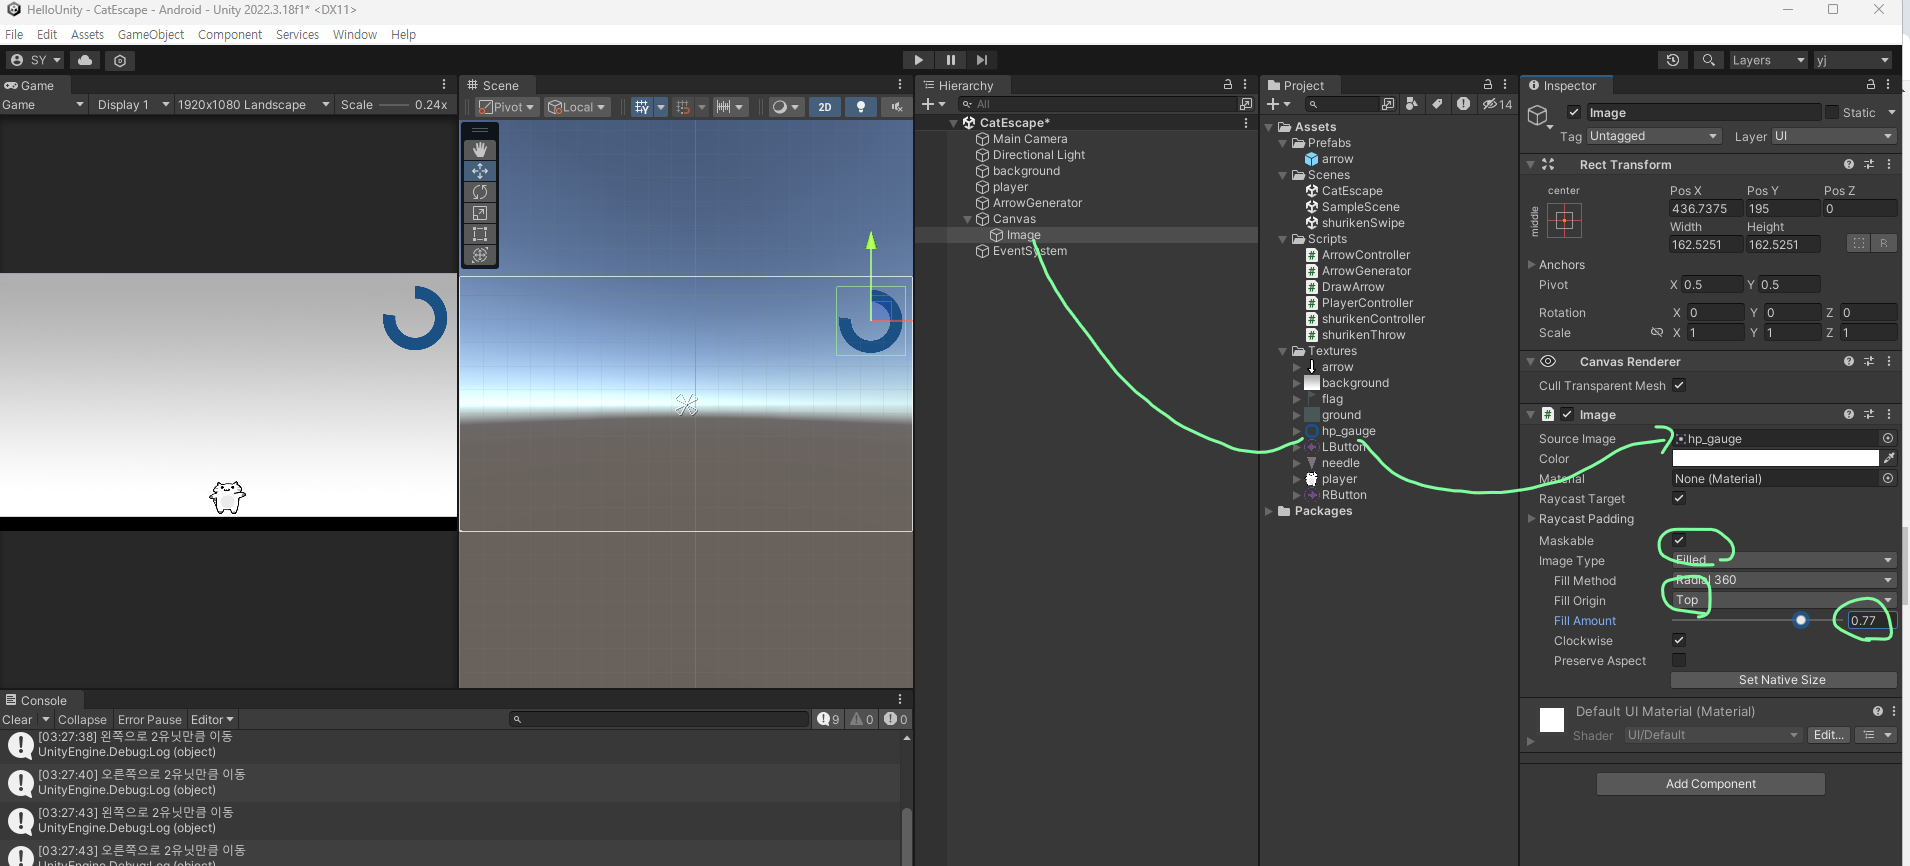
이렇게 캔버스 안에 이미지를 넣어주고 적절하게 크기 조절 후 배치
※캔버스가 너무 커서 이미지가 scene에 잘 안보일수 있으므로
하이라이키에 있는 이미지를 더블클릭해서 위치 찾기
그후 보기와 같이 이미지 타입과
fill origin은 기호에 맞게 설정한후
fill amount 수치를 바꾸면 원안에 파란색 게이지가 변함을 확인할 수 있다.
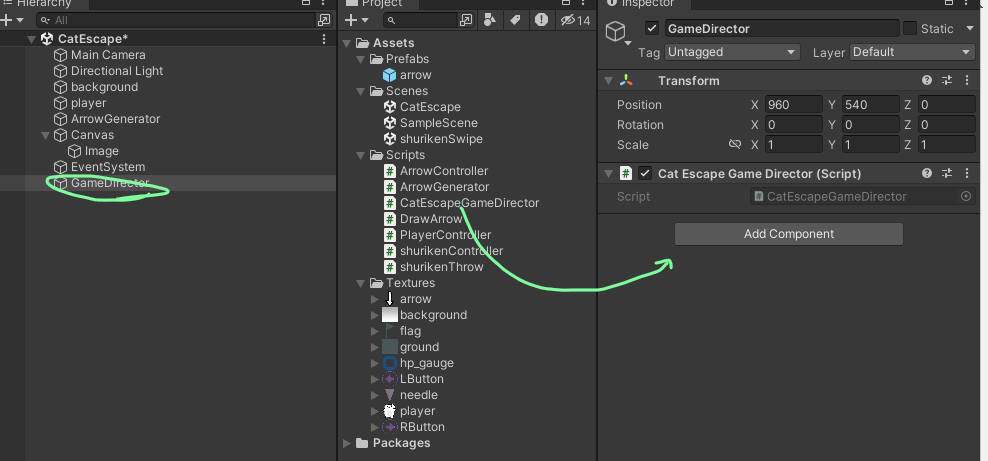
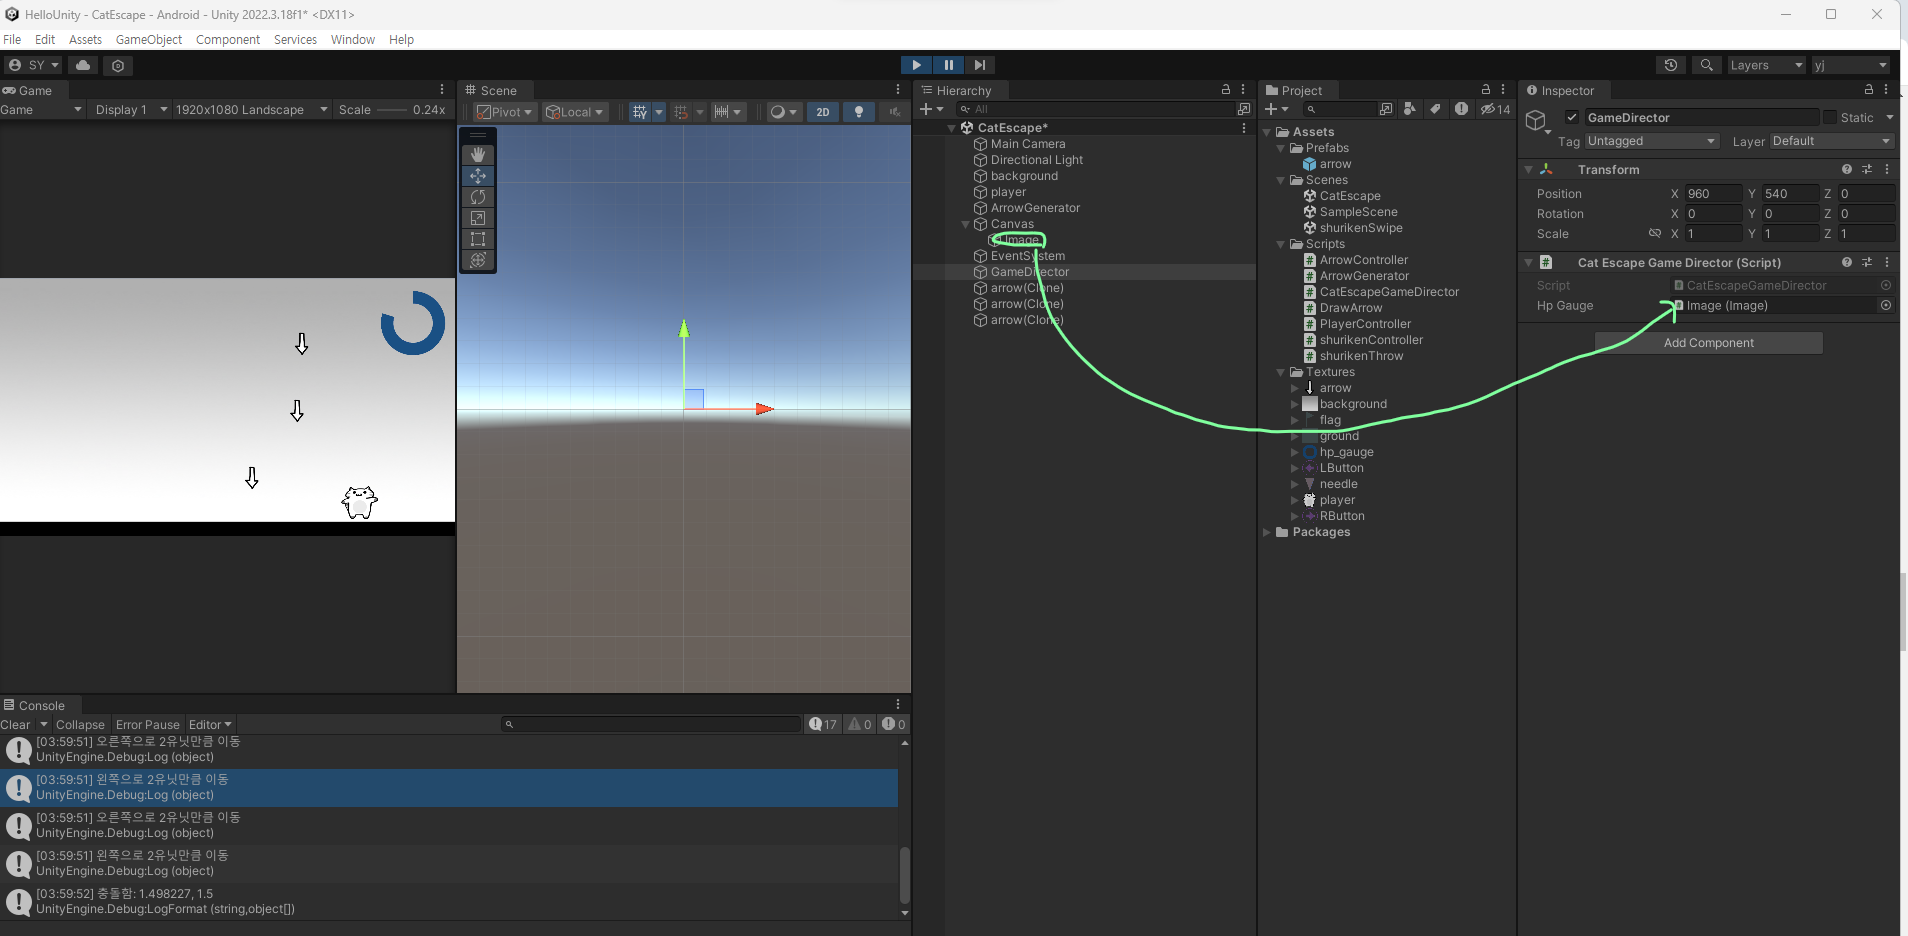
새로운 하이어라이키와 script 생성 후 오브젝트로 넣는다.
using System.Collections;
using System.Collections.Generic;
using UnityEngine;
using UnityEngine.UI; // UI를 사용할 것이므로 추가

public class CatEscapeGameDirector : MonoBehaviour
{
    [SerializeField] private Image hpGauge;

    public void DecreaseHp() //체력을 감소시키는 메서드 생성
    {
        this.hpGauge.fillAmount -= 0.1f; //충돌할때마다 체력을 감소하기 위한 선언
    }
}
맴버변수에 선언
이름으로 게임오브젝트를 찾는 것에 FindObjectOfType<CatEscapeGameDirector>(); 추가
마지막에 충돌했을 때 체력이 감소하는 메서드 선언
using System.Collections;
using System.Collections.Generic;
using UnityEditor;
using UnityEngine;
using UnityEngine.Windows.Speech;

public class ArrowController : MonoBehaviour
{
    [SerializeField] private float speed = 1f;
    [SerializeField] private float radius = 1f;

    private GameObject playerGo;

    //동적으로 생성되는 메서드는 씬에 있는것 을 Assign 할수 없다
    private CatEscapeGameDirector gameDirector;
    void Start()
    {
        //이름으로 게임오브젝트를 찾는다
        this.playerGo = GameObject.Find("player");
        this.gameDirector = GameObject.FindObjectOfType<CatEscapeGameDirector>();
    }

    void Update()
    {
        // 화살표가 내려오면서 Console에 찍히도록
        Vector3 movement = Vector3.down * speed * Time.deltaTime; // 방향 * 속도 * 시간
        this.transform.Translate(movement);
        //Debug.LogFormat("y: {0}", this.transform.position.y);

        if(this.transform.position.y <= -3.56)
        {
            Destroy(this.gameObject);
        }
        // 두 텍스쳐(arrow, player) 간의 거리
        Vector2 p1 = this.transform.position;
        Vector2 p2 = this.playerGo.transform.position;
        Vector2 dir = p1 - p2; // 방향
        float distance = dir.magnitude; // 거리
        // float distance = Vector2.Distane(p1,p2); // => 거리만 알고 싶을 때

        // 두 radius 간의 거리
        float r1 = this.radius;
        PlayerController controller = this.playerGo.GetComponent<PlayerController>();
        float r2 = controller.radius;// 여기서 보호 수준 때문에 PlayController.cs 의 radius를 퍼블릭으로 변경
        float sumRadius = r1 + r2;

        // 두 텍스쳐간의 거리가 두텍스쳐간의 radius의 합보다 가까워 지면 arrow가 충돌이라 인지하고 arrow를 사라지게 할 것이다.
        if(distance < sumRadius)
        {
            Debug.LogFormat("충돌함: {0}, {1}", distance, sumRadius);
            Destroy(this.gameObject) ;
            this.gameDirector.DecreaseHp();
        }
    }
    private void OnDrawGizmos()
    {
        //Gizmos.color = Color.red;
        //Gizmos.DrawWireSphere(this.transform.position, this.radius);
    }

}
그리고 마지막으로 만들어 hpGauge 오브젝트에 하이러라이키에 있는 hp 이미지를 넣으면 완성된다.
'산대특 > 게임 알고리즘' 카테고리의 다른 글
| C# 대리자, 람다함수 (1) | 2024.01.31 |
|---|---|
| Git, SourceTree (1) | 2024.01.31 |
| 멤버 변수와 지역 변수 (0) | 2024.01.29 |
| 유니티 실행 시 인터페이스 (0) | 2024.01.25 |
| 게임 아이템 정보 출력 (0) | 2024.01.24 |